Sunday, January 27, 2013

one beignet - hold the buttons - and a side of alma


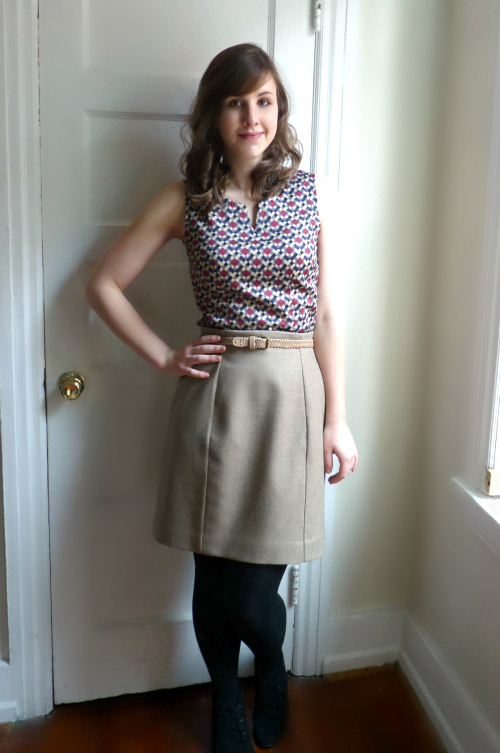
Anyone who knows me IRL probably knows my navy corduroy Beignet skirt, too. We are two little peas in a little ole pod. I'm kinda obsessed with it and typically wear it once a week, if not more. It just fits me perfectly and expertly straddles the line between casual-enough and yet not-so-casual, which makes it a rare gem in my wardrobe. I just had to make this pattern again. I HAD TO. But with four button-down skirts already in my possession -- two of which are in constant rotation -- I decided to sacrifice the buttons this time.


I made the skirt shell in beige wool (gifted from my fabric angel), so the result is a little dressier than the corduroy. It's actually quite a yawn, really, and something I almost didn't blog about. But I thought the button-less idea might inspire someone else to try it -- especially if they already own the Colette Beignet pattern but dread making those 12 buttonholes. 


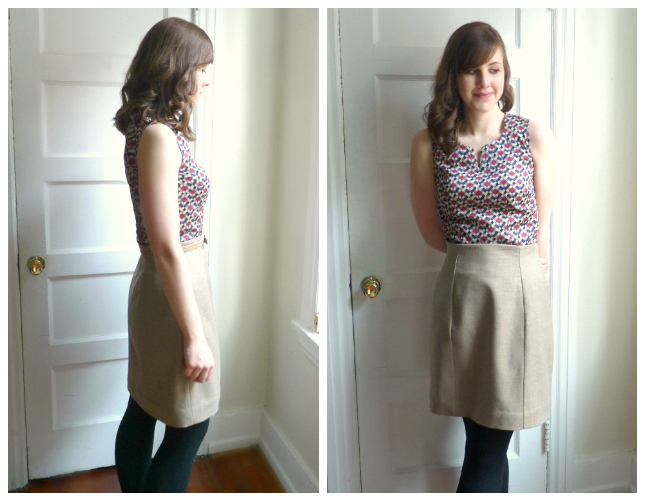
To change it, I eliminated the overlap and cut the front piece on the fold (the center front is where the buttons are marked). I added seam allowances to the back piece and cut two of them so I could insert an invisible zipper. The facings and lining were essentially the same as the original pattern, except for the front piece. I basically cut them to mimic the front shell. The back lining pieces were slip-stitched to the zipper.


That's not my actual bum, don't worry. But this reminds me: I do have someone to introduce you to.


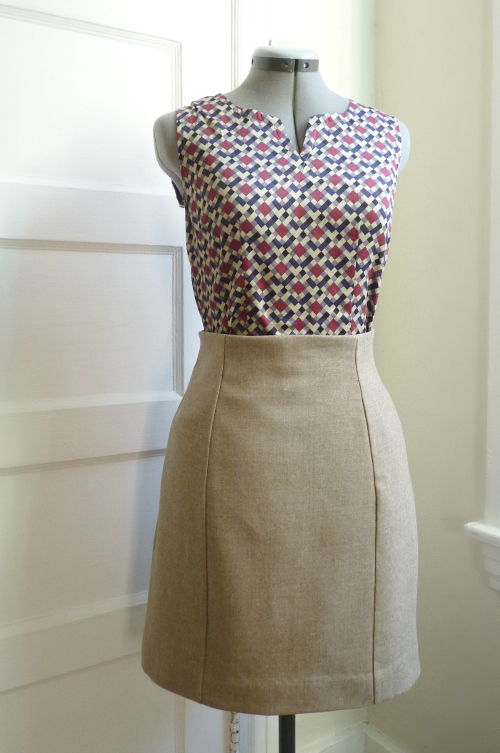
Awwww, ain't she cute. My brother and his girlfriend surprised me with this dressform for Christmas. This little lady has already been featured on my Instagram (I'm pretty new there; if you're on, let me know your username and I'll gladly follow your photo-filtered life adventures), but she hasn't made a proper appearance on my blog. She's a Singer 150 Adjustable Dressform (similar here) that can crank between 6 sizes, so she's got dem hipz like her ma. I'm still getting used to the practical functionality of a dressform, so in the meantime she's just wearing pretty clothes and gazing out my sewing room window all day, creepin' the neighbors out (I hope).

Anyway, as I was making this skirt I remembered that my closet is full of skirts that don't have tops to go with them. I vowed that if I was going to finish this baby up, I would also make something to wear it with. I've had the Sewaholic Alma blouse pattern for awhile so figured I'd go for it.


This fabric was upcycled from an ill-fitting tunic dress I consigned for $9. I only had enough fabric for a sleeveless version so that's what I did. I do realize there's snow on the ground outside. Whatever, you know.

The pattern has you add armhole binding for version A anyway, so I just followed the instructions while ignoring the cap sleeves. I also narrowed and deepened the front V-slit a bit, brought the vertical darts 7/8" toward the center, and took in a big chunk off the back neckline due to gaping. The pattern's fine - nothing revolutionary, but makes for a decent fitted top to wear to the office.


Anyone else out there love the Beignet pattern as much as I do? Would you consider making a buttonless version?

Hope you had a good weekend!

Sunday, January 20, 2013

a quicker way to change serger thread


Ruh roh. It's time for one of my most inexplicably dreaded parts of beginning a sewing project (well, besides tracing, cutting and marking): changing the serger thread color. Confession --- I usually avoid this step as much as possible, so I actually have made quite a few white garments with black serged insides, or red with white insides, black with navy. Yep, for someone who owns a seam finishing machine, I probably have some of the junkiest and funkiest seam finishes out there.

But apparently there's a fast(er) and easy(er) way to change your thread color. WHO'S BEEN HIDING SECRETS FROM ME? I can't keep this knowledge to myself now that I have it, so I'll show you how I switched from blue to white thread on my Brother 1034D without actually unthreading the blue thread. Yes, this is real.

First, snip the thread above the machine on all four spools.


Replace your old thread with the new cones, and bring the new color through the thread guide.


Tie the old color to the new color. I made a simple square knot and clipped the excess. 


IMPORTANT: Pulling this knot through your tension discs is NOT a good idea. What I did is lower my tension down to zero then gently pull the thread up out of the discs. Pull the string of thread forward so the knot is now beyond the tension discs, then thread the new color back into the discs. Do this for all four.


Now, lift your presser foot and make sure your needle is in the highest position. Grab a hold of your threads and start pulling gently. I pulled my looper threads separately from the needle threads, but I don't think it matters.


This will string the knots through the whole machine so eventually the new thread color replaces the old. Incredible, yea?


For the left & right needle threads, don't pull the knots through the needle eyes. Snip the threads and re-thread both needles with the new color. This is the only time you may need your serger tweezers and a keen eyeball.


Hey cool, it's now fully threaded. Make sure to readjust your tension discs to the appropriate tension for your fabric, and now you can take off and serge to your heart's desire. Wee!


Now, how much faster is this REALLY? For the sake of education, I decided to time it. Since I'm not a beginner threader, I can actually thread my serger the "real" way without too much struggle. But what can I say, I still don't like doing it!

Here's the ole fashioned way, switching from white to blue:


Ha, it's kind of pathetic that I used to refuse to re-thread my serger because it seemed sooo tedious, but it actually takes less than three minutes. I should time things more often to put it all in better perspective.

And now, here's the fancy new way, switching from blue back to white:


I'll be honest, though. I pulled the knots through the needle eyes! Ohhhhh noooo cheater. No harm was done to my needles, though. The majority of my time in the conventional way was threading the loopers, no surprise. The majority of my time in the new way was knotting the two thread colors together. So, it's up to you how you prefer to spend your time, and if those 50ish seconds of your life are worth saving.

What do you think? Give it a try? Is rethreading your serger something you dread doing, too?

Thursday, January 10, 2013

knitzzzz


After producing a Cameraman Jacket and a Cambie, a girl deserves to return to her knit stash and churn out some quick tops, yes? I tend to prefer fast production items in general, but I also like to keep it balanced around here. After making these three things in one week, I'm now cutting out a muslin (huh!) for a lined jacket that'll probably take awhile. It's a jacket for myself, don't worry. 


For everything I made, I used two patterns I have no idea why I own in the first place. I agonize over what to get from pattern catalogs during the Joann sales -- really I do -- and then I choose stuff like McCall's 6288 that's kinda a snooze fest (aside from the crazy shoe styling, what):


Like I need a pattern for an elastic waist mini skirt or another racerback tank top? I dunno, guys. It happens. But at least I got good use out of the raglan sleeve tee here. I made it twice, in fact:


Savor (or not) this rare moment of me wearing jeans on my blog. Ugh, nothing's worse than jeans. But I do have to fit into society and society often tells me to wear jeans. Fine -- I'll make an oversized sweater thing to hide the fact that store-bought jeans do not actually fit me at all. To do this, I just cut the side seams way huge, dropped the armpit seam, widened the sleeves and added overall length.


The pattern has you attach the neckband so that it's wrapped around the seam allowance to the outside and stitched in place there. I knew that would be a wonky disaster for me so I just did my usual Renfrew routine. It works easily most of the time, but I still found myself researching coverstitch machines on the Internet over the weekend. Hold me back. Can anyone chime in with their cheers or jeers regarding coverstitch machines? I can't really afford one (or its accessories, geez) but I'd like to know if it's worth saving for, especially as someone who's kinda obsessed with sewing with knits.


I like the design element of these stripes at the raglan sleeve seam. I eased the wide sleeves into fitted cuffs to mimic the sweatshirt look and so I could push them up to my elbows, as is habit.

The third item I made this week was a houndstooth cardigan. I love the color, and I'll probably always love houndstooth, but for some reason I don't like the cardigan itself very much. I still wore it to work with pants (again, rare):


Good morning, rusty fire escape. I'm trying to find different spots for "modeling" that will actually enable me to take photos on weekdays, since my usual spot is too dark in the pre-work hours. This feels like a failed experiment. You all deserve better effort from me.

The pattern I used for the cardigan is New Look 6735. Yep, I paid real live money for this pattern. 


Next in my queue: some enormously flared elastic waist pants as above, I hope.


I cut the front band on the bias for the helluvit, and again added cuffs so the sleeves would stay pushed up. Left off the buttons but maybe the cardigan could benefit from them. Since houndstooth seems too classy of a print for a slumpy cardigan, maybe I can just make the whole thing waist-length, shorten the sleeves and wear it with skirts only? We'll see.

So how do you usually follow up your more tedious and time-consuming projects? Grab some questionable patterns and bust out some half-assed knit tops? (Anyone?) Or tackle something else equally challenging?


Thursday, January 3, 2013

cambie v2


Watch out. This Cambie dress is all growed up.

If you don't count the 18,000 thrifted items I keep meaning to refashion (ugh), I don't have too many unfinished objects languishing in that closet behind me. This Cambie dress was the exception, though. I started and nearly finished it a few months ago, but stowed it away when I got bored. That's what happens when I make a pattern more than once, I think. All I had left to do was adjust the dart position, fix the pockets along the side seam, and hem the skirt and lining. Finally conquered.


Ha, I do not carry around my blazer like this normally. Just when I'm wearing this new dress to a top-shelf cocktail party and/or schmoozy corporate networking event. (j/k I drink Yuengling beer and work for a non-profit.)


This pose better represents my true personality. Squirrel watching, likely.

I didn't think I'd want to make another Cambie because it's pretty darn sweet (see my first here), but I liked how the other one fit so thought I'd try it again with a straight neckline, ungathered sleeves and shorter hem. I think it worked out. I won't wear it a ton because my office is slightly more casual than this. But I could definitely wear it out to dinner or... something. Business casual squirrel-watching.


It's black and white, if the zoomed-out photos weren't totally clear. I wish I knew what this fabric was and it scares me that I don't. It was in the wool section at Jomar, but fabric categories at Jomar are loosely interpreted to say the least. It's some spongy textured suiting type of fabric with a loose weave. It's kinda reminds me of rope, and practically absorbs your stitches. Great for hiding crooked top-stitching but terrible for seam-ripping. 

I chose purple lining because, hell, why not? Corey only saw me sewing the lining part of this dress, so he thought I was making a shiny purple polyester dress. Totally my style, yes? He didn't try and stop me, though.

As before, I attached the lining to the zipper using Tasia's method described on her blog. I also looked at her tutorial for getting the straight neckline but that's pretty intuitive. For my slightly altered dress sleeves, I just used the sleeve lining pattern pieces (which are ungathered already) so I knew how wide to cut them.


I like how the back neckline of this pattern does not gape on me, thanks to the ability to adjust the straps before sewing them at the end. I think I went overboard, though, and made these straps too snug, which prevents gaping but also prevents maximum arm movement. I had already serged the straps so had no more fabric to let out.

Well, one can always unzip the top of one's dress in the back for some more mobility and throw on a blazer as a disguise. But I wouldn't dare cheat like that.


Psyyyyche.

What about you? Have any UFOs that need some attention?

Tuesday, January 1, 2013

2013 goals

Happy new year, kids. We made it! We chanted and hollered and toasted with Art of the Age liquor (Rhuby, yum) and danced clumsily to Beyonce and chugged water all morning. Now the show must sew on.

My blogoversary was in October, so I already did a best-of/worst-of reflection post for the past year. But it's hard to resist using January 1st as an excuse to create a list of goals for my crafting in calendar year 2013. These are actually more like measurable objectives, with the ultimate goal to become a more skilled, efficient and sustainable seamster (and blogger). Keeping with Gillian's theme for the year-end wrap-up posts, I'm writing down five. So, in no particular order:

1. Make three garments using textiles sourced in the USA.


Ooh, that's hippie talk. The primary reason I sew right now is because I enjoy the process, and it's rewarding to create something than I can then wear and show off. I'm realizing now, though, that having this technical skill also means I can actually control the production process of my clothing, which is truly incredible considering the state of the "fast fashion" industry right now. I used to be someone who was thrilled that Forever 21 jeans only cost $9.00, but didn't understand nor did I care to understand WHY they could possibly be only $9.00 and what that meant in the grand scheme of things.

Now that I sew, I can ensure that many of my clothes are made in the USA, but I also want to ensure that I'm using quality and ethically-sourced materials to make them in the first place. I read that 99% of textiles consumed in the United States are unfortunately not made from fibers that were grown, spun or milled here, but there are resources out there for finding sustainable and organic fabrics, both in the US and abroad. I just ordered my first organic cotton knit that is entirely USA-grown and processed (from here). Let's hope I don't botch it.

2. Wear a handmade garment every day during Me-Made-May.


Zoe, who has hosted all the Me-Made months, announced in her own "Hello 2013" post that she wants to host another Me-Made-May. I have not participated in this yet because my handmade wardrobe was not robust or practical enough for me to do so in May 2012. I wear me-mades often but not every day of the week, so I hope that by May of 2013 I will have enough wearable garments to make this possible. I'm always thinking of how I can sew items that will work for my everyday lifestyle, so I hope that by aiming to participate in the me-made month will help me figure out how I can be almost exclusively me-made... eventually.

3. Knit three items.


Er, it's inevitable. I've succumbed to peer pressure. The bandwagon has driven by hundreds of times but finally I hopped on after seeing all these other admirable sewists havin' a rowdy time on board. Over the holiday when I was visiting home, I was seriously missing my sewing machine. A full week of NOT crafting anything? Unbearable. I took the plunge and bought some circular needles and wooly yarn and hopped onto YouTube. I've started my first project -- the GAP-tastic Cowl that Kelli just made as a beginner herself -- and it's going swimmingly (well, after unraveling the first attempt and starting over from scratch). Knitting is certainly different than sewing and I'm not as fond of it yet, but I do love that it's portable, repetitive and has the potential to expand my me-made wardrobe. Makes for a great thing to do while sitting on airplanes or watching HGTV, which describes my holiday break quite well.

4. Get to know my serger better.


I use my serger all the time, but not necessarily to its potential. We have a surface-level relationship, us two. I really don't understand the tension or the stitch width/length/feed required for different types of fabric. When I overlock the edge of a single layer of lightweight fabric, for example, my stitches tend to be incredibly wonky and the loops hang off the edge or the stitches pull and pucker. I usually just shrug it off because no one else will notice, but if I want to be a "good" seamstress than I need to have "good" finishes all around, especially as I start to make more things for other people. So to ensure that I actually get to know my serger better, I must:
  • Read the instruction manual all the way through again.
  • Watch serger videos, read up on tutorials and tips, or even taking the Beginner Serger Sewing class on Craftsy... if it goes on sale.
  • Test different kinds of stitches to better learn how the tension and stitch controls interact.
  • Get my serger knife sharpened. Where? Somewhere.

5. Rev up the ole blog.


I like my blog (and I love my readers!) but I know it could be way better. I recently won Hayley Morgan's "The No Brainer Blog" e-book in a giveaway from my friend Dear Abby Leigh, but I haven't really implemented any of what I learned from it yet. I prefer to have my blog be heavier on project content, which is why you mostly only see me active when I have a new garment to show you. But when I'm not sewing as fast or as much, or can only find time to photograph my projects every other weekend, my blog suffers because of it. 

I think I'd like to share more information with my readers as I learn it myself, or start some kind of regular themed post that's still engaging but won't require me to speed-stitch or lug out the tripod all the time. I don't have a plan for this yet, though, so don't expect overnight magic, yahear. But if you have any suggestions for what you'd like to see on my blog or what I could tweak, I'm absolutely all ears. 100% ears.

--------------------------------------------------------------------------------------------------

Yeah! That's a wrap. This all seems manageable, but I do plan to put one of these in Karen's clever "2013 Put Your Money Where Your Mouth Is" resolution jar so that I'm actually held accountable by at least one person. Anyone else have similar goals to mine? Or know of any resources that may help me along the way? 

Wishing you all a delightfully stitchy 2013.