Pages

Saturday, September 29, 2012

another renfrew mod


Think you've sewn (or seen) enough versions of the Sewaholic Renfrew already? Think again! Think the Renfrew pattern is too casual for your glam dress-stuffed wardrobe? Think AGAIN! That's what this blog is all about, after all: thought-provoking and intellectually stimulating content.

rofl.


Well, I hope you didn't think I made this dress from the Renfrew because I did not. Urban Outfitters made it so I could wear it to lure you in. Louisville didn't get an Urban O. until after I left, so it's nice living in a city where their stuff is already heavily circulated in consignment shops. I'm still not ready to commit to a fully self-stitched wardrobe, so I supplement with secondhand items. One day, though, I'll be head-to-toe in Andrea originals... maybe... ehhh.


So what is handmade here? Duh, the boring cardigan. I laughed when I finished it because it's pretty sloppily made and just reminds me of a $14.99 Merona brand cardigan you'd give your mom for Christmas or something. But I still like its practicality and length and have worn it a couple times already. Hopefully this kind of styling helps its cause.


This red ponte knit is the same I used for my stupid Cynthia Rowley dress from a couple posts ago. I bought like 5 yards of it for real cheap from Jomar, the crazy fabric outlet (is it an outlet? What is it?) in south Philly. Their inventory is heavy on the stretchy fabrics right now. What better way to spend a Saturday afternoon than digging through tabletop mountains of knit yardage of questionable quality? That was not sarcasm.

Making the cardigan version of the Renfrew was quite simple. I shortened it by 2" first because I like my cardigans to fit at the curve of my back (or be really long) so I don't look like a balloon when I wear them with skirts. The front is normally cut on the fold, so I just added a placket to the front pattern piece at the fold line. Cut two front pieces instead of one. This placket extension had enough width to be folded over and still be able to overlap the placket on the other side (1 1/4" total with the intention of making a 5/8" final placket).


On each end of the neck band and bottom band, I extended it by the width of the finished button placket (5/8"). Instead of connecting the bands end-to-end in a circle like on the original Renfrew, I stitched their edges so it'd form a neat square at the top and bottom of the placket. I can explain this in more detail if you'd like.


Too-big buttons, ha. I need to go button shopping so I'm better prepared for my on-a-whim projects:


I did not think about the necessary ease for a cardigan, so this fits like a t-shirt but open at the front. If I make another Renfrew cardigan, I'll size it up so I can wear it over other clothes more comfortably.


It's hard to stop at one when you're working with this pattern, so I made another in a sweater knit, also from Jomar:


I'm not as crazy about this one because the only thing I can wear it with right now is this granny skirt. Literal granny skirt. It was my grandma's -- I chopped off the hem at some point during my college years. I used to wear these warm brown tones all the time because they go well with my complexion, but I've ventured away to cooler colors. I'm kinda thinking of moving back that way this autumn. In fact, I'm currently working on something else now in this same brown.


So, friends, neighbors, far-away sewsters, how do you feel about a Renfrew cardigan or sweater? Dare to try? I know Tasia's revisiting the pattern over on her blog, so it's as good a time as any to bring back out that little green envelope! 

Enjoy the rest of your weekend, y'all hear.

Thursday, September 20, 2012

tiny


My brother's baby is turning one-year-old next week. One! I was never around babies that much in my life, so I am always overly fascinated whenever I witness this one reach some developmental milestone. Yesterday I was texted a video of her wobbling all the way across the kitchen floor, which is the first time I've seen her walk. Bipedal babe! She's, like, kinda doing something that resembles something that adults do! Weird.


I can't be home in KY for her big birthday party (invitation above), so I thought the least I could do was send her some clothes, handmade with love and a minimal amount of curse words.


The dress is made from the McCalls 6015 pattern. I made some changes, such as shaving off eight whole inches from the front and back skirt pieces so it wouldn't be so dang floofy once gathered. It's girly enough as it is, geez. I also shortened it a few inches, because I didn't think someone who still mostly crawls on her knees would appreciate wearing an Amish-length dress. Let that baby move and groove.


I bought the pattern because they said it was fully lined, which is the only way I was going to make a zipped dress for a baby. BUT, the pattern has you slip-stitch only the bodice lining to the zipper, and leave the rest of the zipper exposed. This is because the skirt lining is attached to the skirt first and then treated as one piece from then on. Yuck. I thus had to change the order of construction to make sure the entire lining could cover the zipper edges. I love my tangrams.


I have no idea if this will fit. They don't tell you corresponding ages/months on the pattern envelope, just height and weight. I made it XL, a size larger than her current weight indicates, but hopefully she'll get it to wear it sometime this autumn. I liked the fall-ish colors of this fabric, which is soft quilting cotton.

The only reason I made a sleeveless dress for a kid with a late September birthday was so I could also make her a cardi. This baby better grow up to share my love of cardigans or else. Or else... I'll be making her pullovers, I guess.


For this, I used the jacket from Butterick 3782, in size L. The fabric is a stable interlock knit in gray-brown with tiny white squares. It was in the "juvenile knits" section of JoAnn, and I was offended because I kinda want it for myself. I did juvie this pattern up with some flower buttons. Why not?


This pattern's pretty good, but since they assume you're using a knit, they don't have you encase or neaten up the raw edges at all when hemming. I followed along and did what they said for the neckline, which was staystitch and clip the curves. Then you're supposed to fold it down once and stitch it in place. Uhhh, you mean, my clipped curves will be exposed at the neckline? Ain't doin' THAT, but it was too late. So I serged the edges to re-attach the clipped fabric, then top-stitched with a double needle. Not ideal but it's the best I could do to make it look gift-worthy.


The twin needle was used for all hemming. Legit, right?


So there's the prezzie. I hope it's enough!


I know these pieces don't go together exceptionally well, but somehow I like the larger-scaled floral print paired with the smaller-scaled geometric print. And I think someone as cute as my niece can get away with pretty much anything.


Sorry, couldn't resist sharing another blurry iPhone pic. Happy birthday, sweet girl. See you soon!

Monday, September 10, 2012

red plaid lumberjane dress

No trees were harmed in the making of this dress. 


Maybe. I do wonder what'd I'd discover if I were to trace the whole life of the fabric I buy, just to see what resources and labor are actually exploited -- er, used -- in the process, and where they come from. Who's up for some documentary film-making and weepy liberal guilt? Oh, don't tempt me.


Anyway. I've been yearning for a plaid shirtdress (shirt dress? shirt-dress?) for awhile now but I wanted to wait until autumn. You know, logging season, when lumberjanes typically stalk the woodlands in their pleated skirts and discount synthetic boots. I was too excited after buying this fabric, though, that I got right to it even though it's early September and not yet chilly. Plaid is so aesthetically pleasing, especially in a vibrant color, don'tcha think? This is some plain ole cotton typically reserved for quilters. Try as you might, adorable red plaid, you can't hide from these grubby apparel-making hands. I shall dart you.


I used the same pattern I used the last time I made myself something plaid: the Lisette Traveler Dress, Simplicity 2246. This time I used mostly View C, but with View A's sleeves and a skirt that is pleated instead of gathered, straightened a bit from the dramatic A-line, and shortened. Shortened by 5+ inches! This sassy lumberjane just wants to flash a lil' bit of her opaque tights, you know?


But don't worry! I realize there are supposed to be two more buttons sewn on at the bottom. I won't wear it in public like this; I'm not that sassy. I only had six of the same black button when I needed eight, but I'm saving my notions trek til next weekend. Driving is boring. Might as well hit a McCall's and Vogue pattern sale while I'm in suburbia.

My inspiration was these two dresses, both from ModCloth (quelle surprise). I liked the idea of a shirtdress that buttons all the way down, with a defined waist and slightly fuller skirt (...quelle surprise). I decided to pleat it like my Kelly skirts because it's familiar.
1 - Rockwell Frock (sold out)

One day I would like to try using snaps instead of buttons on a garment, like these. I bet my Masters student homework-swamped boyfriend would love for me to have another loud sewing tool to use while he reads post-colonial literary theory in the next room.


I've reviewed this pattern before (flannel shirt here), and I still stand by it after sewing a different view. It's great! It's quite intuitive and comes together neatly and relatively easily. There's no back yoke/facing or cuffs with plackets. The collar and collar stand are one whole piece instead of separate.


This time I made one size smaller (10 instead of 12) and it fits much nicer, especially with the extra shaping darts in the front and back bodices on View C. I also cut the button placket on the bias so that saved me some time with the whole plaid-matching thing. Speaking of saving time, I used permanent fusible tape to attach the front patch pockets, with some stitching in the top corners to secure them. I did try to topstitch them all the way around, but it's just too severe of a curve for my awkward handling and limited patience. Hey, I'm free to pick my stitchery battles.


Whoa, sunset. I promise this dress is red and black, not neon pink-orange.

So who else is sewing for the new season yet? Oh yeah, did you know that September is National Sewing Month? Whatever that means. I always sew like a maniac, regardless of the month. I only knew about this because the Simplicity website is having a $3.99 pattern sale to celebrate. Maybe you should all buy the Travelers Dress pattern so we can be plaid-clad forest frolickers together this month, eh? Neh?

Monday, September 3, 2012

le beau thurlow

When I was around the terrible age of 13, pants suddenly fit me strangely. Shopping for jeans was a nightmare, especially because I was still shopping the Juniors' section where everything was super low-rise and super flared (note: this was circa 2000). I didn't know what was going on until I realized... I had hips. Where did those come from? I still had a small waist so I felt like I was growing out of whack. I was sure I was the only sad little adolescent in the world experiencing this problem where I couldn't find anything that fit my legs AND my waist. 

Of course, after that, nothing ever changed about my body type -- not even the year I spent as a gym rat trying to burn up my thighs with vigorous squats and lunges. Sorry charlie. But guess what is different now? I can SEW, y'all.


Enter my saving grace: the Sewaholic Thurlow Trouser pattern. Drafted especially for those with small waists and fuller hips. Thank you, genius woman.


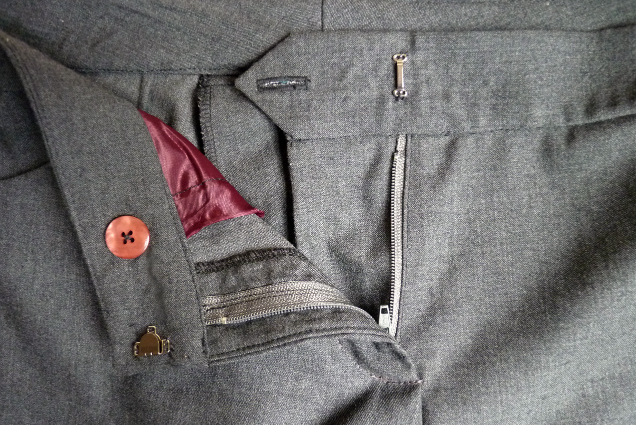
I truly can't believe I did it. I made legit pants! That I can wear in public! I am purty proud of myself. I bought this pattern immediately upon release, but totally bombed my first attempt. I threw the muslin and all the loose pattern pieces into a box and nearly admitted defeat. But I started thinking about the pattern again in these last few weeks. Where I work now is slightly more casual than where I used to work, and walking is a bigger part of my daily commute, so all this affects how I think about what clothing to wear and sew. I decided I needed another pair of neutral trousers to add to my minuscule collection of one. So after a second round of Thurlow practice with a thrifted curtain, I finally felt confident enough to make the real deal.


The fabric is some drapey rayon blend charcoal gray suiting I found on eBay. I love rayon with all my heart, despite its tendency to wrinkle like krazy.

So I know I seem pretty happy with the end result here, but I'm not going to completely sugar-coat this pattern review. I actually had a number of problems with the instructions. I want to warn other trouser newbies that this Thurlow pattern will try to flirt with you but it will NOT hold your hand. Some of the illustrations and instructions were simply not informative enough. I scribbled questions all over the instruction sheet and had to answer them through trial and error, which was frustrating and sometimes a waste of time. This was disappointing because most of the bloggers who have made this pattern raved about the clear instructions for the welt pockets and zip fly. I'll interrupt the Sewaholic love fest just to say that NOPE -- for some of us, 'tis a bit o' a struggle.

Here's an example of what I'm talking about:


Gotta love how Step 6 is, in fact, six steps. It makes sense NOW but when I first looked at it, I couldn't get over how those drawings were so tiny and lacked any helpful detail. Like, why is it hiding the welt pocket? I wanna see how the front is supposed to look, too! I also had issues throughout the rest of the pattern where I couldn't tell whether I should be using the right side or the wrong side of the lining fabric.  This wasn't a huge deal, but in my practice welt pockets I sewed the pocket facing on backwards because of this. Am I really the only one who had these kinds of issues?


I eventually figured everything out. I mean, I love puzzles so I actually enjoyed the process of piecing all the mysterious parts together until it made sense. I knew it was worth it, and the result looks pretty professional.


You'll notice here that I didn't even add the back welt pockets on my final version. I wasn't cheating on technique, but it was a style decision. I practiced the Thurlow welt pockets a few times but I thought they were too wide and looked like droopy eyelids. As a general rule for my fitted or lightweight pants, I don't like any pockets at all. They add texture (pocket wrinkles) and volume where texture and volume should not go.

Speaking of, I actually chopped off the front pocket bags after taking initial photos of my finished pants and realizing how frumpy the pockets looked. Here's what they looked like before and after doing so. It instantly made them look more dressy, imo:


The colors are off, but those are the same pants! I even used thin slippery polyester for the pockets, but I guess with the serged edges it just bulked up under this material. I'll definitely make faux pockets on my next pair.

Some other changes I made: 1) Nixed the belt loops, because the waist actually fits so why would I need a belt? and 2) Narrowed the flare by about 1" per leg. And note that these pants are drafted pretty long. I hemmed mine an extra inch than it calls for (I'm 5'7" btw).

So. Thurlow a go-go. I'm pretty thrilled that these basically fit me right out of the envelope, and I finally have pants that don't gape in the back when I sit. Have you discovered a great pattern that solves your age-old shopping woes, pants or otherwise?