Thursday, February 27, 2014

rosemont and the wild ponies


Grandma bun and grandpa sweater. I am an old soul with a short skirt.

WHAT, pray tell, is better than wearing an enormous 100% wool cardigan that envelops you completely as you battle through a miserably endless winter? I can think of nothing else, especially now that I own one for the very first time. "Own" isn't even the right word, because it's not like I just plucked it from the gramps section of the thrift store and handed over $4 for it. This puppy was hand-knitted by yours truly, and it's astonishing to me that every fiber of its being has passed through my hands and grew before my eyes from a tiny little woolly sprout to this oversized blanket-with-sleeves that I never want to remove from my shoulders until Mr. Sun is back full-force on this side of the earth. There's something about knitting that feels much more involved and intimate than sewing (depending on the project, I guess), so I apologize for the sentimental maternal-like gushing that's going on here. Crafty high -- I can't think straight.


PATTERN: The pattern! It is the Rosemont Cardigan by Hannah Fettig, newly released in February 2014. It's a shawl-collar open front cardigan that's knitted seamlessly from the top-down. Being new to knitting, I still don't know where to start to look for patterns as I don't have any go-to designers yet. Ravelry is a wonderful resource but is absolutely overwhelming. Even if I filter by garment type, style, price, yarn weight, needle size, age/gender, and construction technique, there can still be hundreds of pages of patterns to sift through. And a lot of it is godawful. So, when I visited the blog of a local yarn company, Kelbourne Woolens, and saw they were hosting a knit-along for a new cardigan pattern, I jumped at the chance to have someone ELSE tell me what to knit. I liked that the Rosemont has no closures, is knitted with aran weight yarn, and is a basic, unisex style that's still pretty cute.


I'm grateful for the Ravelry group and knit-along because the pattern's wording for the raglan and neck increases was incredibly confusing to me (and others, thank goodness). If you decide to make this pattern, definitely consult this post first, which explains the logic and order of it all. I would have given up without that help, really. After that was all sorted out, I sped away from the group and finished the rest of the sweater within two weeks. The knit along is supposed to last two months! I am psychotic.


SIZE: I decided to knit the size that corresponded with a finished bust measurement of 39.5", with an added five inches of length to the body. It's the third smallest size out of 11 (eleven!) sizes, so I thought that even though 39.5 inches sounded baggy, it would be fine. The model in the pattern photos is wearing the 36.75" and she's quite slim, so I thought it'd be safe to go up just one size from her. Okay, wow, this cardigan ended up much bigger than I thought it would be, but luckily I'm a fan of oversized sweaters so I'm happy with it. I guess my row gauge ended up being way off because I even stopped knitting the sleeves a full 10 rows sooner than instructed.


YARN: The knit-a-long is using Terra yarn, which is a fancy baby alpaca/merino/silk blend that your girl here simply cannot afford, even if it would mean I could joyfully think of baby alpacas the whole time, whether or not that's what "baby alpaca" yarn actually means:


Cannot. handle. 

Anyway, for a big fat yarn-eating cardigan for an unconfident knitter, I went the economical route and chose Knit Picks' Andes del Campo in the color Smoulder Heather. I don't know what the public consensus is on the quality of Knit Picks yarn (thoughts?), but a 100% Highland wool yarn for $5.49/ball is hard to resist. I ended up using just over seven skeins so it's a relatively affordable sweater all things considered (not counting labor). It's pretty soft and not that itchy on bare skin. I think this is ACTUALLY the first authentic wool sweater I've ever owned and worn. I have a ton of store-bought cardigans that are either cotton or some acrylic cocktail mix.

The color is described as: ""Inspired by the warm glow of a bonfire, Smoulder Heather is a rusty burnt orange with mahogany undertones that is combined with heathered flecks of yellow, burgundy, and purple." It is definitely an autumn color, but it complements my coloring and it matches my boots, living room brick wall and hardwood floors so, you know, here it is in February. It looks toasty brown from afar but is actually quite complex:


CONSTRUCTION AND SHAPING: I taught myself how to do the knit stitch in continental style, which is SO much faster than English style, but I cannot for the life of me do purl stitches in continental style. I also can't knit continental on double-pointed needles, so my first sleeve felt like it took forever, especially since I always drop stitches accidentally on DPNs. I switched to the Magic Loop for the second sleeve, and since it was circular I could just knit continental nonstop without purling, so the whole sleeve took like 2/3 the amount of time.

Just after finishing the sweater, I couldn't get the shawl collar to roll properly. Wet-blocking helped me form the collar to proper shape, at least when flat, but as soon as I put it on it doesn't want to roll enough of the way back to cover more of the neck ribbing. I don't know if it's supposed to, and I can't tell if it's just because my sweater is so oversized it doesn't fit my shoulders properly. The ribbing does seem laughably deep:


THE PONIES: Okay, I can't ignore the ponies. I sewed this basic dress in January from some silky poly I found at Jomar. Of course I liked the print, even though these are insane, chaotic horses tromping about all upside down and round about. Took me awhile to figure out which was way up -- or which way had the most upright horses. The dress itself is okay. Sleeveless, elastic waist, lined skirt, self-bound neckline and armholes. It doesn't fit beautifully so it actually benefits from being overshadowed by a huge grandpa cardigan. The pattern is (roughly) the bottom layer of the BurdaStyle Double Layer Tank dress, which I've used before.


Alright my little alpaca babes, how are you staying warm? Is anyone else knitting the Rosemont or knitting/sewing something just as snuggleh?


Ravelry notes here.


Sunday, February 9, 2014

my 4 favorite shirtmaking tools


I'm thrilled that so many of you have found my tutorial on sewing a shirt collar to be helpful. Thrilled enough to keep talking about sewing shirts. O'boy! I'm continuing to feverishly sew button-downs for my main dude, so I'm slowly learning (er, improvising) all the little tricks to getting better results each time. It's satisfying to watch my skills improve and to figure out my go-to methods that lead to consistent outcomes. Translation: I'm addicted. I also may have accidentally drafted a multi-size men's shirt pattern. Moving on!

Since I'm just a home sewer with run-of-the-mill equipment you can find relatively easily, I thought I'd share with you the extra "tools" I use regularly when sewing shirts to help get the details right. Some of them are hardly tools -- just stuff. This list includes items that I use in addition to normal sewing equipment/notions such as a machine, ruler, seam ripper, etc. So none of these are absolutely essential for sewing a nice-looking shirt. They just make it all a bit easier.

TOOL #1. GLUE STICK


I've always used a glue stick to help attach centered zippers on skirts, ever since I saw this tutorial on Sew Mama Sew a million years ago. Now I use one throughout the shirtmaking process, too, particularly when I need to secure something on the inside while sewing from the right side. To me, glue makes it easier to control the fabric and get it perfectly positioned, and can be faster than basting and more secure than pinning, especially on slippery fabrics that will immediately shift as you remove the pins during sewing. And the stakes aren't that high -- you can easily reposition something before the glue dries... or even after.

Here I use fabric glue from JoAnn's that claims it is water-soluble and won't "gunk up" your machine needle, but I've also used the regular ole office supply stuff in the past. Here's when I use a glue stick:

- To secure button plackets so they're less likely to ripple or drag when you're topstitching them down...


- To secure a pocket before sewing it on...


- To position the inner collar stand's lower seam allowance before edgestitching it in place from the right side...


- And to help make sleeve plackets by properly positioning all the folded parts (by the way, I use Pam's two-piece shirt sleeve placket tutorial which I highly recommend. She also uses glue at one point!)...


TOOL #2. EDGESTITCHING FOOT (edge stitching foot, edge-stitching foot, edge stitch foot, whatever) 


Ever since getting an edgestitching foot (also known as a stitch-in-the-ditch foot or edge-joining foot), my shirtmaking confidence has skyrocketed. It has a centered guide that enables you to sew precisely at 1/16" or 1/8" from a seam or the edge of your garment, or directly within a seam if you need to. Of course it's not impossible to sew close to the edge without one, but I can't tell you how many times I used to seam-rip and redo my edgestitching, especially on the back yoke when there's a long horizontal line where any wave in your stitches is very obvious. I just couldn't stand the thought of people sitting behind me on the subway and staring at my crookedly-stitched yoke. NIGHTMARES.


It sounds fussy but I don't mind investing money in sewing tools that produce satisfactory results almost every time without having to put in much more time or effort to learn how to use it, and this is one of those things. I bought this generic snap-on foot from Amazon that works with most low-shank machines. It was about $10. 

I use it on pockets...


The yoke...


Collar stand...


And sleeve placket...


TOOL #3. SCRAP FABRIC
You've probably heard this before, but one way to get even stitches when topstitching or edgestitching is to ensure your presser foot remains level. Have you ever tried to sew over a bulky seam or continue stitching after a pivot point, but the presser foot just won't move and your bobbin thread gets all tangled? It's likely because your poor foot is stuck trying to move uphill:


If you shove some scrap fabric under the foot behind the piece you're sewing, the presser foot will no longer be tilted up at an angle and it will sew forward much more smoothly. This was a game changer for me when top-stitching collars points and collar stands. No more tiny little struggle stitches on full display around your face!


TOOL #4. SLEEVE BOARD


This is probably one that's only worth it if you sew a lot of long-sleeved shirts (or other kinds of narrow tubes, I guess). Before now, I always just serged all my shirt seams, but now I've been forcing myself to make French seams or flat-felled seams because they're more attractive when the sleeves are rolled up, which for Corey and me is always. Pressing all the way down the sleeve seam is essential for this kind of finish, so it's just easier to have a sleeve board for this process so you can flatten out and fold the seams most efficiently. 


If you're desperate, though, you can just stick a narrow rolled up towel down your sleeves, too, though it will be a bit squishy and may not get your seams as flat.


And that's it! I tried thinking of five tools but these are really the only ones I use regularly. I own some other stuff like an expanding buttonhole placement ruler gauge thingy, but I find it sufficient to measure buttonhole placement with a normal straight ruler.

What are your favorite shirtmaking tools? Any that I haven't thought of? Chime in, buttercups.

Friday, January 24, 2014

how do you store knitting needles?


I'm a relatively new knitter, but just as it was with sewing, the obsession hits hard and supplies accumulate extremely fast. I'm having flashbacks to when my fabric and sewing supplies all fit on half of a shelf in my living room. I had one Simplicity dress pattern and thought, "Hey, this is pretty fun..." and eight months later I had two (now three) machines and a mountain of fabric and was at the point of demanding my own sewing room.

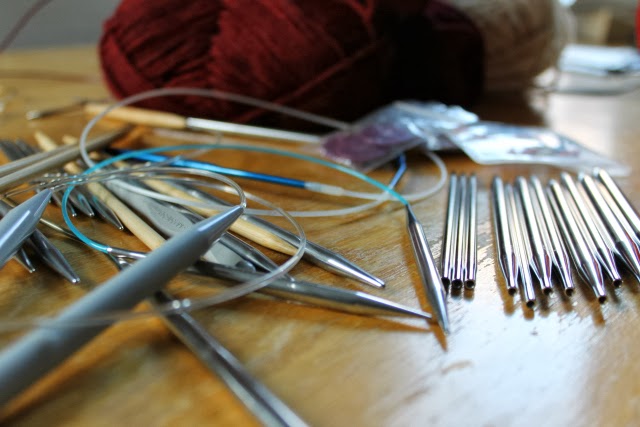
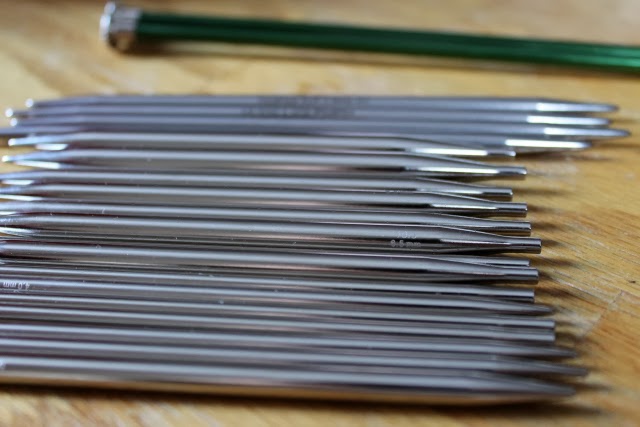
Luckily, knitting takes up much less space, but there are a lot of small barely-distinguishable items -- often in pairs or quadruples -- that can be tricky to keep track of. I started out buying only the knitting needles I needed for the projects I wanted to do, but that quickly became frustrating when I downloaded a new pattern and wanted to start right away but didn't have the proper needles. It's also pretty clear that buying needles in bulk or in interchangeable sets can save you a LOT of money in the end. I did buy the Knit Picks interchangeable set for circulars and straights, but its vinyl case has already ripped.


So, you know the story. I already have a lot of needles and no idea how to organize them neatly so everything is easy to find. I know many of you are knitters, so I'm turning to my favorite people in the blogosphere: I need your advice on knitting supply storage.

How do you store all your knitting needles? Do you organize everything by size, type, length, etc? Do you keep them all in the same case, or in multiple places? Do you keep them in the original packaging? Do you label everything? How do you keep all your sets of double-pointed needles together? Do you make sure your storage is portable? Do you prefer to roll everything up, fold everything up, hang everything up, or throw it all in a bag or box and toss it in the closet? Do you hack other storage devices (i.e. CD cases, three-ring binders, Ziploc bags, vases, etc)? Did you SEW your own case (and what pattern did you use)? Where do you keep your stitch markers, point protectors, gauge rulers and all the other small doodads that so easily disappear in the dark depths of the couch cushions? Etc. etc.

Two recent projects - the Lucky 7 Hat and the Vermont Hat

Tell me everything! I'd love to hear about your knitting organization systems (or lack thereof, to know I'm not alone) so I can figure out the best way to proceed before things get out of control. Thanks in advance!

Sunday, January 19, 2014

overlock & overload


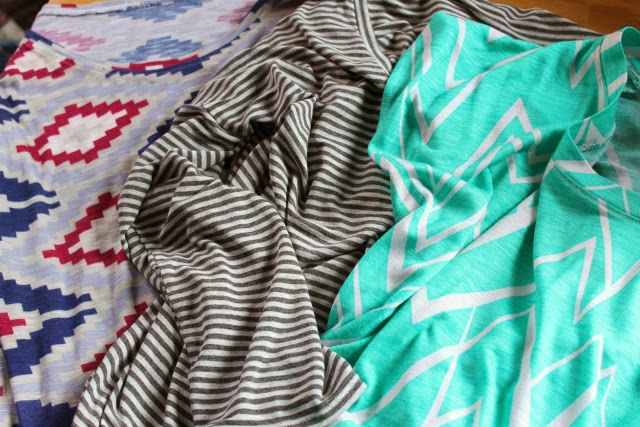
I had an epic jersey stash-busting sewing marathon this past week. I recently organized my sewing room (see proof here) and sorted my fabric by type/content as well as fabric-I-want-to-use and wtf-was-I-thinking-fabric. I actually don't have a large fabric stash right now (a subjective statement), but I thought it was about time I make some room for new stuff. I hate storing slinky fabric that doesn't fold crisply or stack well, so I grabbed all the drapey rayon/lycra blend jerseys that have been slipping off my narrow closet shelves for several months now. 


To help tackle all these knits, I downloaded the PDF of Grainline Studio's free Hemlock Tee pattern. It's a slouchy-fit, drop-shoulder top, which isn't necessarily the most flattering look for me, but hey, a girl's gotta lounge. I've been wearing jeans more often lately because all my tights are ripped so I can't wear dresses. Instead of buying more tights, I'm sewing more tees so I can wear jeans more often. Hopefully someone out there gets my logic.


So all week I've been busting out Hemlock tees like it's my JOB. omg I wish that were actually my job. Please, someone. This pattern is drafted in one size and only includes three pattern pieces (front, back, and sleeve -- you draft the neckband yourself). The instructions (provided in Grainline's post here) show you how to make the tee with a serger (overlocker). I almost always use my regular machine as well as my serger for construction on knits. I just feel like I have more control and dexterity with my machine, which helps when matching stripes, matching underarm seams, or attaching neckbands that need to be pretty precise.


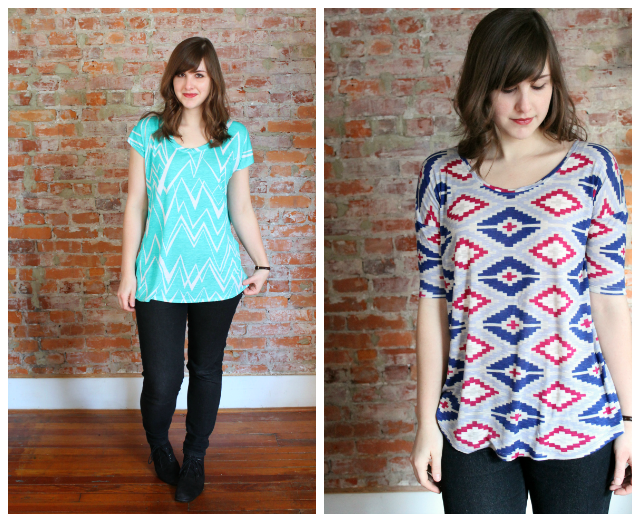
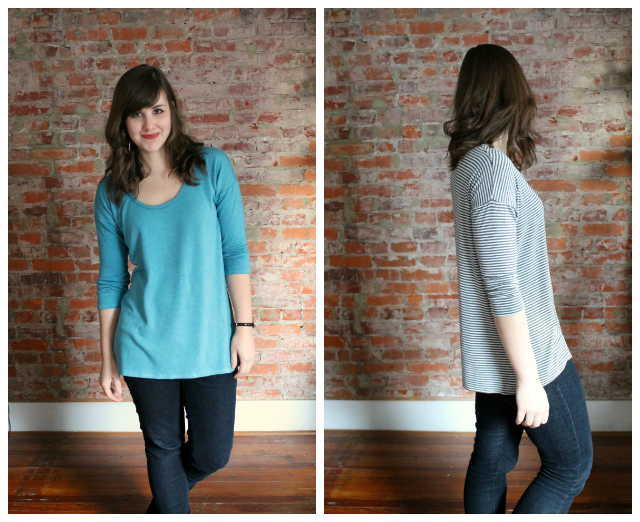
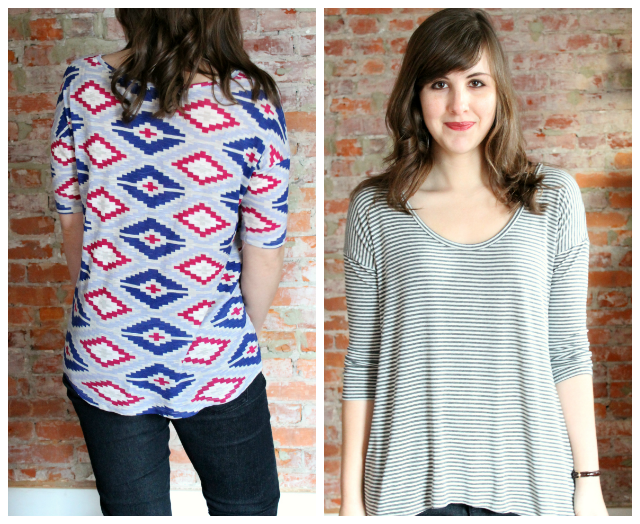
I made some modifications on all of these. On my first practice try, the neckline was too high for my liking and the sleeves too loose. Each of my subsequent necklines were lowered about 3 inches (!!scandal!!). I also lengthened each hem about 2 to 3 inches. The hem of the tribal/cross print one is curved up at the sides, and the hem of the striped one is curved up at the front and longer at the back. I used my coverstitch machine to hem everything. Ole Janome got quite a workout this week.

I made slimmer elbow-length sleeves on the tribal print version, and slimmed down all the others so they could be scrunched up. And obviously I left off the sleeves on the zig zag print version to make a little kimono cap sleeve thing, extending the shoulder seams another inch. Oh go on, call me a ~designer~.


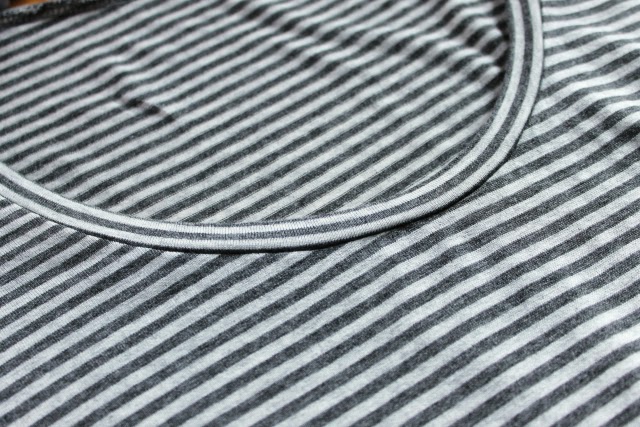
All three of the rayon jerseys (prints, stripes) are from Fabric.com bought within the last year. I originally intended the graphic print ones to be dresses, but they're certainly too lightweight and sheer for that. The tribal print one was advertised as blue and red, but it's definitely purple and pink. And totally printed off grain, as is typical of Fabric.com. Ah well. I made sure the pattern placement was alright so that I didn't have big crosses or pink diamonds directly on my b00bz. The gray striped fabric was going to be another Henley for Corey but he didn't like the fabric (what? Unbelievably picky, that guy). So now it's mine!


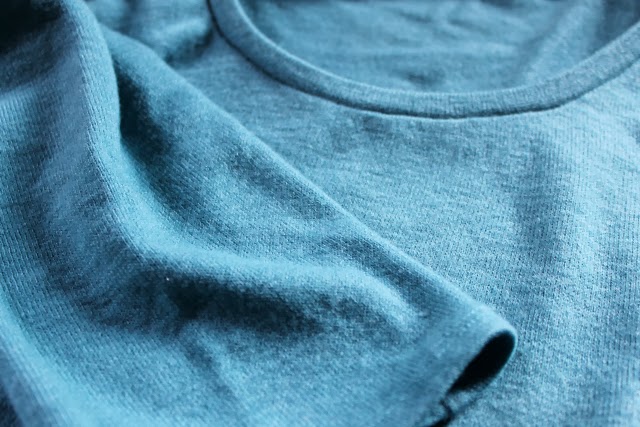
I was inspired by Makes The Things' sweater version of the Hemlock tee pattern, so I decided to make a heavier version with this turquoise sweater knit fabric that sweet Handmade Jane mailed to me all the way from the UK last year just because she knew I liked it. Seriously. She's a sewing angel among mere sewing mortals. See the raglan sleeve dress she made with this same fabric here. Thanks again, Jane! This one's definitely the warmest version, and goes to show that you can make this pattern with thicker knits, as long as they still have a bit of drape or airiness so the drop shoulder doesn't look too bubbly and weird.


The Hemlock has you choose your desired neckband width. I used a 2" wide quilt building ruler to cut all my neckbands out. All of them are folded in half wrong sides together then sewn/serged to the neckline with a 5/8" seam allowance and pressed up, except the short sleeve zig zag one, which was sewn at 3/8". Two of them I topstitched down and two I did not. I ALWAYS attach my knit neckbands flat instead of in-the-round, then connect the second shoulder seam after the fact. That way I can achieve my desired neckband snugness without doing any math or fiddly trial and error work.

The Hemlock pattern obviously sews up very quickly, so I recommend it if you want to whip up some basics, need to get out of a sewing rut, sew up some of your jersey stash, or, as in my case, all of the above. I've already worn mine to work, to the movies, to the gym, and/or to bed. Multi-purpose, gotta love it. Thanks for another great little pattern, Jen B. You're a superhero.


Who else is Hemlock crazed?