Showing posts with label sewaholic. Show all posts

Wednesday, April 10, 2013

blue. minoru. v2.


Minoru Jacket v1 and I were two peas in a pod. We went everywhere together and saw all the sights. We held each other close when the weather turned bitter. Many people IRL commented on Minoru v1, always impressed by how well we complemented each other. Minoru v1 saw me through my long-distance-relationship and a job change and a significant out-of-state move. It was my first handmade jacket, my first creation of substance with a clean finish and flattering fit, and probably the project that started regularly bringing traffic to my blog and turning visitors into followers.


Then, one gray day in October 2012, on my way home from the Philly airport after a weekend away, Minoru v1 escaped from my loving grasp and took a tumble off the train platform into oblivion. Or something. All I know is that I had it on the train but then it didn't make it home with me. And that was that.


Of course, I exaggerate for the sake of storytelling. Minoru v1 was a decent jacket, sure, but it's not like I slaved over tailoring techniques for months or anything. I knew I could remake a Minoru in a matter of days with inexpensive materials and it would be all good. And it IS good. I like my new jacket. I still wonder, though, where did that other little guy end up?


Anyway, you may have noticed I modified the pattern a bit this time around. I was a little TOO inspired by Mika's most recent version, and when I'm TOO inspired I just downright copy ya. I liked her diagonal welt pockets in the front, and I liked the way she attached the hood to the collar piece, and I liked how her elastic waist didn't wrap all the way around the jacket, and I liked that she changed the cuffs to non-elastic. So, you know, I just did it all. I even e-mailed her asking about the shape of her pocket bags at the welt (thanks, Mika!), so I think she could already tell that I was a big fat Minoru plagiarizer. And now I have proof.


These are my first single welt pockets evar. I followed Poppykettle's tutorial for them, which I certainly recommend. However, I first sewed mine on right-side-to-wrong-side of the jacket, which I didn't notice until AFTER I had sliced them down the middle. After some Instagram sobbing (what, you don't turn to your tiny friends living in your phone at a moment of crisis?), fray check dabbing, stitch unpicking, and deep breathing, I got em all squared away. The pocket bags are kind of small but I can ball up my fists in them, fit an iPhone, my usual million tissues. I'm a snot-nosed child, if you didn't know.

The jacket shell is made from some lightweight wool suiting from Jomar in Philly. Last month this fabric was actually halfway to becoming a Colette Anise Jacket. I made four bound buttonholes and everything, guys. I decided I didn't like the Anise, though (seems to be the theme with my Colette patterns lately), and so I switched plans to Minoruville. Off topic, but does anyone know how to pronounce Minoru for real? Min-o-roo? Min-ORR-oo?


The wool is loosely woven so I fused some ProWeft Supreme Medium Interfacing from Fashion Sewing Supply to the entire shell. This interfacing is like a baby blanket; it's wonderful to the touch. It really doesn't like staying fused to my fabric, though, so there's constant bubbling at the zipper placket. I wonder if it's too heavy for my fabric?


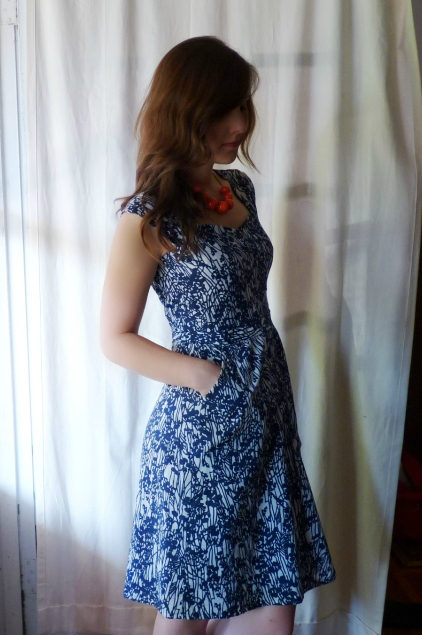
The lining is vintage cotton in a blue paisley print that my sweet boyf got me from Etsy for my birthday. The print is not my usual style for a blouse or dress, but I thought it would work well here with the navy jacket. I only used it on the front and back lining pieces. The sleeve lining is bemberg rayon so the jacket is easier to slide on and off over long sleeves.


I'm still not crazy about the elastic in the back, but the jacket had to have some kind of waist definition or I was going to look back-pregnant. I tried copying Mika's idea here, too, with the tab and buttons. I couldn't sew a decent looking oval-shaped tab for the life of me, though.


I used the same hood pattern piece as is, improvising ways to attach a lining and connect it to the collar. It's wonky on the inside (long story) but looks fine on the outside... except the hood is HUGE. I guess most people who've made the hooded version of the Minoru already know that. It tends to fall in my eyes as I walk, but I actually prefer that to it falling off the back of my head entirely. Who needs vision while walking through city streets?


I could be done now, but what blog post of mine is complete without a new Archer shirt to show you? 


This is my second of three Archers so far (first here and third here): an orange linen version that I wear obnoxiously often. I made a couple changes, like lengthening it, curving the side hem some more to make room for my hips, doing a tiny swayback adjustment, and facing the yoke with a cotton print because of fabric limitations.


I only had enough fabric to make half-sleeves, so there are no cuffs. I used French seams on the side and underarm seams because I wasn't about to buy orange serger thread and I knew I would want to roll up the sleeves and expose the seam. P.S. I'm still pretty chuffed that I know what French seams are but Richard from freakin' Project Runway didn't. Home sewers: 1. Fashion designer wannabe reality show divas: 0.

So, I like my Minoru a lot, but since I finished it, the weather went from winter coat temperatures to sundress temperatures within a matter of like four days. This is supposed to be a spring jacket -- wtf earth? Climate change is bad news for the polar bears as well as the slow seamstresses. How can I plan my spring wardrobe if suddenly spring just doesn't exist in the northeastern USA?  Bah.

How's your spring sewing going?

Thursday, January 3, 2013

cambie v2


Watch out. This Cambie dress is all growed up.

If you don't count the 18,000 thrifted items I keep meaning to refashion (ugh), I don't have too many unfinished objects languishing in that closet behind me. This Cambie dress was the exception, though. I started and nearly finished it a few months ago, but stowed it away when I got bored. That's what happens when I make a pattern more than once, I think. All I had left to do was adjust the dart position, fix the pockets along the side seam, and hem the skirt and lining. Finally conquered.


Ha, I do not carry around my blazer like this normally. Just when I'm wearing this new dress to a top-shelf cocktail party and/or schmoozy corporate networking event. (j/k I drink Yuengling beer and work for a non-profit.)


This pose better represents my true personality. Squirrel watching, likely.

I didn't think I'd want to make another Cambie because it's pretty darn sweet (see my first here), but I liked how the other one fit so thought I'd try it again with a straight neckline, ungathered sleeves and shorter hem. I think it worked out. I won't wear it a ton because my office is slightly more casual than this. But I could definitely wear it out to dinner or... something. Business casual squirrel-watching.


It's black and white, if the zoomed-out photos weren't totally clear. I wish I knew what this fabric was and it scares me that I don't. It was in the wool section at Jomar, but fabric categories at Jomar are loosely interpreted to say the least. It's some spongy textured suiting type of fabric with a loose weave. It's kinda reminds me of rope, and practically absorbs your stitches. Great for hiding crooked top-stitching but terrible for seam-ripping. 

I chose purple lining because, hell, why not? Corey only saw me sewing the lining part of this dress, so he thought I was making a shiny purple polyester dress. Totally my style, yes? He didn't try and stop me, though.

As before, I attached the lining to the zipper using Tasia's method described on her blog. I also looked at her tutorial for getting the straight neckline but that's pretty intuitive. For my slightly altered dress sleeves, I just used the sleeve lining pattern pieces (which are ungathered already) so I knew how wide to cut them.


I like how the back neckline of this pattern does not gape on me, thanks to the ability to adjust the straps before sewing them at the end. I think I went overboard, though, and made these straps too snug, which prevents gaping but also prevents maximum arm movement. I had already serged the straps so had no more fabric to let out.

Well, one can always unzip the top of one's dress in the back for some more mobility and throw on a blazer as a disguise. But I wouldn't dare cheat like that.


Psyyyyche.

What about you? Have any UFOs that need some attention?

Saturday, September 29, 2012

another renfrew mod


Think you've sewn (or seen) enough versions of the Sewaholic Renfrew already? Think again! Think the Renfrew pattern is too casual for your glam dress-stuffed wardrobe? Think AGAIN! That's what this blog is all about, after all: thought-provoking and intellectually stimulating content.

rofl.


Well, I hope you didn't think I made this dress from the Renfrew because I did not. Urban Outfitters made it so I could wear it to lure you in. Louisville didn't get an Urban O. until after I left, so it's nice living in a city where their stuff is already heavily circulated in consignment shops. I'm still not ready to commit to a fully self-stitched wardrobe, so I supplement with secondhand items. One day, though, I'll be head-to-toe in Andrea originals... maybe... ehhh.


So what is handmade here? Duh, the boring cardigan. I laughed when I finished it because it's pretty sloppily made and just reminds me of a $14.99 Merona brand cardigan you'd give your mom for Christmas or something. But I still like its practicality and length and have worn it a couple times already. Hopefully this kind of styling helps its cause.


This red ponte knit is the same I used for my stupid Cynthia Rowley dress from a couple posts ago. I bought like 5 yards of it for real cheap from Jomar, the crazy fabric outlet (is it an outlet? What is it?) in south Philly. Their inventory is heavy on the stretchy fabrics right now. What better way to spend a Saturday afternoon than digging through tabletop mountains of knit yardage of questionable quality? That was not sarcasm.

Making the cardigan version of the Renfrew was quite simple. I shortened it by 2" first because I like my cardigans to fit at the curve of my back (or be really long) so I don't look like a balloon when I wear them with skirts. The front is normally cut on the fold, so I just added a placket to the front pattern piece at the fold line. Cut two front pieces instead of one. This placket extension had enough width to be folded over and still be able to overlap the placket on the other side (1 1/4" total with the intention of making a 5/8" final placket).


On each end of the neck band and bottom band, I extended it by the width of the finished button placket (5/8"). Instead of connecting the bands end-to-end in a circle like on the original Renfrew, I stitched their edges so it'd form a neat square at the top and bottom of the placket. I can explain this in more detail if you'd like.


Too-big buttons, ha. I need to go button shopping so I'm better prepared for my on-a-whim projects:


I did not think about the necessary ease for a cardigan, so this fits like a t-shirt but open at the front. If I make another Renfrew cardigan, I'll size it up so I can wear it over other clothes more comfortably.


It's hard to stop at one when you're working with this pattern, so I made another in a sweater knit, also from Jomar:


I'm not as crazy about this one because the only thing I can wear it with right now is this granny skirt. Literal granny skirt. It was my grandma's -- I chopped off the hem at some point during my college years. I used to wear these warm brown tones all the time because they go well with my complexion, but I've ventured away to cooler colors. I'm kinda thinking of moving back that way this autumn. In fact, I'm currently working on something else now in this same brown.


So, friends, neighbors, far-away sewsters, how do you feel about a Renfrew cardigan or sweater? Dare to try? I know Tasia's revisiting the pattern over on her blog, so it's as good a time as any to bring back out that little green envelope! 

Enjoy the rest of your weekend, y'all hear.

Monday, September 3, 2012

le beau thurlow

When I was around the terrible age of 13, pants suddenly fit me strangely. Shopping for jeans was a nightmare, especially because I was still shopping the Juniors' section where everything was super low-rise and super flared (note: this was circa 2000). I didn't know what was going on until I realized... I had hips. Where did those come from? I still had a small waist so I felt like I was growing out of whack. I was sure I was the only sad little adolescent in the world experiencing this problem where I couldn't find anything that fit my legs AND my waist. 

Of course, after that, nothing ever changed about my body type -- not even the year I spent as a gym rat trying to burn up my thighs with vigorous squats and lunges. Sorry charlie. But guess what is different now? I can SEW, y'all.


Enter my saving grace: the Sewaholic Thurlow Trouser pattern. Drafted especially for those with small waists and fuller hips. Thank you, genius woman.


I truly can't believe I did it. I made legit pants! That I can wear in public! I am purty proud of myself. I bought this pattern immediately upon release, but totally bombed my first attempt. I threw the muslin and all the loose pattern pieces into a box and nearly admitted defeat. But I started thinking about the pattern again in these last few weeks. Where I work now is slightly more casual than where I used to work, and walking is a bigger part of my daily commute, so all this affects how I think about what clothing to wear and sew. I decided I needed another pair of neutral trousers to add to my minuscule collection of one. So after a second round of Thurlow practice with a thrifted curtain, I finally felt confident enough to make the real deal.


The fabric is some drapey rayon blend charcoal gray suiting I found on eBay. I love rayon with all my heart, despite its tendency to wrinkle like krazy.

So I know I seem pretty happy with the end result here, but I'm not going to completely sugar-coat this pattern review. I actually had a number of problems with the instructions. I want to warn other trouser newbies that this Thurlow pattern will try to flirt with you but it will NOT hold your hand. Some of the illustrations and instructions were simply not informative enough. I scribbled questions all over the instruction sheet and had to answer them through trial and error, which was frustrating and sometimes a waste of time. This was disappointing because most of the bloggers who have made this pattern raved about the clear instructions for the welt pockets and zip fly. I'll interrupt the Sewaholic love fest just to say that NOPE -- for some of us, 'tis a bit o' a struggle.

Here's an example of what I'm talking about:


Gotta love how Step 6 is, in fact, six steps. It makes sense NOW but when I first looked at it, I couldn't get over how those drawings were so tiny and lacked any helpful detail. Like, why is it hiding the welt pocket? I wanna see how the front is supposed to look, too! I also had issues throughout the rest of the pattern where I couldn't tell whether I should be using the right side or the wrong side of the lining fabric.  This wasn't a huge deal, but in my practice welt pockets I sewed the pocket facing on backwards because of this. Am I really the only one who had these kinds of issues?


I eventually figured everything out. I mean, I love puzzles so I actually enjoyed the process of piecing all the mysterious parts together until it made sense. I knew it was worth it, and the result looks pretty professional.


You'll notice here that I didn't even add the back welt pockets on my final version. I wasn't cheating on technique, but it was a style decision. I practiced the Thurlow welt pockets a few times but I thought they were too wide and looked like droopy eyelids. As a general rule for my fitted or lightweight pants, I don't like any pockets at all. They add texture (pocket wrinkles) and volume where texture and volume should not go.

Speaking of, I actually chopped off the front pocket bags after taking initial photos of my finished pants and realizing how frumpy the pockets looked. Here's what they looked like before and after doing so. It instantly made them look more dressy, imo:


The colors are off, but those are the same pants! I even used thin slippery polyester for the pockets, but I guess with the serged edges it just bulked up under this material. I'll definitely make faux pockets on my next pair.

Some other changes I made: 1) Nixed the belt loops, because the waist actually fits so why would I need a belt? and 2) Narrowed the flare by about 1" per leg. And note that these pants are drafted pretty long. I hemmed mine an extra inch than it calls for (I'm 5'7" btw).

So. Thurlow a go-go. I'm pretty thrilled that these basically fit me right out of the envelope, and I finally have pants that don't gape in the back when I sit. Have you discovered a great pattern that solves your age-old shopping woes, pants or otherwise?


Saturday, June 9, 2012

cambie, can it be?


Can it be... that I sewed something blue?


I do like other colors, I think. I just forget about them when I'm shopping for fabric. But I should really stop being embarrassed to show you blue garments because otherwise I'd have nothing to blog about and it'd be a disaster for humanity if I stopped blogging, right guys?


I doubt this dress needs an introduction because anyone who reads sewing blogs probably recognizes that I used the new Cambie dress pattern from Sewaholic. One of the fabulous benefits of sewing for yourself is that you'll always have a unique-to-you garment in the end. Yet, when you're part of a sewing blog community and everyone's making the same dress at once because you love Tasia and her patterns with all your heart, it kinda makes this dress feel like old hat already.


Luckily for me, the real-live people I interact with daily do not know that there are adorable seamsters in other nations/states/nation-states prancing around in their own versions of this same gathered-capsleeve sweetheart dress. (OK, maybe it's only Scruffy Badger who I've ever witnessed prancing, and she looks good doing it!) And it still means I will never again have to experience the horror of walking into a party wearing the same Target dress as someone else. Weird: just three months ago I was still friendly with Target and didn't feel too gross about buying their clothes. But I was there last night and found myself scoffing at their sad unlined shapeless polyester dresses with misaligned stripes at the seams. The seamstress snobbery hath surfaced.


So yes, I do love my Cambie dress, I really do. A lot, even. This feels like one of the better-quality garments I've made. The full lining helps with that, and it just fits well (in the bodice at least) and is modest yet flattering. I lined the skirt with Bemberg rayon which seems way more luxurious than the $2.99 polyester I usually use (o-god I admit). The main fabric is a navy-and-white pure cotton lawn in a "botanical abstract" print from Fabrics and Trimmings on Etsy. I had enough left over to make the bodice lining, so I decided to stay economical. Here's the inside:


Yeah they didn't have white lining so I went with the navy. I notice in the photos that it does darken the fabric from the outside but big whoop, yaknow? Call it an ombre effect. This dress wasn't difficult to put together, but took a few evenings of solid work to finish it. I sometimes got lost within the layers when I was sewing in the lining and had to reorient myself over again. The fit of the skirt was the most time-consuming part, as I couldn't get the pockets to lay right without them tugging or gaping in the wrong places.


Since I'm Sewaholic's target seamstress (meaning, pear shape and/or awesome), I cut a straight size 6 according to my measurements. Who knows what happened, but the front skirt ended up being way too huge to fit the waistband. I took it in a lot but still had to ease the rest in, so my "A-line" skirt kinda drapes awkwardly when I stand certain ways:


I didn't make a muslin but the fitting wasn't that onerous beyond the skirt. The neckline gaped, as expected, but I took in the front bodice at the top side seams which made it acceptably snug across the top of the bust. The back neckline also gaped, as expected (I'm a hunchback, remember?), but I was able to adjust and angle the straps to eliminate that. I like that the straps/sleeves are attached last so you can ensure that everything sits correctly in the end:


I didn't make any design changes, and the only technical change I made was understitching the sweetheart neckline so the seam wouldn't roll forward. I'd recommend it. You could also understitch the back neckline and armhole seams in the bodice, but I only noticed seam-roll issues in the front so I didn't find it necessary to do the whole thing. Here's the understitching from the inside:


I made this dress primarily to wear to a friend's wedding (today!) but I bet it'll get some mileage at work and nicer restaurants. Uh, but knowing me I'll probably wear it to bars to watch the NBA playoffs, too. Overdressed freak.


How are your summer (or winter, as it may be) dresses coming along?

Wednesday, May 23, 2012

knit tee: help wanted

Now that I've worked with the Renfrew pattern and inevitably want to make 5,000 more of them and physically can't stop myself, I'm trying to think of ways to incorporate basic knit tees into my wardrobe in a not-so-basic way. I can't do it on my own, though, so I'm lucky that the Internet was invented primarily to help me learn how to dress myself. Thanks, Internet. AP style capitalizes your name for a reason.

Alright, so who is better in blogland for classy knit tee inspiration than Kendi Everyday? Kendi's a wildly popular fashion/style/outfit blogger (as in, >14,500 Blogger followers alone, excusez-moi) who owns her own clothing boutique in Texas. Our styles don't always sync --she can get away with wearing pleated pants and hot pink heels, after all-- but I enjoy stalking her blog anyway due to her sarcasm, love for colors & prints, good photography, etc. Here are some recent examples of how she dresses up casual knit tops, all of which I'm a fan:


What have we learned here? I need colorful flowy skirts and chunky jewelry and a cherry red blazer, that's all. Annndd maybe a husband who's a professional photographer, blog sponsors that send me free loot, and a gym membership. On it!

I went on to make a short-sleeved Renfrew with the hopes of wearing it in a effortlessly chic way, just like Kendi does. Yet, all I've done is glare at the finished product with narrowed eyes for a couple weeks now. I'm worried about the colors, print choice and banded style. Very worried. I mean, I like the birds - I have another RTW bird shirt in poly chiffon, but "bird t-shirt" isn't what first comes to mind when I think of chic fashion. I don't know what I was thinking, but dressing up this top is quite difficult, at least with my current wardrobe.

(not my dawg)


It's high time I solicit the advice and opinions of my dear readers. After all, I think of you as a support network for all my creative endeavors, so I can't be left alone to ponder whether I'm one of those people with, ahem, questionable taste. 


SO, please, I need you to answer a very important question with as much honesty as you can muster...
DOES MY NEW RENFREW LOOK LIKE A LITTLE BOY'S PAJAMA TOP?


OH GOD contrast cuffs