Wednesday, August 19, 2015

refashioned shirt quilt


I've been blog-dead for many moons, but this year I decided to participate in The Refashioners, hosted by Portia, because it seemed like a fun and creative way to reengage with the sewing blogosphere. The challenge was to refashion a man's shirt, but I took it in a slightly oddball direction. I decided to make a quilt out of many men's shirts! My goal was to make a cool modern quilt that happened to use secondhand shirts, instead of making a "shirt quilt" that looked like a bunch of men's shirts, so it took me many thrift shopping trips to find these bold solid colors that matched my home decor.


Head over to Portia's blog to see my full post about the process, and while there be sure to check out the rest of what The Refashioners have done this year. Pretty amazing stuff! If you decide to participate yourself, there's an enormous prize package to be had by one random winner. Yeah, it's like laughably enormous. 

I do plan to be back soon with a brief tutorial, and perhaps a post about the Colette Cooper backpack I recently made. As you probably know, you can always keep up with me at Instagram (@foursquarewalls) where I'm slightly more active...

Get shirty!


Friday, May 1, 2015

me-make may?

Denim Archer shirt I made for myself (for fun!) a few months ago

I know. May is the time of year when all the AWOL sewing bloggers suddenly show up in your blog reader with bathroom selfies galore for Me-Made-May. Don't worry; I've definitely been AWOL and here I am suddenly on May 1st, but bathroom selfies ain't me. I decided that I wouldn't make a proper pledge for MMM15, because I tend to (try to) wear at least one item of handmade clothing everyday and I'm pretty aware of my wardrobe needs and desires already. 

Kimono thing I made two weeks ago. Sooo slapdash but I'm kinda obsessed.

My problem is actually making time to address those needs and committing to sewing for my own damn self. When you sew for a [modest] living, every moment at the sewing machine is a potential money-maker, so it's hard to shove my to-do pile aside and sew for fun. I figure May is a good enough time to spoil myself, though. I've been having major Insta-Envy, where I scroll through Instagram with a pit in my stomach because everyone's making Ginger Jeans and Morris Blazers and undies and cool bags and all the things I want for myself but don't have time to make. #PoorBaby. I know it's the price I pay for choosing this ridiculous career path, but I'm grateful that my passion for sewing is still strong and that my only limitation is lack of time, not lack of desire or inspiration.

Baby quilt for my future nephew I made in March. Really should have taken better photos on a proper camera.

So I'm calling it Me-Make-May, where instead of just wearing my existing handmade stuff, I'm going to try to set aside time to sew more clothes for myself... that aren't cut off-grain and slapped together on a serger and left unhemmed as per usual these past few months. I'm afraid to set quantitative goals for myself because I can't always predict my work schedule and deadlines, but I would love to work towards accomplishing the following:
  • Tops. I wear black jeans like everyday and have few tops to pair them with. Maybe one knit tee and a short-sleeve button-up?
  • Maxi dress. I still feel like I'm playing dress-up when I wear the one I have (never blogged), but it's so damn comfortable that I need another.
  • Pajamas and underwear. Not very fun but the situation is dire.
  • Dress for my friends' wedding at the end of May. I have some knit lace I want to use, but need pattern inspo.

Linden Sweatshirt I made as a sample for my knits class at Butcher's Sew Shop

Here's to hoping I can get all that done. My plan is to check in with you all again, either halfway through May or at the end of it (let's be real... how about July?), to see how I did. Fingers crossed!

Do you guys also have sewing goals for MMM15, or is it more about reflecting on and celebrating what you've already made?

Wednesday, December 31, 2014

2014

I knowingly skipped over my third blogiversary, or however it's spelled, because I felt that my neglected blog didn't deserve any hoopla at the time. As the year 2014 rolls to an end, though, I thought I should revisit this space to catch up and do a bit of reflecting on the past year of sewing in general. If only to distract myself from thinking about the impending nightmare of filing my taxes as a self-employed person for the first time. And I've certainly missed you all!


As you may know (from this blog post), in February I quit my position as a grant writer in order to sew for a living. For awhile after that I was mostly sewing for a studio that did bridal alterations and custom projects. The owner ultimately decided to narrow her focus and cut down the volume of her workload, so I stopped working there in early September and ventured out on my own. 

One of my last projects at Seamstress for Hire: a tablecloth playhouse. Naturally I had to try it out for myself.

Since then I've been freelancing, sewing on-demand for a few Etsy shops and local brands (Rebourne; Cuddle Sleep Dream; Brynnie). The work is consistent and I get to work from home on my own equipment, which is excellent in that I can set my own schedule and I certainly enjoy the autonomy and pajama dress code. But it also means that my small sewing room is in a constant state of chaos and I never know how to stop working because the work is always staring at me.

Above: my pile of items to sew/alter before the holidays

I have also been teaching more often at Butcher's Sew Shop, leading the Sewing with Knits workshop as well as some sections of Sewing 101 and 201 and private lessons for adults. In the past I never imagined myself being any sort of teacher due to my introverted nature, but teaching people how to sew has been incredibly fun. I'm lucky that Butcher's is a laid-back and warm environment, and it's rewarding to witness the students' proud moments of finishing a new project. I've learned that patience and encouragement (...and being able to multi-task like kRaZy...) go the longest way as a sewing teacher. If you're interested, you can read more about the talented owner of Butcher's on Madalynne's blog here.

Clockwise from top left: Sewing 101 students with their finished clutches; a student's Linden sweatshirt from my Sewing with Knits class; me with a student in Sewing 201 working on the Salme Kimono top (photo by Maddie found here); and a student's finished Deer & Doe Plantain tee.

The rest of my time is spent doing custom projects and alterations. I'm trying to shy away from this type of work when possible because it takes a lot of (unpaid) time to meet with people and do fittings, and the work can be unpredictable. The majority of these type of clients so far have been friends or people I know, though, which is certainly more enjoyable that way.

Clockwise from top left: Custom button-back top for my friend Charlotte; duffel bag made from firefighter gear for a retired fireman; a Craftsy post I wrote on hemming jeans (quite a controversial subject according to the comments); and a flat tummy adjustment in progress on a RTW dress.

My hobby sewing (and blogging, as you know) has slowed considerably, but I have cranked out a couple easy things for myself in the wee hours. I did sacrifice a whole work day and made hedgehog costumes for Corey and me for Halloween. (People thought we were lions.) I also took time where possible to make birthday and Christmas gifts for some dear ones this year.

Above: wide-wale corduroy pants I made for Corey's birthday. I used the Thread Theory Jedediah Pants pattern, which fits him perfectly with no modifications. He wears these cooooonstantly!

Favorite makes this year, clockwise from top left: Linden sweatshirt for myself in a loopy sweater knit; Portside duffel bag I'm obsessed with (I replaced that white zipper with a gold metal one and it's bangin'); Several pairs of handmade underwear because I hate shopping for anything anymore; Hedgehog costumes made from fleece and a ton of felt triangles.

2014 has been a truly bonkers and amazing year. I almost can't believe this is my life now. I certainly do not miss working in the office environment and never for a moment have regretted my decision. Working for myself of course comes with its own stressors, like unreasonable deadlines, taxes, business licenses, expense tracking, clutter!, picky clients and 15 hour work days where I don't leave my house. I work about 70 hours a week and earn less than half the income I had at my office job. But! I feel as though I own my stress because I can decide what work I'm taking on in the end. It's taken me awhile to build confidence and I still get frustrated at myself for making dumb mistakes or taking too long, but I've more often been proud of myself than anything for what I've done so far.

So here's to another bonkers and amazing 2015. Happy new year, friends, and I will see you on the other side!

Wednesday, November 12, 2014

steaming out permanent creases on altered garments

I seem to know a lot of tall guys. Poor guys, can't find shirts or suit jackets that fit in the shoulders and chest AND are long enough for their gorilla arms. Poor seamstresses (me), having to alter the tall guys' sleeve lengths and mess with those awful mitered vents.


I will answer a couple major questions here. Can you lengthen a suit jacket sleeve? Despite the sad lack of internet tutorials on how to do so, YES, you can. In this case I lengthened the jacket sleeves by 1-1/4" and added a facing so I would have enough fabric to recreate the sleeve vent. The buttons along the back sleeve seam are not functional, so I could pop them off and re-position them after the sleeves were lengthened.

Another major question: Can you get rid of that pesky horizontal crease that persists from the original factory-pressed hem? YES. Maybe not 100%, but yes. Here is what it looked like before, even after pressing and steaming, steaming, steaming with water multiple times:


Many moons ago, Megan Nielsen blogged about steaming out a seemingly permanent crease on her denim Kelly skirt using a brown paper bag that she wet with a 50/50 mixture of white vinegar and water. Luckily I was able to find her post again (HERE) and followed her lead to remove the hem creases on this suit jacket. 


I cut a scrap of brown packing paper from one of my far-too-frequent Wawak mail orders, then I dipped that in a mixture of white distilled vinegar and water. I placed the wet paper on top of the creased area, then steamed the daylights out of it. Held my iron there with constant steam for maybe 15 seconds until the paper was dry, then moved to the next section.


Side note: I have a "one size fits all" iron shoe tied to my iron, in case you're wondering what that thing is. Helps prevent scorching and shine.

And here's the finished sleeve after the vinegar magic show:


Not bad! The garment does not smell like vinegar, though my sewing room and hands now do. I'll also note that the thinner packing paper worked better on the crease than when I tried this with a Trader Joe's paper bag, which is a bit thicker. 

That's all. Just wanted to share this tidbit in case you ever have to alter clothes for a tall guy (or gal). Have you tried this?

Sunday, August 31, 2014

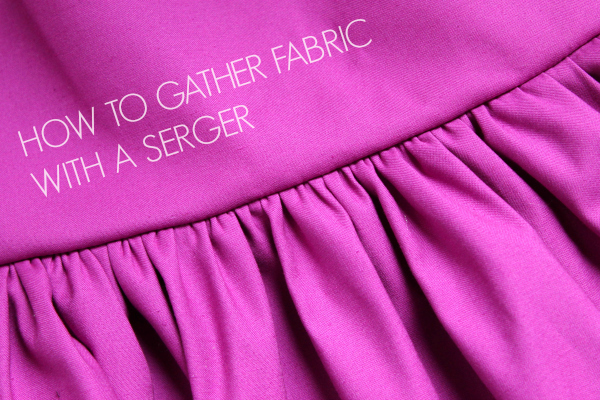
how to gather fabric with a serger


Darlings! I haven't had a moment to breathe sew much for myself since I last updated, but I figured I could at least share some lil' techniques I've been learning "on the job." In my freelance work, I often sew multiples of the same thing, so I use those opportunities to try out different ways of executing the same step to see which method is fastest or looks the best. 

Gathering fabric is one of those [obnoxious] tasks that can be done a few different ways, such as pulling on two parallel lines of basting stitches, zig-zagging over a strand of dental floss or string, or using a gathering or ruffle foot on your machine. Those all work fine... when they work. I actually haaaaate gathering fabric because those methods very easily go wrong and can be time-consuming, especially when your threads snap and you have to start all over again. And what if you need really dense gathers, or your fabric is a bit thick? A gathering foot won't do you much good there.

Well, I was recently commissioned to make 10 gathered party skirts for a local startup clothing line, so I had to figure out a way to get fast and consistent results with sewing gathers. OR ELSE. The fabrics I'm working with for these skirts are cotton sateen and silk taffeta, and they have a skirt-to-waistband gather ratio of 2.75-to-1, so they're pretty frickin' poofy and need a lot of gusto to gather. I think 3-to-1 is the determined max limit on gathered skirt poof before it becomes, like, physically impossible to sew and maybe socially unacceptable to wear.


I knew in the back of my mind that sergers could gather fabric, but I had never tried it. So when I did try it, I couldn't believe how much easier and faster it seemed. All you have to do is adjust some settings on your serger and get gathering. Now, of course this method can go wrong, too, as nothing in sewing is fool-proof, right? This technique actually works in an opposite manner as the basting method because you gather the fabric as you serge and then loosen the gathers to fit. This is unlike the basting method, in which you typically tighten the gathers to fit. This means you should test out your gathers on scrap fabric first to make sure it gathers tightly enough on your serger. If the gathers are too loose after serging, it will be difficult to tighten them up.

The first step is to set up your serger for four-thread overlock. The tightest gathers will occur if there are two needles engaged instead of one. Once you have threaded your serger properly, tighten the tension of the two needles (not the loopers), which are typically the two leftmost dials. For this particular project, I needed to gather the fabric very tightly, so I increased the needle tension as high as it would go, which on my Brother 1034D serger is at a "9" tension. After some trials, I found I achieved best results if my left needle is at "9" and the right needle is more like a "7" tension. Your machine may react differently. I left the loopers at default tension, which for my machine is a "4":


Next, tighten the differential feed if you are able to. The serger has two sets of feed dogs, one in front of the other, and the differential feed controls the ratio at which these feed dogs move the fabric under the presser foot. A higher differential feed -- in this case, a "2" -- will move the first set of feed dogs twice as fast as the second set, which gathers up the fabric. Conversely, a lower differential will move the first set of feed dogs more slowly, which stretches out the fabric. Here I've set it to the highest ratio possible:


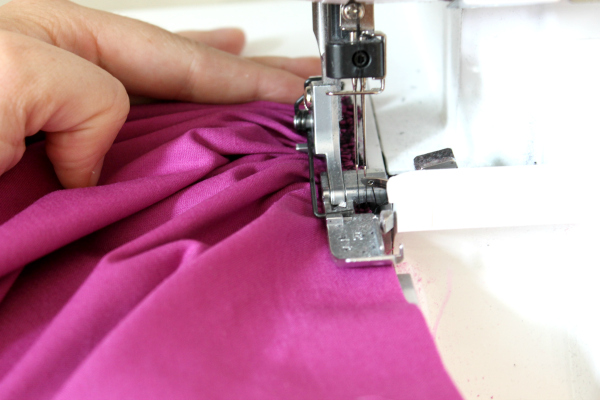
Now, all you have to do is serge along the edge of the fabric and the machine will do the gathering work for you. 

Here is a video I took of the gathering at work. This is high production value, folks. Oh you're welcome!


Keep in mind that the serger will gather along the edge, so you may need the adjust your seam allowance first or serge so the blade cuts off part of the seam allowance if it is 1/2" or larger. Make sure the left needle of your serged seam does not extend past your desired seam allowance because the threads will then be exposed on your garment and they're hard to pick out neatly. It may help to match your serger thread color to your garment, but I did not do that here (the skirt is lined and I did not want to spend money on four fuschia cones for one project!).


If you are attaching the gathers to a flat piece of fabric, it helps to have marked the gathered fabric and the flat fabric into fourths so it's easier to match up the points and distribute the gathers evenly. Below, I have matched the quarter marks and then I gently loosened and distributed the gathers so they match the length of the flat fabric. If you yank on the serging too hard to loosen it, the threads may snap, so be currful. Lots of pins help secure the gathers.


When you sew the gathers to the flat fabric on your sewing machine, it helps to have the gathered side facing up so you can make sure the gathers aren't folding over or jutting out from the seam allowance. Be sure your needle sews right below the serged seam.

Donezo.


It's worth mentioning that you can do something similar with a regular sewing machine by upping the tension, but the serger helps create tighter, more even gathers because it is set up to sew two parallel lines of stitching with two needles and you can adjust the differential feed as well. I also like that it finishes the edge as you gather so there's less annoying fray to deal with when you're attaching it to the flat fabric. And because it's so fast, if your gathers somehow fall out or get too loose, you can just zip over one section again with the serger. Much less stress than having to rebaste two full lines.

How do you prefer to gather fabric?

Sunday, July 27, 2014

a painterly dress


I keep waffling between LOVING this dress and thinking it looks like a 90s thrift store special. Something about the mix of pink and purple in the color palette seems dated, maybe, and sometimes I think I see butterflies in the print that aren't actually there. Butterflies on clothing reminds me of my childhood. But I mostly love the dress. It helps that it's relatively well-made, by my standards, and it fits quite nicely, by my standards. And I do like the abstract floral print. I made it specifically to wear to a wedding so I enjoyed having an excuse to sew a fit-and-flare dress that has more than three seams, is fully lined, and not made of cheap jersey like my usual handmades.


I started with one pattern -- Simplicity 1418 -- but went completely off script as I tend to do. I bought a few of those Simplicity Project Runway patterns on sale at JoAnn recently and then decided they were kinda "meh" once I got home. It used to be I was so bored by the Big 2 offerings that indie patterns seemed shiny and bright, but now I'm bored by indie patterns --at least for dresses-- so it felt exciting to flip through the commercial pattern books and see a bunch of new-to-me stuff that I could gobble up for $1.99 each. But, it turns out they're all basically the same sort of silhouettes anyway with a few questionable details tacked on, like the fake lace-up binding on the back of this dress:


I first made a muslin of View B with the wide cap sleeve things like the yellow dress on the envelope. It looks cute on the model. It did not look cute on me. Getting those sleeves to fit would be tricky. They actually have an elastic casing attached underneath to help the sleeves stay put on your shoulders, but they still kept slipping down into 80s territory and were all gapey in the back so I knew I would have to play too much with the sleeve pattern to make it work. Plus, strapless bra requirement? Ew.

So I decided to make View A.... kinda. Here's what I actually kept about the pattern:
  • Princess seam lines on the front
  • Back pieces with darts and high back inset, though I seamed in the inset instead of attaching it behind the back pieces
  • Side zipper placement

Here's what I changed:
  • Changed the neckline from a v-neck to a scoop neck and cut the front piece on the fold instead of as two pieces.
  • Eliminated facings and edge bindings.
  • Added full lining, which narrowed all the edges since I was turning under seam allowances instead of binding them.
  • Used the half-circle skirt from Simplicity 1651 instead of this pattern's pleated skirt. I assumed that since they were the same pattern line and same size, the skirt would match to this pattern's bodice, and it did perfectly.
  • Added pockets to hold my phone and keys while I'm dancing at the wedding reception, of course.

So, I basically made it more boring! I very nearly bound all the edges in black bias tape as the pattern calls for. It didn't "feel" right, though, so I consulted the smart gals of Instagram because it's impossible to make decisions on my own in this approval-obsessed age of social media. The vote for clean finish vs. black bias tape was 36-to-18, so I had to go with majority. I do think it was probably smarter for this kind of occasion -- black edging would have made the dress more casual and bias tape can look hokey and be difficult to apply neatly. Without it, though, some of the design effect of the back bodice is taken away because the binding is supposed to outline the inset piece. Ohwell.


FABRIC: The fabric is a linen print from Jo-Ann, so probably a third of you own it as well. It's a bit scratchy on its own which is why I chose to line it. The bodice lining is made of some off-white cotton I found in my stash, and the skirt lining is cream-colored Bemberg rayon.


FIT: I was kinda surprised to see that these envelopes are split at size 12 instead of size 14 like other Simplicity patterns I own (so you have to buy either 4-12 or 12-20). Maybe it has to do with the amount of design variations included in the pattern, so they can only print so many sizes. Fortunately it doesn't affect me too much because I only make a size 10 if it's a knit pattern, so I just bought the upper envelope. Choosing size for this dress was a bit of a gamble; they do list the finished garment bust size on the back of the envelope, but I had to consult the actual pattern pieces to find the finished waist size. I fall between a size 12 and 14 for bust and waist, but cut the size 12 to cut down on some of the built-in ease. I got nervous that adding a lining would bulk up the dress, so I sewed the side seams at 3/8" instead of 5/8" and it worked out fine.


I made a muslin and tweaked issues like puffy princess seams, sticky-uppy shoulders (technical fitting term), a gaping armhole and a waist seam that dipped too low in the back. I actually altered the pattern pieces (!!) so the issues would already be taken care of on the final fabric. Yeah, I don't normally do that...? This is one of those patterns that has the option of sleeves vs. sleeveless without any change to the shape of the armhole, which seems like bad drafting IMO. Luckily the front princess seams end right where the gape at the front armhole is, so it's easy to adjust there. I also folded out a small (3/8") wedge out of the back armhole pattern piece before cutting into my final fabric.

CONSTRUCTION: The original pattern has facings, but the facings are supposed to be basted to the garment edges WRONG sides together, then all layers of the raw edges are bound with double-folded bias tape. Huh? What's the point of the facings if they're not there to help finish the edges? I don't know if it's just to provide stability to the neckline or what, but if I were to make this garment without a lining and with the binding, I would probably just eliminate the facings all together. Am I right or wrong on that?


I used a 14" invisible zipper in the left side seam. Sewing an invisible zipper around an in-seam pocket is always an adventure, and since I added my own pockets to the pattern, the instructions weren't included for that. The only tutorial I can find linked to online is from 2008 on the Pins & Needles blog that no longer exists. Luckily I own Simplicity 2215, which uses this method.


The half-circle skirt is cut so that the side seams are on the straight of grain and cross grain, with the center front and center back hanging on the bias. Helps with zipper application, maybe. I had limited bemberg rayon for the skirt lining, so I had to cut the lining with its side seams on the bias and the CF and CB along the grains. I'm not willing to figure out the geometry of why that saves fabric but, it does. I... don't recommend this, if you can help it. I guess you have to even out the hems separately no matter what, but it made it seem like more of a headache because after hanging, the main skirt was drooping too low in the front and back, while the lining was drooping too low on the sides. Zzz hemming. Once I got it even enough, I did a blindstitch hem on my machine, which I only attempt on textured or printed fabrics.


I feel like I'm providing an unnecessary amount of detail about making this pattern, so I'll shut my trap now. Have any you had success with a Project Runway pattern lately? The Project Runway collaboration with Simplicity makes me laugh because Nina Garcia would probably kick me off stage if I sent this dress down the runway for real. Too twee and fashion-backward for Marie Claire, perhaps. BUT ILIKEITALOT.

Thursday, June 26, 2014

archer shirt variation: v-neck placket

Wutsup Internet pals. After my last post, I received some requests for a demonstration on how I modified the plackets of the Grainline Archer shirt to a V-neck. And I oblige! I like this look because the shirt lays flat against your chest while still framing your neck and face in that nice button-up shirt kinda way. It's slightly more feminine, too, so there's that.


This doesn't involve anything too difficult, despite the long post that follows here. The modification involves three steps: 1) modify the shape of your shirt pattern piece, 2) draft separate plackets to match, and 3) shorten your collar stand. I'll also show you how to actually sew on the new plackets. You can, of course, do all this with any button-up shirt pattern, but I'm showing it on the Archer because it seems likely that more of you guys already have this pattern (or are thinking about getting it) than some rando Butterick pattern or something, right? We're all indie fangirls and we know it.

So if you want to get this look, follow along!

PLACKET DRAFTING INSTRUCTIONS:
1. Assemble the front pattern piece of the Archer shirt. If you need to print a new one for this modification, you only need to print pages 2-4, 8-10, and 14-16 from the PDF. Cut or trace your size.


2. Cut along the vertical line that says "Trim Along Dotted Line for Right Front." The original Archer pattern has you fold under and stitch the placket on the wearer's left side, and attach a separate placket piece for the right side. On this modification, both sides will have two separate plackets so throw away that chunk and pretend it never existed.


3. Cut off the desired amount to create your V-shape in the front. Make sure it doesn't cut way below your bust apex (unless u naughty), but remember that there will be added plackets that will provide more coverage. For reference, I made a point 1" inward at the neck and another point 7-1/2" down, and connected those points with a straight line which I then cut off. Feel free to make the neckline more or less open, higher or lower.

Because I was making a sleeveless version, I went ahead and modified the shoulder and armhole, too. As Jen writes in her sleeveless Archer mod post, you don't want a sleeveless shirt that hangs off your shoulders, so shorten that shoulder seam and blend to nothing at the original underarm. I shortened my shoulder seam by 1-1/2". You'll need to similarly alter your yoke and back pieces, too.


4. Before drafting the plackets, go ahead and draw the seam line on the front edge of the shirt pattern piece. The seam allowance on Grainline patterns is 1/2". This steps just helps with the drafting process for accurate measuring of the new plackets.


5. To draft the plackets, place a sheet of tracing paper over the top of your pattern piece (I use Swedish Tracing Paper). Weigh it down then trace that seam line you just drew. Now draw a parallel line 3/4" to the left of that seam line. 3/4" is the final desired placket width I chose, so if you want a wider or narrower placket, adjust as you please. Connect the top of the two lines by tracing the curved outline of the shirt neckline. Connect the bottoms with a straight perpendicular line that matches the hem of your shirt piece.

So, the blue outline on the tracing paper is now the placket piece without seam allowances on the sides:


6. Add seam allowances to the sides of the placket only, since SAs are already included in the top and hem (traced from the original pattern). My SAs are in green in the photo. Stick with 1/2" if you're using the Archer so it remains consistent with the rest of the shirt construction. When drawing your SAs at the top of the placket, the top bit should continue to follow the curve of the shirt neckline. It will look crazy pointy, but that is all trimmed down later after you sew it on. Cut out your new final pattern piece.


COLLAR STAND MODIFICATION INSTRUCTIONS:
While you have all your pattern pieces and fabric out, let's do this mod now before sewing anything. Remember that you removed fabric from the front of your shirt pieces, which makes the garment neckline shorter around. If you're adding a collar, collar stand, or both, you will need to adjust the pattern piece(s) accordingly. I decided I wanted a "mandarin collar," or just a collar stand with no collar piece, so I'm only showing that modification here. The same theory applies if you're adjusting a collar, too: remove length at the center so the shape and pitch of the ends remain unaltered.

First, calculate how much of the neckline you removed from the shirt on each side. Instead of measuring all the pattern pieces and adding stuff together, just think about the original pattern pieces versus your new ones and do some subtraction. On the original Archer, there is the full neckline plus a 1" placket. For my version, I removed 1 inch from that neckline, then added plackets that are only 3/4". So my shirt neckline now has 1-1/4" less on EACH SIDE, or 2-1/2" less total. I hope that makes sense. I tried to create some diagrams but it just made it seem more confusing.

The Archer collar stand is cut on the fold, so changes made to this pattern piece reflect only one side, though the changes will be doubled once the fabric is cut. Since I removed 1-1/4" from each side of the shirt neckline, I similarly removed 1-1/4" from each half of the collar stand at the center back. I marked a line at 1-1/4" and cut there. This is your new "Cut on Fold" line when you cut your fabric.


PLACKET CONSTRUCTION INSTRUCTIONS:
1. Cut FOUR placket pieces from your fabric. Two of them will be your outer plackets and the remaining two will be the placket facings. Cut two interfacing pieces as well. 


2. Fuse the interfacing to two placket pieces.


3. Right sides together, pin and sew the the facings to their placket counterparts. You will be sewing the outer edge, or the outer curve of the plackets. Trim this seam allowance.


Open the pieces and press the seam to the placket facing (uninterfaced side). Understitch this seam in place.


4. Fold together and press, wrong sides together. The understitching will help the placket facing stay put in the back. Double check the width of your plackets now and trim the raw edges to make everything even if you need to. 


5. You'll now be attaching the plackets as one piece to the front shirt edges. That means you'll sew both layers of the placket and placket facing to the shirt, and the seam will be visible on the inside. I decided not to do a "clean finish" (where the placket facing edge is folded over and stitched to cover the separately-sewn placket seam) in the interest of time and in the interest of me not being interested in a clean finish. Do whatchu do.

Pin the right side of the placket side to the shirt edge. The pointy seam allowance at the top of the placket sticks out awkwardly as it's supposed to, but remember it will be trimmed and pressed back in place later. 


Stitch these seams at 1/2" then trim and finish this seam by serging or zig zagging. Press the seam away from the placket. Topstitch down if ya want.


Your plackets are done! I know you can hardly see them in this fabric, but check out how the neckline now looks when the plackets are overlapped. It will open up more once you put it on a 3D body.


Continue constructing the shirt per the pattern instructions, using your modified collar stand. Some other things to note:
  • If you need help sewing on the collar/stand, I have a tutorial on that here
  • If you made your shirt sleeveless and need help finishing those edges, the Colette blog has a nice post on finishing armholes with bias binding, which is how I sewed mine here (except, duh, I sewed mine in the flat, not the round).
  • The buttonhole/button situation will be a little different than your standard Archer (there's fewer of them, yay!), but just make sure you place a button at the fullest point of your bust to avoid placket gaping/bra peekaboo.

Any questions? Holler!