Monday, April 21, 2014

spring robin


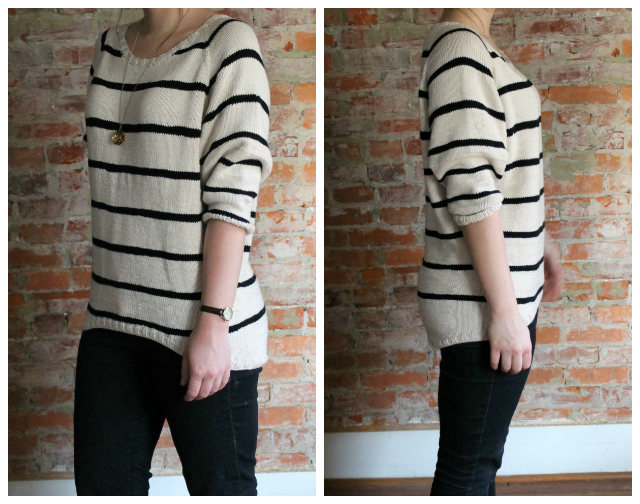
This is one of those garments that you love to wear despite knowing it is not necessarily that flattering nor well-made. Ha, I act like that's a common thing for other people, too. I dunno, dude, I'm just on a baggy top kick and I don't know what else I want to wear these days. There's something pleasant and comforting about dressing like a frump. Let's call it effortfully effortless, because a lot of effort goes into knitting a baggy sweater you can take a nap in.


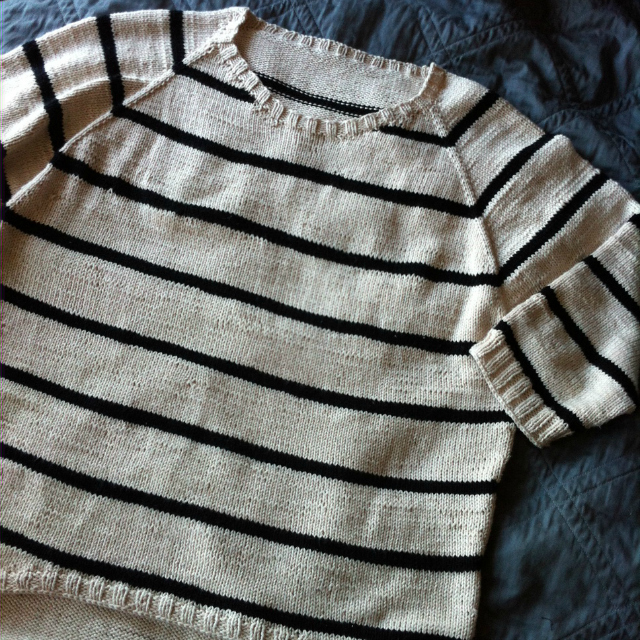
This little mama is knitted from the Robin pattern by Josée Paquin. It's a striped raglan-sleeve sweater with a dipped hem, knitted in one piece from the top down. It's purposely slouchy, with VERY LOW armholes for a batwing look. Wait a sec... batwings. I think I understand why she called this the Robin pattern.


Another example of someone wearing something all the time despite it being unflattering.


I wanted a sweater that I can wear in the transition months between cold and hot weather and vice versa, so I chose to make this pattern using a cotton/modal blend yarn: Shine Sport from Knit Picks. I have leggings that are cotton/modal and are heavenly to wear, and this yarn is just as delightful. I spent a lot of time just squishing it against my face. I went with the cream and black colorways to keep it classic. I used about 9.5 balls of the cream and 2 balls of black. I eventually realized I couldn't make it all the way through this sweater with so little black, so I shortened the arms to 3/4 length which is fine by me anyway.


I bought size 3 circular needles specifically to do this project, but my gauge was too loose. Instead of buying MORE needles, I just knitted the smallest size in the pattern and hoped for the best. It ended up being the size I was expecting, sooo I dodged that bullet. The insane thing about knitting garments is that you have no idea if it's going to fit until you've already invested many hours over many days, weeks, or months. At least with top-down garments you can try on as you go, but it's not like I would know how to make mid-knit fitting adjustment calculations anyway. 


It's a cropped-head kinda day, folks.

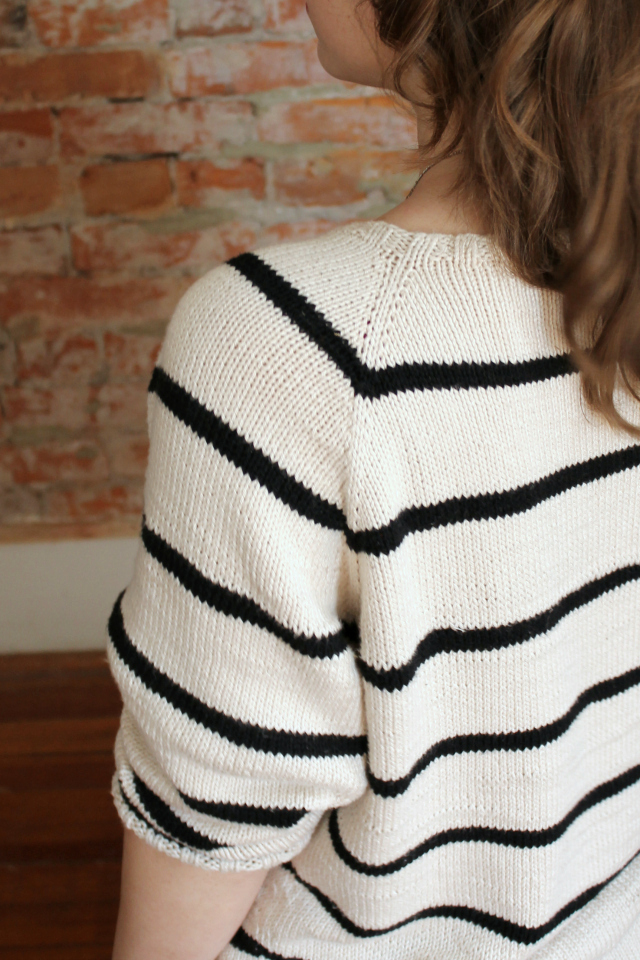
Short rows are used to shape the neckline as well as the high-low hem. The pattern has you do yarn-over short rows, which I found I prefer over wrap-and-turn short rows because it's easier to find them when you pass over them again. I don't know if these things have technical names! For help with the YO short rows, I used this resource.


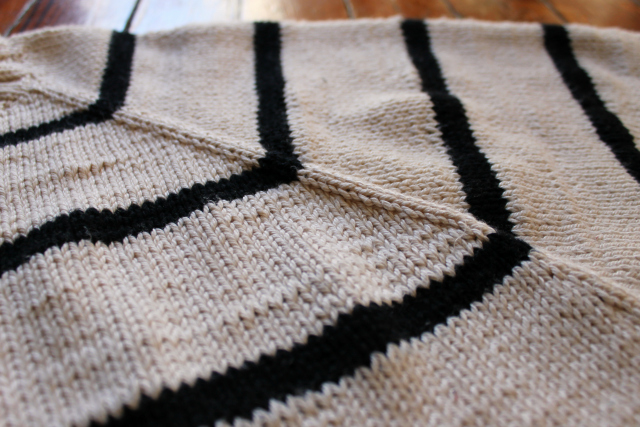
I don't know what happened with my tension while knitting... or maybe it happened while weaving in all the ends (which I always half-ass) or blocking (I dried it in the dryer!)... but my stripes are a bit wonky. You can tell in some of the photos where they look jagged. Some of the white stitches above and below the stripes were looser than others, causing the black to dip or raise in random places. In one or two places, a black stitch just disappeared. Ran for its wee little life.


I'm still a rookie, okay?! I'm not that upset. I should just probably stop switching between English and continental style knitting so often, but I get hand cramps if I don't keep it varied. 

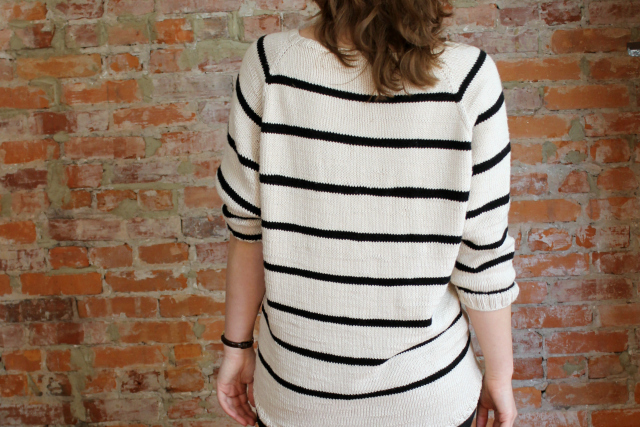
All in all, this was a fun and relatively simple knit. I love the colors I used and find it cozy as hell to wear. As a seamstress, I appreciate that the stripes automatically match across the body to the sleeves. It's the little things.


I doubt I'd make it again (do people knit sweater patterns more than once?), but if I did I would raise the armholes by a lot and streamline the fit if possible. 

Ravelry notes here.

I guess I've accomplished two of my six handmade "goals" this spring: I made a bag and now a spring-appropriate sweater. I still plan to tackle the others, except maybe the shorts, but I keep being lured in other directions. I'm less confident about Me-Made-May this year. I've been wearing fewer me-mades recently because I no longer work in an office (uh, hallelujah), so all the business-casual dresses and skirts I've made over the past 2+ years are starting to collect dust. More baggy tops to make, I guess. Who's with me there?

Thursday, April 10, 2014

portside duffel bag


Duffle bag or duffel bag? I think they're interchangeable but I've always used the -el version. Neither spelling is recognized by this spell check anyway. No, Blogger, I don't mean "ruffle" and I certainly don't mean "luffed." WHAT IS LUFFED?


It's probably not normal for a person to love a duffel bag as much as I love this one. I don't love much of what I make, I admit. Sure, there are handmade garments that I like because they're comfortable or flattering. But LOVE? I usually reserve that for family, my boyfriend, dogs, and French fries only. And now this bag. I kept complimenting its beauty (aloud, yes) while photographing it. Truly creepy.


The pattern is the duffel bag from Grainline Studio's Portside Travel Set, released in October 2013. It's a roomy bag (20" x 11.5" x 12") designed with a zip top, handles and a detachable shoulder strap made from webbing, two exterior pockets, and a full lining (hooray!). It's been on the back of my mind for awhile, but the only trips I've taken since its release have either required a monster suitcase or a tiny overnight bag -- which is the only luggage I've owned since moving to Phila. I'm taking a last-minute trip to Louisville this weekend and staying three nights, and I started wondering what I was going to use to pack for that length of trip. Ohhh right, Jen B's got my back as always. The whole set includes the duffel, a dopp kit for toiletries, and a zipped pouch for other small travel necessities. I didn't make the little guys but you bet I'm saving the pattern pieces.


The fabrics and notions I used are all from my stash because I was in a hurry to make this and I'm broke as a joke. I ain't mad about a little neutral-mixing, though. The contrast is made from wool coating that I never got around to using for a garment this past winter despite my obsession with it. It's a navy/black mix with gray plaid. I cut the side panels on the bias so I wouldn't have to match the plaids horizontally over the curve, ha. The bias-cut pieces are also interfaced to prevent stretching and drooping.

The self/bottom fabric is... can I say "vegan leather" so it sounds classier? It's cloth-backed home decor vinyl that I got for 99 cents at Jomar in Philly. It was easier to work with than I expected despite its bulk. Some basic tips for sewing with vinyl can be found here, which covers what I did, though I admit I used a low-heat iron on the cloth side of the vinyl to try (and mostly fail) to remove its wrinkles. Nothing melted. The only problem I had with the vinyl was uneven stitch length on the topstitching because it would randomly start to drag. The bag is large, too, so it would often get crammed against the wall behind my machine and the fabric would stall. Can't fix topstitching in vinyl, though, so I'm living with it!


I lined it in bright red fabric -- cut from an old Target curtain that didn't fit our windows. I could have used some beige linen in my stash but I wanted to make the piece somewhat more exciting since it's handmade and all. And you know I can't resist pairing red with black. Since I was using this pleather stuff, I also had to line the outside pockets because the back of it is so unsightly.


As far as construction goes, this bag is a pretty straightforward sew. I finished it from first cut to final slip stitch in less than 5 hours, which included the extra step of making my own double-topstitched straps instead of using webbing. I didn't have the hardware or patience to make a shoulder strap, but I made the handles long enough to be shoulder-slingable as is. Because you can't pin vinyl (it leaves permanent holes), I used Wonder Tape to secure the straps to the bag before sewing them on. It's basically just narrow double-sided tape that dissolves in water. Good for positioning zippers and pockets and such, too.


To give a better sense of its size, here is Corey wearing it. Don't be fooled -- this bag is for me, not him, though the fabric choices are decidedly unisex. He thought this bag was store-bought until I started getting it plumped up for its glamourous photoshoot. Natch he's requested his own now.


The Portside Duffel is larger than most other travel bag patterns I've come across, which was perfect for what I needed. In the first set of Corey-less photos of this post, the bag is stuffed with two throw pillows and about five or six pieces of multi-yard fabric. It's droopy without anything in it but I made sure the seams were sturdy enough to hold weight once full. I haven't packed my belongings for realzies in it yet, but I expect it will hold everything I need for a four day trip, especially now that it's warmer and I don't need to bring thick sweaters and boots.


The denim shirt he's wearing was also made by me a few months ago. For awhile this shirt stood as the best-loved handmade item in this household because honestly it's some of the best detail-sewing I've ever done, but now it's overshadowed (literally, here) by my AWESOME DUFFEL BAG. I love it. I luff it. Most-luffed duff in the world. This post has officially come full-circle. /gush

Who else is sewing to travel? ...Would you ever trust your handmade luggage in the hands of the airlines? Carry-on only!

P.S. With your help I fixed my pixelated image issue I  mentioned in my last post, at least on my end. Turns out it was a Google+ auto-enhance setting I needed to switch off. However, it seems the photos still don't show up on the Feedly app my iPhone so probably not Bloglovin' either. Really sorry -- I'll keep digging.