This year I almost didn't bother to make any gifts for Christmas. It's too stressful and time-consuming, right? But, if you think about it, handmade gifts are totally forgiving. Even if the receiver isn't smitten with the item itself, or it's something they would never think to get for themselves, they tend to be more likely to appreciate the gesture even moreso because it's handmade. For example, you can just buy an ole teddy bear anywhere, so it's not that interesting of a gift on its own. They sell teddy bears in airports, hotel gift shops, Amazon, in line at the CVS Pharmacy, Wal-Mart, Goodwill (#bedbugs), and even at the fabric/craft store. There is no shortage of teddies in any shape, size, or color. But a HANDMADE teddy bear? Oh c'mon now, that's special. ...Right?
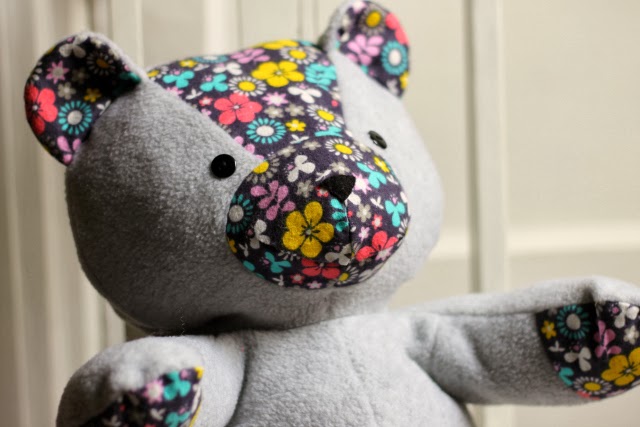
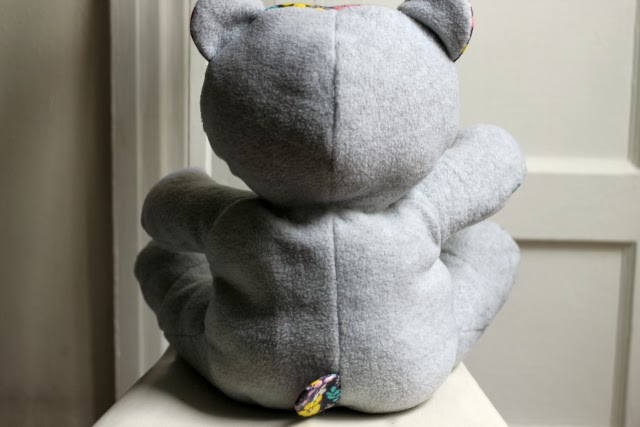
I made this particular bear for my two-year-old niece for Christmas. I know a two-year-old doesn't care whether something is handmade or not, but her parents know and hopefully they'll tell her about it one day. I've mostly made clothes for her in the past (see the robe, dress/cardigan, and jacket), but making garments for an ever-growing child who is disinterested in clothes feels like too much of a risk. I decided this year that I should still make her something, but something that she can love for longer. I saw the bear that Lisa G made for her daughter recently, and decided to try that same How Joyful bear pattern and tutorial because they were free (here), and the finished product looked cute instead of creepy. It's 16 inches tall, sits up on its own, and is readily posed for a big hug. I followed Lisa's lead and made it a showcase for a cute fabric print.
The How Joyful Bear tutorial seems to be a popular post, but I could only find a handful of other people online who posted about their finished bears. The consensus seems to be that it's a difficult tutorial to follow. I agree that it's not explained very thoroughly, and it lacks photos of steps that could really use accompanying photos, like where the seams of the feet pieces should meet and how. However, the pattern pieces are labeled with letters on each corner so you know how they should line up with other pieces, which certainly helps because the bear's shape was not intuitive for me to figure out the construction order on my own. I wouldn't say it was difficult to make this bear, because it can be completed in one evening even with unpicking and some frustration about seams not matching up. It's just different than what I'm used to since it's a more complex curved 3-D shape than your typical knit dress.
I actually sewed this bear up once before this one, but the fabric I chose (some bathrobe-type material) shed like crazy, even after it had been sewn up, which made it very impractical for dragging around the house. Here's what I was dealing with:
Plus the first bear just turned out ugly. My second time around, I used better fabric, colors and accessories, and smoothed out some of the curves of the bear's head and belly so he wouldn't end up as grotesquely fat as my first one did. For this guy, I used light grey anti-pill fleece for the bear body and navy floral flannel for the contrast pieces. I didn't want to use a set of "animal eyes" because they kinda gross me out (don't ask), so I just sewed on black plastic buttons. I first tried fabric-covered shank buttons, but the fabric attracted lint and the buttons flopped around making the bear's face look insane. He's much more charming with these eyes, and I think I like that it gives off a hint that the bear is handmade instead of storebought. I cut the nose from felt and hand-stitched it on. The whole thing is stuffed with polyfill bought in a bag from JoAnn's.
I took a few photos of my niece opening the bear on Christmas morning. I think she said "Wow" and then kissed it (on our command), but since it's just a stuffed bear, it doesn't really provide endless opportunities for entertainment for a small child. I just hope she'll hang onto it for awhile and grow to love what Aunt Andrea made for her. Teddies are timeless! And this one has flowers on its face!
And yes, she and her daddy (in the background) were both wearing cowboy boots. Did you forget I'm from Kentucky?
I hope you all had a wonderful holiday. Did you, too, make something fleecey for a special niecey?


