Tuesday, October 8, 2013

babies who brunch


I rarely pay attention to children's sewing patterns, but Oliver + S have nudged their way into my periphery with their adorable paper doll envelope art and popular online presence. This is classically cute stuff, people. Like shrunken grownup clothes, with empire waist lines. 

For my niece's 2nd birthday gift, I decided to give the company a try. I obviously love sewing from indie sewing patterns and it's fun to try new ones, especially when it's a baby pattern that allows you to make a full jacket from one tiny yard of fabric. I thought a jacket might be appropriate for her late September birthday, so I went with the Sunday Brunch Jacket pattern.


The name of this pattern cracks me up, because it makes me think of a table full of babies drinking Mimosas on the patio of some trendy brunch joint that serves things like lemon ricotta pancakes. Mmm, brunch.

This is a PDF pattern that was easy to align and tape together because there are one-inch grid lines printed on all the pages. Hey, it's the simple things that win my heart. This jacket was so fun to sew, and even though I didn't originally plan to blog about it, the result was so stinking cute I just had to. 


The pattern size range is 6 months to a size 8 (does that mean 8 years old? Good thing my clothing size isn't associated with my age anymore). I sewed a size 2T since my niece just turned two and is within the weight range for that size. Since I don't have kids of my own or know how kiddo sizing works in store-bought clothing, I can't say how an Oliver + S size 2T compares to an off-the-rack size 2T. 

Edit: Baby's mama has since told me that the jacket fits well in the shoulders and arms but is a bit short in the torso. She apparently already wears some 3Ts in ready-to-wear.

For the jacket shell I used a stretch denim in a rich teal color. The inside is supposed to be finished with facings and decorative bias tape, but I went for a full lining. The lining here is a quilting cotton with colorful peacocks.


I admit I was making it up on the fly when I was drafting the lining, and I actually cut the front lining pieces far too narrow at first. I didn't realize this until after I had sewed on the whole lining, clipped all my seam allowances, turned everything right sides out and tried to hem the damn thing. The bottom edges were misaligned by several inches. I nearly drove all the way out to JoAnn's again to buy more fabric and start from scratch because I hate, hate, hate reversing my work and unpicking the daylights out of some serged seams. Though frustrating, I chose to fix my error and move on. I guess I can say the lining is "bagged" but I'm not gonna claim expertise on that.


Hey, sassy peacock, I see you.


The pattern doesn't call for covered buttons, but how could I resist? They fit perfectly with this style.


I cuffed the jacket sleeves, rolling them up twice to reveal the lining but hide the raw edges, and slip-stitched them secure.


I unfortunately don't live in the same place as this babe, so I don't have any clear photos of her actually wearing it. But I do think the parents approved! The baby likely showed a substantial amount of genuine disinterest. Lemme show you these cheeks anyway:


Happy birthday, sweet cowgirl. 
Love, 
Your weird aunt who will forever send you handmade clothes on your birthday instead of money. xoxo

Who else has made an Oliver + S pattern? Did the end result melt your heart?

Sunday, September 29, 2013

tribal / cord


My general approach to cold-weather apparel includes wearing normal summery dresses with additional layers. I've never really been the type to keep two separate wardrobes that replace each other every six months. The foundation pieces in my "winter clothes storage" include one sweater knit dress and a couple cord and wool skirts. My tights and cardigans, however, are overflowing.


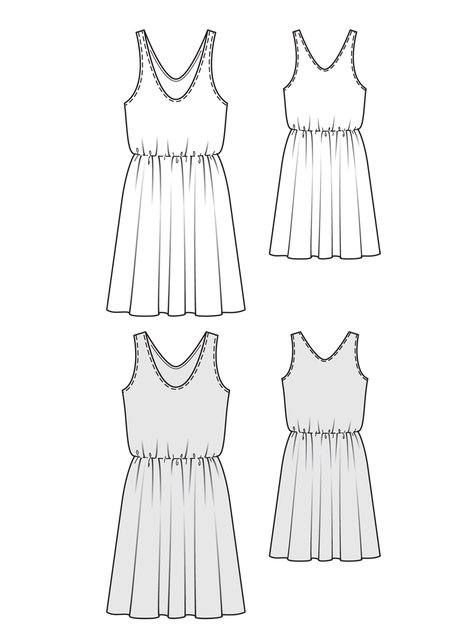
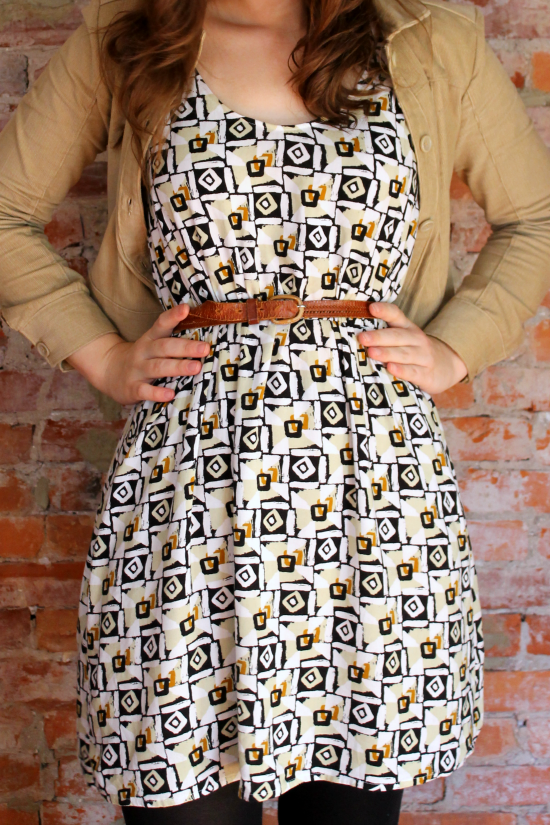
I made this dress in (cringe) "tribal print" rayon a few months ago. It's a basic sleeveless dress with a high elastic waist that I made from the under layer of the Burdastyle Double Layer Dress PDF pattern from 6/2013. I didn't think the style of the dress was blog-worthy but I've probably worn it once every weekend since I made it. The fabric is interesting and goes with black AND brown, which I obviously love to mix. It's rare for JoAnn's to carry rayon prints, but I'm always happy when I find them because it's one of my favorite fabrics to sew and wear.


The dress truly is nothing special. The neckline and armholes are finished with bias tape facings. It has a machine-stitched narrow hem. Done and done. And I'm obsessed with it.


These days I'm starting to prefer wearing light jackets instead of cardigans, I guess because they're edgier (?) and feel more weekend-appropriate. I've had a thrifted khaki jacket for awhile that was stained and starting to rip in the elbows. I decided it was time for a new one, so I bought some khaki corduroy to recreate a similar style.

I did this by seam-ripping an old Target jacket and using those pieces as the pattern. I was able to make a broad back adjustment, which I've finally accepted as something I need to do on most fitted garments with sleeves. In the original jacket, I wasn't able to even hug anyone. Wah! Now I will hug everything and everyone. I think there's a misconception that a well-fitting garment needs to be flush against the skin from all angles. Don't forget (like I have for years) that your arms move forward and upward, but not backward, so even if a jacket looks puffy in the back by the armscye when you're standing straight, it's necessary for comfortable driving/hugging/cooking/child-holding/dancing/pool-playing/Swiffering/etc.


I don't love the cuff openings on this thing, as they gape open when the cuffs are buttoned. I think I need to study other ready-to-wear jackets to see how the cuffs are made. 


This corduroy is pretty thin and SUPER wrinkly. The elbow areas of this jacket look like a constant hot mess no matter what. My recommendation: if you're going to make a jacket using the remains of a cheap old Target jacket, use nicer fabric and NICER BUTTONS or else your handmade garment will end up looking like a cheap old Target jacket. Does anyone know where to buy higher-quality corduroy?

Still, though, I'ma wear the hell out of this outfit, even if autumnal corduroy mixed with tribal print rayon is a bit of a seasonal disconnect. Try and stop me.

What's first on your fall sewing list?

Sunday, September 15, 2013

sewing a collar: a different order


So I've kind of become obsessed with mastering the techniques of sewing a button-up collared shirt (or shirt dress!) lately. I've made several of them in the past but it's never a perfectly smooth ride. The hardest part of making a shirt, for me anyway, is sewing the stupid collar stand. Everything about it -- attaching it to the shirt, attaching it to the collar, edge-stitching around the curves, and sewing a buttonhole on it. I dread it all every time, but I'm determined to keep practicing and trying to find ways to make it go more smoothly.

I've discovered a technique in attaching the collar/stand that works considerably better for me than the other methods I've tried. It's not necessarily a technique -- it's more just a change in the order of construction. I don't think this is new or revolutionary -- in fact, Peter of Male Pattern Boldness used a similar method in his Colette Negroni sew-along when he was making the version of the shirt with the traditional collar stand (see here). But, his is the only tutorial I've seen so far that demonstrates this order of construction, and he does a mirror image construction to what I prefer. It's a hard method to search online because there's no name or distinguishing feature for it. So, I'm just going to throw it out to the Internet again and see if anyone catches.

Most patterns have you construct the collar then sandwich it between the collar stand pieces and stitch everything together. Then you have to attach this whole already-sewn thing to the shirt neckline. This is what I've always seen in commercial patterns and other tutorials:


This has always resulted in a fiddly mess for me because it's harder to get the collar stand edge to perfectly align with the front plackets. The method I prefer is to attach the outer collar stand to the shirt by itself, then attach the collar to that, and then sew on the inner collar stand. Here's how to do all that:

1. Sew the body of your shirt as usual or as instructed in the particular pattern you're using. Make sure you've turned/attached your front plackets and done any shoulder-seam topstitching before attaching the collar. Stay-stitch the neckline of your shirt so it doesn't stretch out beforehand.


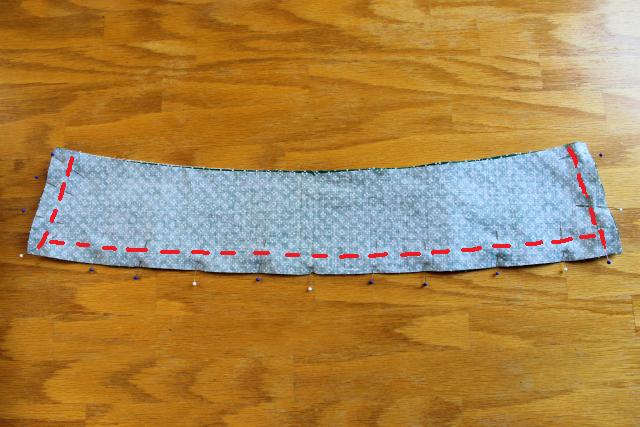
2. Fuse (or sew) interfacing to the upper collar and the outer collar stand piece. To reduce bulk in the finished garment, cut away the seam allowance in the interfacing before fusing it. I didn't reduce mine all the way around, though you definitely could (should?).


3. To make a neat collar, it helps to start with properly sized collar and collar stand pieces. If you're using a pattern that has the same pattern piece for both the upper collar and the under collar, you're going to want to trim down the edges of your undercollar by 1/8" all the way around. I also do this on the inner collar stand. When pinning and sewing later, you will align the raw edges up as usual, and the smaller piece will stretch a bit to fit. Why do this? By reducing the size of the inner & under pieces, the seams will roll more naturally to the underside, and you won't get puckers when sewing the inner collar stand.


(Please don't use a rotary cutter directly on your table. I removed my cutting mat for the photo so you could see the cut edges more clearly).

4. With right sides together, pin the bottom edge of the interfaced collar stand piece to the shirt neckline, matching centers and any notches. It helps to clip some parts of the shirt neckline so it conforms to the curve of the stand. 


The ends of the collar stand will protrude from the front edges of the shirt by the given seam allowance. 


Stitch this seam. Trim the seam allowance and press up. I always leave a more considerable seam allowance at the ends. It may be bulkier but it's easier to handle in subsequent steps.


5. Sew the sides and bottom edges of the upper collar piece to the under collar piece, right sides together. Leave the top edge unstitched. 


Trim the seam allowances if necessary, turn right side out, and work your magic to get sharp collar points. (I always try using this tip from this tutorial, though it's not always 100% successful.) Press the collar, rolling the seam slightly under so it's not visible. Top-stitch 1/4" from the edge if desired. You can baste the top collar edge now, though I typically don't.


6. Pin and baste, or just pin, the whole collar piece to the interfaced collar stand, which has already been attached to the shirt. Make sure that the interfaced side of the collar (upper collar) is facing up. The uninterfaced side of the collar (under collar) will be facing the interfaced (outer) collar stand. Got it?


7. NOW is when you attach the uninterfaced collar stand piece (inner collar stand) to the whole shebang, right sides together, matching centers and edges. The collar will be sandwiched in between the two pieces. Before pinning, fold up the seam allowance of the uninterfaced collar stand on the bottom edge so that it mirrors its interfaced counterpart. You can press up that whole edge at this point, too, but I prefer to do it later.


8. Stitch this seam, making sure the stitches butt up (hehe) directly in line with the front placket edge. Backstitch securely.


Trim this seam allowance and clip the curve, but make sure to leave yourself some wiggle room with the S.A. at the edge. Turn right side out and press. See how well the edges line up? This is where it helps to have more of a seam allowance inside because it's easier to push it in and out of the way from the bottom edge. I've found that a tiny, fraying S.A. is more stubborn.


9. Press under the lower seam allowance on the inner collar stand so the edge just covers the seam line. 


10. You can slip-stitch this in place (more common in women's wear), or pin from the right side and edgestitch all the way around. For the record, edgestitching is just topstitching at 1/8" or 1/16" from the edge.


I've still never achieved perfect edgestitching, but it does help to use my blind hem foot for this process. It has a sliding guide that I can line up with the edge of the seam. I've ordered a stitch-in-the-ditch foot that has a shorter, metal guide that I hope will offer more stability than this lopsided plastic thing. It hasn't arrived in the mail yet but I'll keep you posted on how well it works! 


11. The collar's done! Now finish the rest of your shirt/dress and post that beauty on your blog or whatever.


[ Shirtdress pattern is McCalls' 6696 from spring 2013. Fabric is vintage cotton from Etsy. The sleeves are just rolled up here because they're not hemmed yet. ]

As you may have determined, this collar-sewing method is not drastically different from what you've probably seen before. HOWEVER, doing it in this order gives you more control of where the collar stand lines up with the front plackets, and lowers the risk of getting wonky edges and seam allowances that refuse to stay tucked in place under the inner collar stand.


I hope this makes sense. How do you sew perfect collars? Let me know if you've tried this method, tried something better, or have any questions! 

Thursday, September 5, 2013

cynthia of yore


I love the photos of myself where I'm trying to be candid and coy, but it just looks like I'm sleeping while standing up. Oh, the riveting process of blog modeling! Honkchoo.


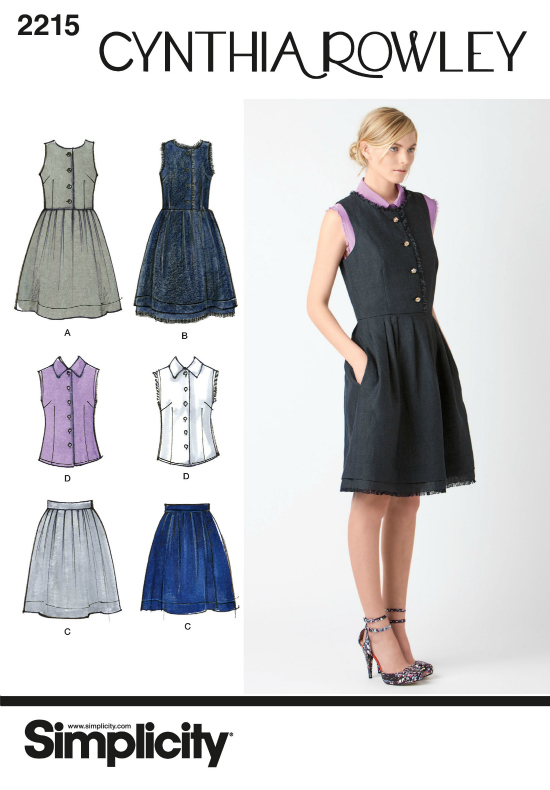
The pattern here is a Cynthia Rowley design from Simplicity 2215. Gah, commercial pattern. Printed on tissue! I've had this pattern forever (i.e. <2 years) but chose to ignore it once I witnessed Cynthia Rowley being mean to Mondo on Project Runway. Old news. I'm over it. I had sewer's block a couple weeks ago so went digging through my pattern collection to try to see my old patterns in a new light. This pattern comes with an option for a dress, a button-down sleeveless shirt, and a pleated skirt. The "design elements" include an option for fringed edges (no joke) and an asymmetrically pleated skirt.


Dang, girl, those are some shoes. Not sure I understand the styling connection there. What would Nina Garcia say? What would she say about MY outfit?! Ha, yikes, I don't wanna know.


I made the dress view A as written, except I made my skirt pleats symmetrical. I thought they might look sloppy otherwise. If you've found this blog post because you're hoping to make the collared shirt from this pattern, I will tell you that there is no collar stand to the collared shirt. If you care about that sort of thing. Which I do. I think. I wish they would make details more clear before you purchase a whole pattern.


This project was refreshing for me, actually. It was very straightforward, and I felt like I hadn't made anything in this style lately. I guess I've been making a lot of bullshit jersey dresses (behind the blog scenes), so it was satisfying to work with a stable woven cotton that pressed and folded like a dream. I haven't made a Simplicity pattern from start to finish in almost a year now. I typically sew with indie patterns or McCall's because they're more hip and fresh, yea, maybe? This dress here is not very hip and fresh, but I thought it might look delightfully French or something. I did worry that the high neckline, adorableness of the buttons, and blue color would make me look like an Amish schoolgirl. To remedy this a bit, I lowered the neckline about an inch and shortened the hem to above-knee length. Jury's still out.


This fabric is from the (gasp) home decor fabric section at JoAnn. It's 100% cotton that looks like, uh, a curtain. I originally intended it to be a bottom of some sort. The fabric is pretty structured for a bodice, but I thought I'd try it anyway because it was the only fabric in my stash that was woven, non-wool, and in a quantity above one yard. Someone needs to go shoppppping. I made a size 12 but it ended up being too big, so I shaved down the side seams. It's still roomy in the bust and under the bust, but you can only tell when I slouch. Which is always.


This pattern is drafted to have a fully lined bodice and unlined skirt. I used lightweight cotton print scraps from Fabric.com for the lining. I never used to bother adding fun fabrics in hidden details of my sewn garments, but it truly does make the whole thing more enjoyable to sew and wear. Why's that?


It can be tricky to fully line a sleeveless bodice with a zipper, and you have to decide which edge(s) you're going to hand-sew or how else to master the origami to keep all the seams hidden. On this particular pattern, they sacrifice the zipper opening and have you treat the bodice and lining as one when attaching the zipper. I realize after the fact that I'm not a fan of this, because I hate the look of the inside of a zipper when it's not covered up. It spoils the clean beauty of the lined bodice. You can see my crooked stitching from where I improvised a hand-picked zipper, and see the serger thread I refused to switch from white to navy. Ick. Yuck.


Boooooo. The outside looks okay, though, despite how I used a regular zipper when I much prefer invisible. Again, dismal stash! Feel sorry for me!


I think this dress will look best when layered up for fall. I couldn't resist wearing my new Franco Sarto wedge boots (here, only in black) in this photo shoot, though I'm not normally the type to wear boots with bare legs and I know it looks kind of hokey. I'm just excited to wear real leather on my feet instead of Payless plastic! I'm trying to become a grown up who makes investments in quality items, you see. A grownup who makes dresses that look like school uniforms? Yeah, well, oh well. 


Have you revisited an old(ish) pattern lately?

Tuesday, August 27, 2013

rotary blade sharpener: worth it?


It didn't take much convincing to get me to join the rotary cutter gang. Nah, it's not what it sounds like. I'm a nonviolent person (...the kind of person who cries in public while listening to a This American Life podcast episode about teen gang violence). I'm talking about sewing tools, and my obsession with speediness but with a desperate need for accurate cutting. Rotary cutters are the perfect invention.

With the volume of sewing I tend to do (only three-quarters of which lands on the blog), I've been blowing through rotary blades like crazy. I cut a lot of fabric, of course, but I also went through an experimental phase where I was cutting pattern tissue paper with them, too, just to see if it dulled the blades more quicky. FYI: it does. I didn't really mind when my blades got too dull for fabric, because I could then use them to cut out PDF patterns from computer paper. Swear! Only when the blades got so severely knicked up would I resign them to the trash (after putting them back in their original packaging so I wouldn't slice open the trash bags).

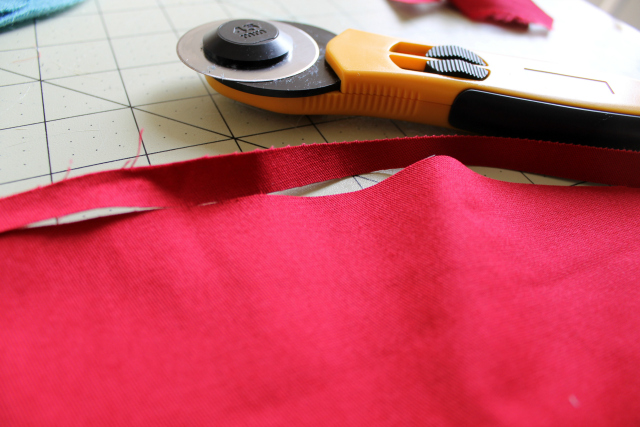
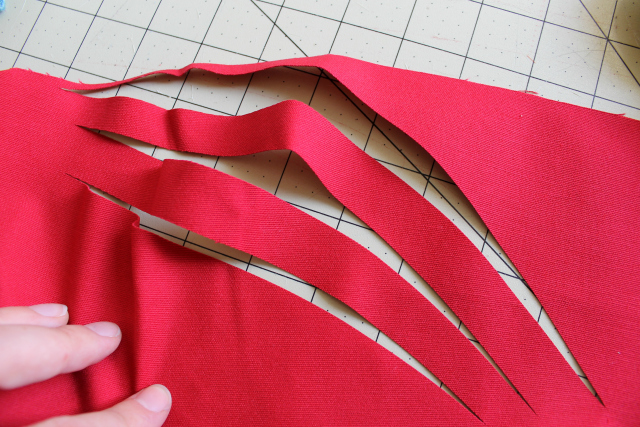
Still, I felt like I was spending unnecessary cash on something that can become so easily damaged and quickly disposable. And nothing's more infuriating than a knicked blade that leaves attached threads along the edge of the fabric, or pushes up mountains of fabric as you try to roll along. You know the drill:


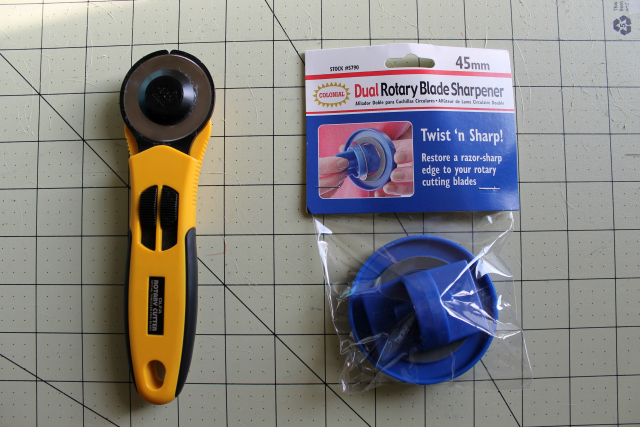
This is supposed to be a sustainable hobby, right? Ha. So I finally decided to make another investment to see if I could extend the life of these bad boys. Enter the dual rotary blade sharpener, in this case produced by the Colonial brand. I bought it for about $15 USD with free shipping on Amazon (here). 


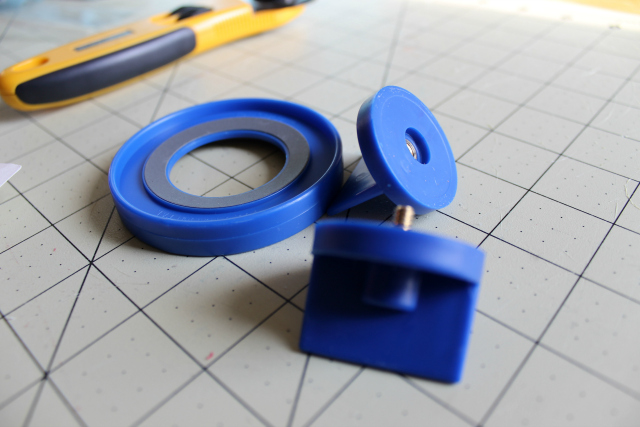
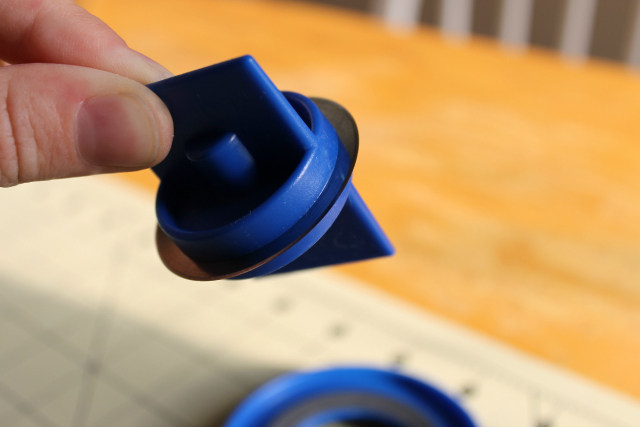
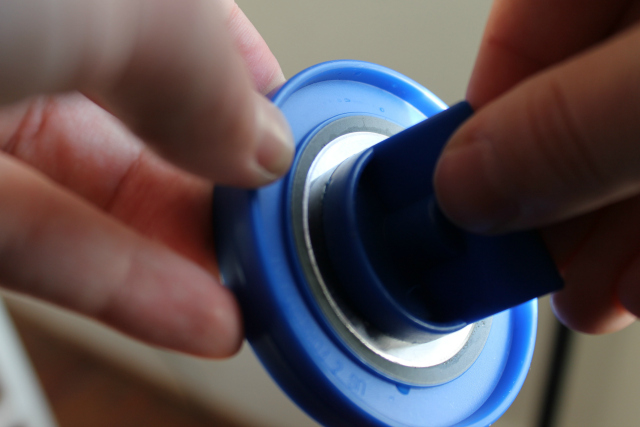
This one is simple, plastic. Seems like a toy you'd find in your McDonald's Happy Meal bag. You screw these two knobs together to secure the blade, then insert that in the disk and turn. The blade rubs against the ringed sharpener. There's a course side and a fine side to the sharpener, which you use in successive order.


The instructions warn you that it may take more than one try to get it to work on a dull blade. Once it's been warmed up to the sharpening process, it will take to it more easily in the future. Or something. I sharpened as instructed and tried it. Honestly didn't really work. Still dinged up:


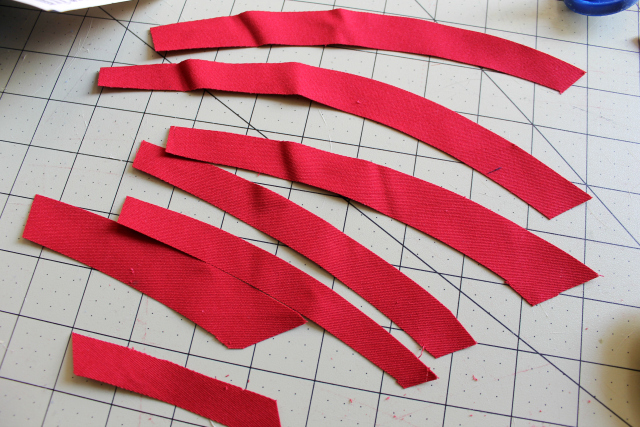
I went through the sharpening process again. And it worked! Not an annoying connective thread in sight. This is a new section of fabric:


Whooohoo. I got a lil scrap happy. A blade that was destined for the landfill is back in the game. I say it's worth it... considering $15 is the cost of three Fiskars replacement blades, which for me would go rather quickly. And considering the "Twist 'n Sharp" pun is spot on.


Have you tried a similar gadget, or have a fancier one? Does it work for you? What do you think?

Rotarize in peace and save your dough, my friends. P.S. I hope you enjoyed the primary color overload in this post. ;o)