

OK, more dudewear! I know you gals love it, right? Here are some handmade Henleys for the handsome him in my life. Apparently Henley (a collarless shirt with a short buttoned placket) is a capitalized word because it's named after the English town of Henley-on-Thames. Ralph Lauren was the one who said, "Let's take this weird long underwear top historically worn by rowers and make it popular for all men to wear in public" (not a direct quote) and it worked, because he's Ralph Lauren. Alright, enough history.

The pattern is the Strathcona Henley from Thread Theory, the new menswear pattern line based in Canada. You can see the shorts I made from their great Jedediah Pants pattern here. I bought the Strathcona PDF the second the pattern was released. Corey had been wearing these awful pilling Henley shirts from H&M that stretched out like crazy in the arms and were made from the blood and tears of children working in sweatshops overseas (I perhaps exaggerate). Our household has recently enacted an unofficial and unvoiced ban against H&M. I prefer to be the underpaid seamstress for all of our clothes, got it?

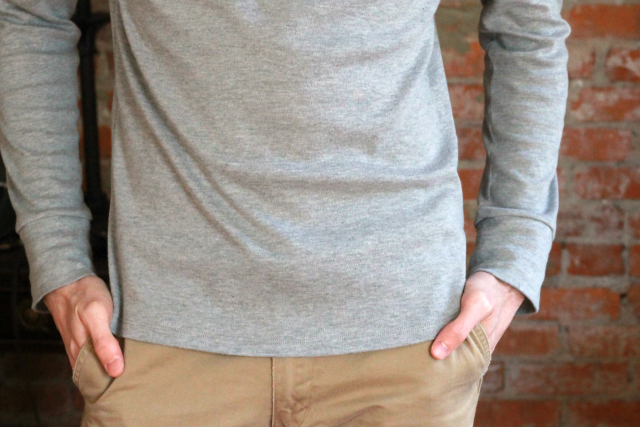
Corey is 6'1" and has a 30" chest. I made him the size XS with 1/2" seam allowances instead of 5/8", and it has a slim fit to his liking.

I don't really want to sugarcoat my whole review of this pattern, because I came across some issues with the construction and design that I changed in future versions for better results. HOWEVER, it's an excellent starting-off point and the fit is great, so I'm delighted with it anyway. My first try/muslin was a hot mess. The second one (the red one in the first photo) was better, but the fabric is a weird cotton/lycra blend from Girl Charlee that changes colors when ironed and gets fingerprint markings when handled. The third one is this heather gray version that is cozier fabric and is better made (but not stellar) in general.
So, in case you're interested in making this pattern, I want to go over some stuff that concerned me or that I changed. This post is pretty detailed about a men's pattern that a lot of you won't make, so I understand if it's not your thang.
1) Placket
The placket as written is supposed to turn out like this:

The placket is cut as one piece that is intricately folded so the inside ends up with tucked away raw edges. The bottom edge is folded and topstitched on the exterior of the garment. Red flag: disastrous sewing for Andrea ahead. Plackets are naughty by nature. Combine that with stretch fabric and an impatient seamstress and good luck.
After Googling the hell out of some plackets for Henleys and polos, I realized the ideal (for me) method was already under my nose: the Banksia Top pattern by Megan Nielsen! She includes two methods for the Banksia placket in the pattern instructions and on her sew-along. She calls this one the "easy" method, and I agree that it is easier, but I also prefer the way it looks because the bottom edge is tucked out of sight to the inside of the garment.

To make the changes to the Strathcona pattern so I could follow Meg's example, I sewed the 1"-wide rectangle on the shirt first, so that when slit down the middle it creates two 1/2" seam allowances. Then I cut two separate placket pieces instead of one. I wanted a one-inch wide final placket, so each piece is 3 inches wide to start. It's interfaced, folded in half wrong sides together, and sewn at 1/2" to the front placket slits. I followed the rest of Megan's tutorial and called it a day. Just note that the Banksia has you finish the neckline before attaching the placket, but in this case for the Henley, the placket should be sewn before the neckband is attached. And of course, for menswear, the placket opens the opposite way (which it does in the Strathcona instructions but not in the photos that accompany the pattern).

I made my own my calculation error on this placket (sewing it at 5/8" seam allowance instead of 1/2"), which is why the left side looks a little too narrow and doesn't lay completely flat when worn. What I wrote out in the above paragraph will address this, though.
2) Neckband
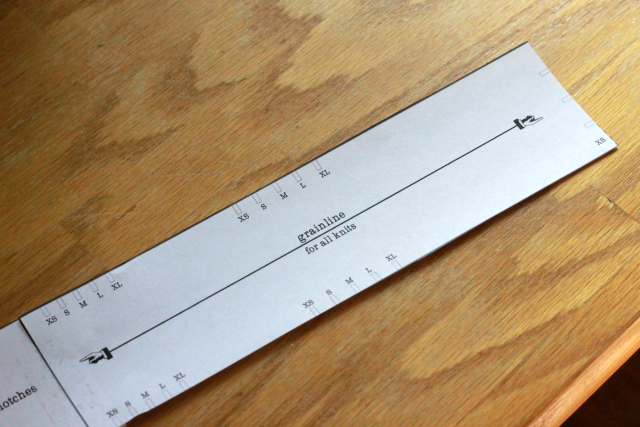
The pattern piece and cutting layout tells you to cut the neckband along the lengthwise grain. Huh? On two-way stretch fabrics (jersey, double knit, interlock, ponte), the maximum stretch is on the cross-grain of the fabric. So... in this case, the neckband is NOT cut along the maximum stretch of the fabric, which doesn't make sense because the neckband absolutely needs to stretch to get over Corey's big fat head. It should be cut in the same direction of stretch as the body of the shirt is.

??
I tried it this way on the first Henley, and it was more difficult to stretch the neckband around the neckline of the shirt. The neckband is cut significantly smaller than the neckline -- which is appropriate for knit garments -- but without proper stretch in the neckband, it just doesn't really work. So, for future versions I cut mine along the cross-grain of the fabric instead.
If the neckband is cut on the lengthwise grain as instructed, then the neckband edges/corners are created by sewing vertically (along the crosswise grain), which means they groooowww as you sew, and you get ugly pointy neckband corners that are not squared off. This is hard to explain in written text, so I'm sorry if you have no idea what I'm trying to say. Let me know if you want more photos, because I plan to make this shirt again soon and can take construction shots.
3) Buttonholes
The pattern doesn't call for a button on the neckband, but it seemed too thick to not have one. I added one so it doesn't flop open and flash its serged seams. Risque.

My machine dislikes sewing buttonholes in general, but especially on this shirt, it was a nightmare trying to get the buttonhole foot to move at all on the finished placket/neckband. On my third version, I opted to sew the buttonholes on the placket and the neckband before attaching them each to the shirt. This made for neater buttonholes, yes, but it also meant I didn't get the final spacing very even. I didn't say anything about the button spacing to Corey and he didn't notice (or care), so we'll pretend it was intentional.
4) Cuffs and Hem Band
The sleeves on this shirt are meant to be long on a normal dude (versus long-armed Corey). The cuffs themselves are quite long. He requested that I lengthen the sleeve and shorten the cuff part a bit.

I omitted the hem band because the shirt would have been too long (in his opinion) with it, and I wasn't digging the style. I finished the hem with my coverstitch machine instead.

Besides the minor issues I had, it all sews up quickly and comfily. Snuggle up.

I hope I don't seem too nitpicky, because it truly is a great casual wardrobe staple for guys. Corey loves both of his. And Thread Theory includes very thorough instructions for sewing with knits - with or without a serger - that are geared toward beginners. If you're confident in your placket-making skillz, then this shirt can be made in a hot little minute. Or you can just make the t-shirt version!
If you've sewn a placket like this, do you have a preferred method?


