Thursday, May 29, 2014

sewing for money

$ewing for Money. Do you do it? Would you do it? Would you do it full-time?


No Georgies were harmed during the taking of this photo.

We've probably all mused over this topic at some point. When you practice a skilled trade, especially one like sewing that is so practical yet so rare, after awhile you start to wonder if you could earn some cash from it. Or even make it your career and your livelihood. If you love your hobby, why not pursue it wholeheartedly? Why yank yourself away from the purr of your sewing machine for your obnoxious morning commute, or pretend you're working when you're actually reading sewing blogs at your cubicle all day (ahem)? On the other hand, if you love your hobby, why monetize it and turn it into a stressor in your life? Or most importantly: why spend precious time and resources sewing for OTHER people who don't even love you unconditionally? I battled with these thoughts for over two years.

It was a weighty decision, but this past February I quit my full-time office job to become a seamstress. I'd been in fund development (grant writing and database management) for non-profit organizations for about four years. I thought I had found an ideal career for me: I was involved in social services to benefit vulnerable people in the local community, but working behind the scenes in a role where I could still be comfortable as a detail-focused introvert. I was promoted last year and figured the comfy salary could make up for whatever else I felt was missing. And yet despite how I thought I should enjoy my role, I never truly did. Once I realized a passion for sewing as a hobby in 2011, I could never shake the idea that it should be more than a hobby.

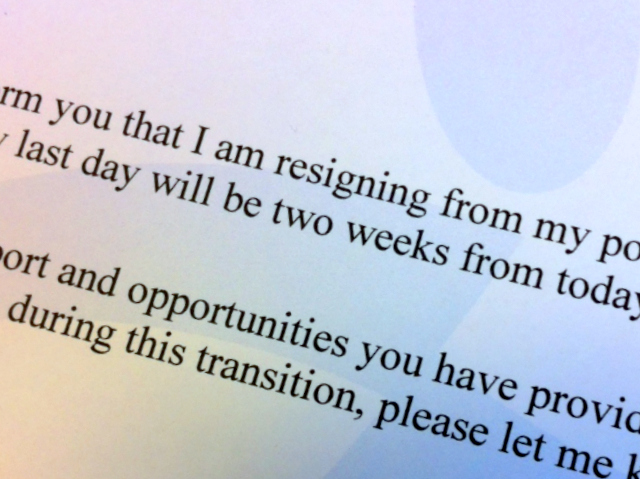
Yes, I took a photo of my resignation letter. I felt simultaneously idiotic and liberated.
I always laugh nervously when I tell people I quit my "real" job to sew, I guess as a way to ward off initial judgment before I am able to justify myself. Fortunately it doesn't need much justifying; so far, this decision is usually congratulated and celebrated in what feels like a sincere way. Even by my parents, who understandably worry about my financial well-being. On reflection, it seems like other people were always the ones asking and encouraging me to sell my services or my handmade items, and it was always me coming up with excuses for why that was implausible. Oh, I'm not a designer. Oh, I'm not skilled enough. Uh, I have a Sociology degree, for god's sake. Oh, I can't afford to leave my job. Oh, I don't even know where I would start.

And yet, every Sunday night, that feeling of dread for the work week ahead would creep over me. How was I going to slog through 40 more hours on my ass at a computer in the office? If I spend each workday thinking about how I'd rather be sewing, why am I not sewing? I felt like I might as well try it while I still could.

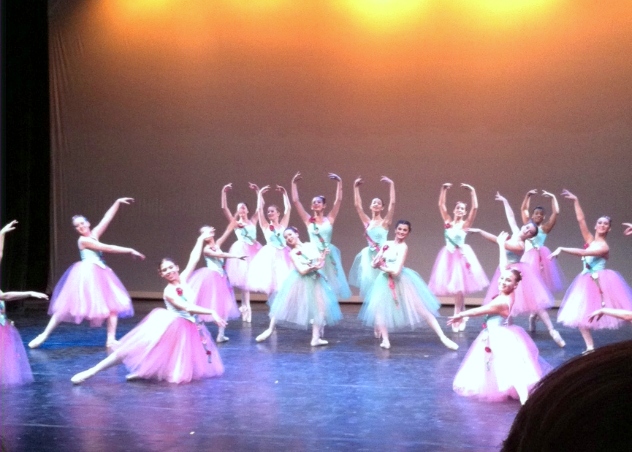
I sewed the tulle on these tutus. 8 yards each!
It's been three months now, so I've had a little bit of time to absorb the reality of it and adjust to my new lifestyle (and pay cut, if I'mma be real). I almost wasn't going to "announce" anything at all to my blog readers because I thought no one would give a damn, but I realize that many of you have considered making a similar move or have gone through it yourselves. There are many paths for sewing-related jobs, and I took one that a lot of you would probably never want for yourselves, but I figure I could still be a resource, an inspiration, or a deterrent for those who may be thinking of making a similar change.

So what do I DO now? The majority of my time is spent working in a sewing studio that does commissioned work for custom garments, alterations, home decor, accessories, costumes, design prototypes, everything. Less frequently, I help sew for a local baby apparel company and a youth ballet company whenever they need me.

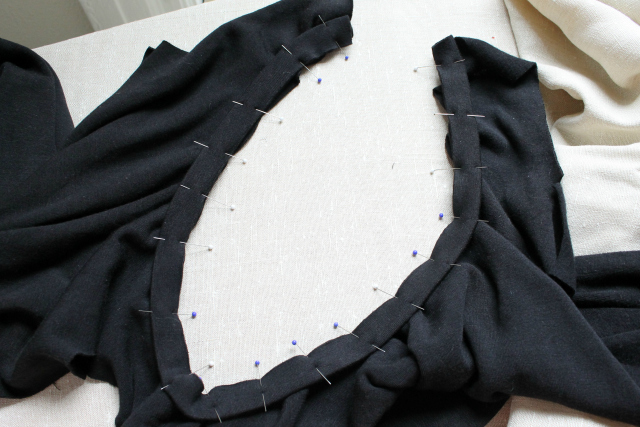
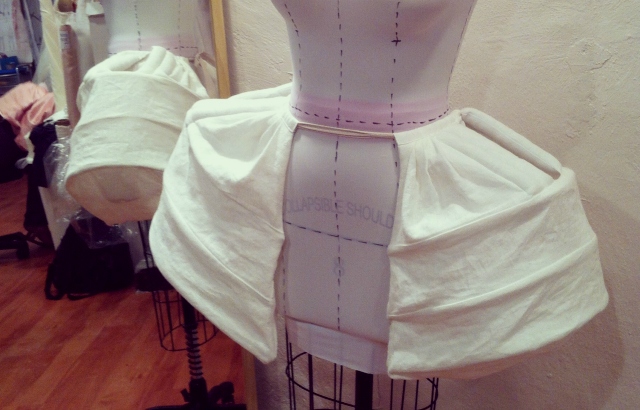
Pocket hoops I sewed for an 18th c. costume. Includes steel boning and musket balls (?!)
I decided to take this route because I wanted to tread lightly and work for someone else who already knew how to run a business and could help me improve my sewing skills. While I felt ready to pursue sewing as a money-maker, I was not ready to be an entrepreneur. I certainly considered learning how to draft patterns to sell or opening my own Etsy shop, but I wanted a lower-stakes way to make sure that I could spend all my days sewing (not for myself) and still enjoy it.

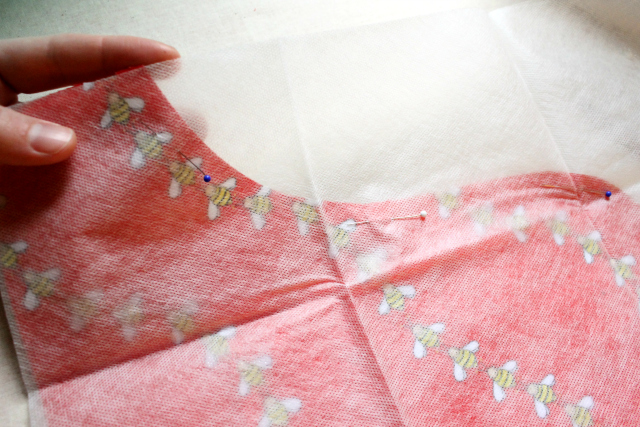
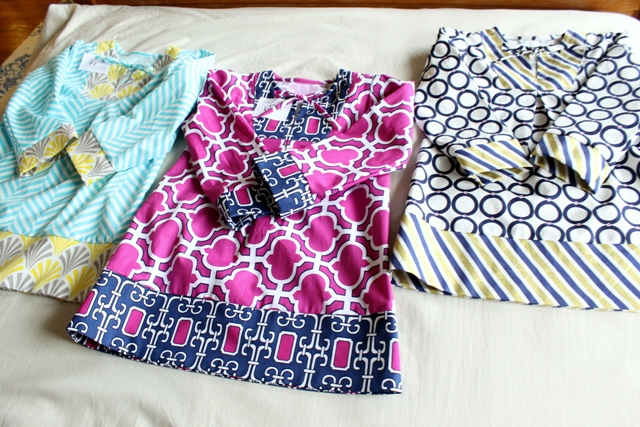
Dizzy?  Girls' dresses / quilting cotton print explosion
I also wanted to move out of my sewing comfort zone. Sure, I can slap together a half-assed Archer shirt or a slouchy knit tee for myself, but can I alter a pattern to fit someone else's measurements? Can I sew with more difficult and delicate fabrics? Can I sew eight silk blouses in one week, or 40 pairs of lycra ballet pants in a weekend? Can I drape chiffon pleats on a dressform? Can I make a rub-off pattern of someone's storebought garment and modify it to their wishes, then put it all together without instructions? Can I baby-hem a mile-long bridal gown without losing my mind?

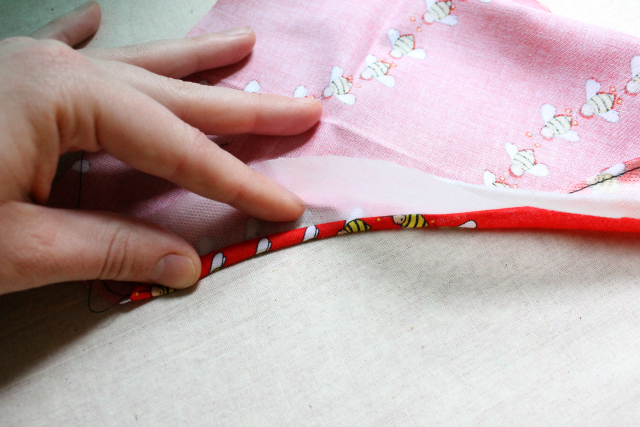
Wedding dress about to be altered
Turns out I can, but it's certainly not easy. In fact, the job is incredibly difficult. The pressure is on when someone's paying you to create or alter a garment that is very important to them. I have to speed up my process and be extremely accurate without sacrificing quality, which is daunting when you're learning new techniques and using tools that aren't your own (though my boss did oblige my request for fabric glue sticks, which I discussed as one of my favorite sewing tools here). Luckily I work with laid-back people who don't rush or judge (I am still SLOW, especially at alterations for some reason), and we can commiserate with each other over the strange or difficult projects while celebrating small successes like beautiful welt pockets.

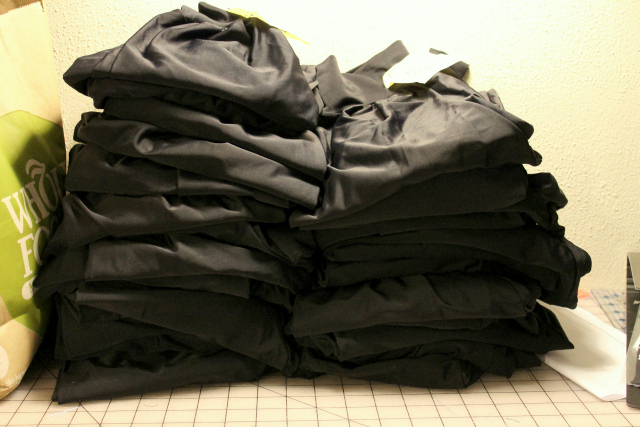
40 pairs of spandex pants for a boys' ballet performance
I felt the personal benefits of this career change immediately. Well, for one, I have Mondays off, and it's insane (but no surprise, really) how three-day weekends can boost your morale and productivity 1000%. Hear that, Department of Labor? I also enjoy tackling a variety of projects and testing my sewing skills and abilities on a daily basis. I often get frustrated with myself at how slow or sloppy I can be, but it's satisfying to have a job where you take on and accomplish something new everyday and can notice visible improvements in your work. Plus I get to hang out with the studio dog:

Mandy, one of my new colleagues
All of these opportunities came about via Craigslist, believe it or not, so I had no "connections" beforehand. I was brave enough to include my blog address in my intro e-mails, which actually ended up working in my favor despite the embarrassing modeled poses and excessive use of the words "y'all" and "bad boys" on here. I think it helped to see a visual portfolio of what I've sewn but get a sense of my true (-ish!) personality, too.

I guess the biggest question you might have is whether I can still find time or energy to sew for myself. I wish I could say that my personal sewing output is the same, but it's not really. Part of that is because I work hourly now, so I'll often squeeze in more work hours at home to help cover dem billz. And a lower income means less fabric bought, and an unwillingness to replace my broken printer to print new PDF patterns, etc. So really, it's more a financial issue than it is a lack of desire to sew for myself. As of yet, I don't resent sewing at all. It still delights and challenges me in such valuable and indescribable ways. I surprisingly feel fulfilled sewing for other people, and can feel satisfied producing a well-made garment, even if I can't (or wouldn't want to, as it usually the case) wear it myself.

 --------------------------------------------------------------------------------------------
So tell me -- if you've made it to the end of this post, god help you -- have any of you had a similar experience of quitting your day job to pursue a passion? Do you sew for a living? Would you want to, or would you never even consider mixing your career with your hobby? Lemme know if you think I'm crazy, though I'm bound to disagree.

Thursday, May 22, 2014

in the round vs. in the flat

Are you a round or flat person? Um, lemme rephrase that. When given the choice, do you like to construct your garments using an in-the-round method or in-the-flat method? 

Nettie bodysuit sleeve attached flat

I don't know what else to call these techniques, really, so if you have no idea what I'm yapping about, here's the basic idea. On a bodice or top, most patterns have you sew the shoulder seams, side seams, and underarm sleeve seams pretty early on in the construction process. This creates round openings for the armholes, neck finishings, bottom opening (t-shirt hem/bodice opening to attach to skirt/etc), and sleeve caps. Here's the Scout Tee pattern as an example:


An alternative method is to leave those seams open so you can construct everything flat instead of in the round. For example, sew only one shoulder seam, attach the neck binding, then sew the other shoulder seam. You can also attach your sleeves and finish your hems BEFORE sewing the side seams and underarm seams. Here's an example from the Plantain Tee pattern for attaching sleeves flat:


I'm pretty fascinated with industrial techniques for making garments. When I "shop," I just turn clothes inside out to inspect the finishing techniques and make Hmmm noises. Of course, the fashion industry's primary goal is making clothing as quickly and cost-efficiently as possible, which means that the way they do things isn't necessarily the best way a home sewer should do them, or the way we even can with our measly little junk machines ;) However, I do strive to find ways to make sewing easier for me, and I will always try alternative methods if I think they will be faster but still achieve the same, or very similar, results. 

Storebought tank with straps attached flat before side seams are sewn

Sewing garments flat is one of those industrial methods that I will almost always turn to if possible. Awhile ago, Colette Patterns' blog featured a guest post from Sharon Blair explaining different industry practices. One of them was as follows: 
"Perform similar operations at the same time and sew flat. Sew the details first. Set these aside. Then start assembling the garment. Complete as much as you can before joining side seams. Sewing in a tube is more time consuming than sewing flat."

It's true that if you inspect your store-bought garments, you can tell that the side seams are usually sewn last in one continuous line of stitching from the sleeve opening to the hem. Many of my t-shirts have one shoulder seam sewn after the neckband is attached, and even sleeves that were hemmed before the underarm seam was sewn. To keep the serged seam more obscure, it's always pressed and tacked down toward the back of the garment. Would you ever know the differences here if you weren't looking for them?

Storebought t-shirt with sleeves hemmed before side seams sewn

I often change construction so I can use these methods, too. I never ever set in sleeves, no matter the fabric type or sleeve cap size-- I attach them flat because it's easier to ease the sleeve cap evenly this way. I'll do the same for armhole bindings because it's easier to sew on binding around curves when those curves are not yet attached in a circle. On t-shirt nec kbands, I will leave one shoulder open so I don't have to do any measuring; I'll just cut a long binding piece and "feel the stretch" as I pin it on, then snip off the excess once I reach the other shoulder. For super small hem openings, like the legs of baby leggings, hemming the legs flat is faster than forcing your presser foot around a tiny tube, especially on a coverstitch machine like mine that likes to stall and skip stitches when sewing over seams.


I figured everyone else would be lazy like me and prefer the flat construction method. However, when I was pattern-testing the Nettie Bodysuit, I applauded Heather for including instructions for constructing the neckband flat (shown above). She followed up with me to say that other testers didn't like that method, so she changed it back to "in the round" instructions for the published version. Y'all are just some tidy little seamsters, aren'tcha. 

So that made me wonder why someone would choose the round over the flat method. Does the end result look cleaner? Do you find that the methods are actually comparable in how easy or fast they seem? Do you use one on certain fabric types only? Or you just prefer to follow the pattern instructions regardless? What's your choice?

Wednesday, May 7, 2014

stretch


My doctor told me that with all the hunching forward I do (at the computer, sewing machine, cutting table, ironing board, etc.), I need to stretch my upper body more, like with some regular yoga (or "sewga," as my colleague calls it). Don't want those pectoral muscles to shrink. Eternal slouch!

Have I taken her advice? Uh barely. But I have sewn some stretch garments...? Surely that counts toward something, like my emotional health and blogger points. And I could probably do yoga in this outfit as long as I was home alone with the curtains drawn, so we're getting there.


I was a chuffed little pattern tester for Closet Case Files' newest pattern, the Nettie Bodysuit, named after a real Nettie you may know. I remember bodysuits from the 90s as a child, but the appeal of them now is that they stay smooth and tucked in under all the high-waisted skirts I own without all that unsightly scrunched up bulk underneath. I remember Heather's debut bodysuit that she wore paired with her Tania culottes last year, and I thought she was a genius. Now she brings her genius to the masses.

The pattern comes with two neckline variations (high neck and scoop), three back neckline variations (high neck, medium scoop, and looooow scoop if you dare), and three sleeve lengths (short, 3/4 and long). Options also include a snap crotch for practicality's sake (interpret as you may), a shelf bra, and a dress length hem for some bodycon sauciness. Here I've made the bodysuit with scoop front neck, medium scoop back, and 3/4 sleeves. What else would you expect of me, really? I did make the snap crotch and I laugh every time I have to re-snap because I'm certainly not graceful at it. Maybe I attached them in the wrong direction.


Here's Ms. Thang bravely modeling the suit on its own. She's not self-conscious of her dented hips and Barbie-like thigh gap:


As you can see (..kinda), the suit is designed for full rear coverage. The leg openings, like the neckline, are bound with self-binding that is pulled quite snugly for a close fit. The whole point of a bodysuit is that it's a close fit. The Nettie has mega negative ease and calls for a fabric with 4-way stretch and 5-10% lycra content. Fabric makes all the difference in the fit of this pattern, so check out Heather's extensive post about Nettie fabrics, as I can't give much more advice than she does.

For this version I used a charcoal heather gray cotton-spandex knit from Girl Charlee (found here), which has 75% stretch. I made a generous size 8 (probably more like a 10) in the torso and arms and graded out to a size 12 at the hips. EDIT: Heather has since updated the sizing, so by her chart I am a true 8 in the torso now, instead of the 6 I fell in before. If you follow her advice for fabric selection and sizing, you should be fine.


I'm so glad I made this skirt, too. The pattern is a lengthened version of a rub-off I did of an old store-bought skirt. I've decided I really need to start wearing longer (knee-length) skirts, especially in bare-legged weather, but I don't have that many casual ones. I also wanted to copy the RTW way of constructing a waistband like this: it's wide so provides stability and comfort, but there's a hidden interior channel for 3/4" elastic at the top, so the waistband won't flip over or start to droop like my other handmade knit skirts that are only held up with fabric.

I bought this fabric at the same time as the fabric for the Nettie with the intention of wearing them together. Though the fabric colors are both called "charcoal," the grays are pretty different -- the skirt is more blue -- but whatever. There's always an ~element of surprise~ in online fabric shopping. The skirt fabric is a cotton jersey in a "plant silhouette" print, also from Girl Charlee (found here). It's pretty cool but pretty similar to the print of my first Cambie dress, which I didn't realize until I started sewing it. Oh well -- Cambie doesn't get out much these days, but this skirt does. It's very breezy and soft, and the length means it normally stays decent in gusts of wind.


It's sheer so I lined it in some white fabric I originally bought to line a swimsuit. It's one of those performance knits from JoAnn. I have two swimsuit fabrics in my stash and wavering intention of actually ever making one, so I snatched the lining from the pile when I was in one of those anti-swimsuit moods after eating too many Reese's cups shaped like Easter eggs. DON'T say you can blame me. The lining is attached to the waistband as one with the skirt shell, but hangs free.


I'm planning on recreating this exact outfit in many different fabrics. A striped Nettie is definitely next in the queue. Um, I wonder if Girl Charlee offers in-house credit cards.

If you're still not convinced, check out Carolyn's seven Netties, Lauren's non-bodysuit Nettie, Lindsay's Nettie dress, Mokosha's low-back Nettie, and Nettie's own Netties. Then get your Nettie here. Phew, links.

So, do you find time to stretch out your aching sewing muscles with some sewga, or is your doc worried about the inevitable seamstress hunch, too?

Thursday, May 1, 2014

narrow hem: three ways


I sew a lot of narrow hems these days, and I've tried so many different methods to make them. The majority of tutorials for narrow or rolled hems (that I've seen) include a ton of measuring, trimming, or exhaustive pressing. Boo, ain't got time for that. What if you could make the narrowest of hems doing a minimal amount of all that stuff, and without a rolled hem foot? Yea, I said it.

A narrow hem has a finished depth of 1/8" to 1/4". The tiniest versions, baby hems (1/8"), are typically used to keep lightweight garments flowy without weighing down the edges, and to keep the hem of sheer fabrics as inconspicuous as possible. Due to the nature of their narrowness and the nature of the fabrics you will likely be sewing them on, these hems can be tricky to fold and sew evenly if you're doing a standard hem technique of measure-fold-press-measure-fold-press-sew. So here are some alternatives.

METHOD ONE: WITH A SERGER
For a 1/4" hem, my favorite method uses a serger for the first step. You can definitely do a similar method with a regular sewing machine, but I prefer the serger because it makes folding the hem easier; the width and sturdiness of the serged stitches help keep the fold perfectly even. You can also adjust the differential feed in case you want to tighten up the edge of your fabric ever so slightly to help with easing in a curved hem.

1. Set your stitch width so the left needle hits 1/4" away from the raw edges, or just within 1/4". Thread color doesn't necessarily matter as long as your fabric's not too sheer. Serge along the raw edge of the right side of your garment without cutting anything off. IF you're using a regular sewing machine, sew a line of stitches 1/4" from the raw edge, or just within 1/4" if possible.


2. Start folding the serged stitches toward the wrong side of the garment the same width as the stitches. Or if you didn't serge the edge, fold the edge under so your first sewn line of stitches juuuust rolls to the wrong side. The width of the stitches does all the measuring for you here. I only do a quick finger press to get the fold going, then immediately start sewing from the wrong side of the garment, using my hands to keep folding the edge before it reaches the presser foot.

Sew right along the folded edge, about 1/16" inward. This secures the first fold and makes a guide for stitching on the next fold:


My thread is darker blue so you can see it. Again, this is the wrong side of the garment now:


3. Fold the edge under once more, the same depth as the first fold. Working from the wrong side of the garment, sew along the line of stitching you created in the last step, folding the hem over as you go. This secures the hem perfectly by catching the top edge in your stitching:


You will have a single line of stitching on the right side, and a doubled line of stitching on the wrong side:


A classy hem, without any tedious pressing OR measuring.

METHOD TWO: WITH BAN-ROL
This little trick needs to be wider known. If you dig on the Internet you can find it in other tutorials, but I thought I'd go ahead and share it here to help spread the word. For an even tinier hem (~1/8"), I like to use the aid of Ban-Rol, also sometimes referred to as Ban Roll. wtf is that? It's a very sturdy starched interfacing used by tailors for stiffening waistbands in pant and skirts. It comes in various widths on continuous yardage. It's loosely woven, despite being stiff, so you can peel away the threads to create a "comb" that helps easily turn your fabric for hemming but will be pulled out after stitching.


The great thing about this method is that the Ban-Rol is reusable so you can make one small investment to have a lifetime of beautiful tiny hems. You can find it in 50-yard packs on Amazon and Wawak, but there's no way you would ever need that much. They sell it by the single yard online at the Sewing Place, Crafter's Vision, Londa's Creative Threads, and B. Black and Sons (edit: and Kenton Trimmings Online, for those in the UK). I'd recommend getting a few yards so you can create different "combs" for different hem widths, or just in case you ever have to hem a maxi-length circle skirt or something cray.

1. Snip into one bound edge in order to get the first vertical thread free. From there, you can start pulling out the threads with your fingers. Keep pulling the single thread until you have a length that matches or slightly exceeds the circumference of your hem:


Keep going until you create a "comb" that is the width of the hem you would like to have. So, this would work for super teeny hems and heftier hems:


2. Now align the edge of the comb with the RIGHT SIDE of the raw edge of your garment to be hemmed. If your fabric frays madly, move the ban-rol inward slightly to stay clear of the fray. Pin if you want, but I've found that the ban-rol doesn't really shift as long as you align it correctly as you sew.


3. Take it to the sewing machine, where you will stitch JUST INSIDE the inner edge of the comb part. You don't want your stitches to catch the still-woven part of the ban-rol. Remember the comb is pulled out of your stitches later, so you should only sew over the horizontal threads:


4. For fraying fabrics, trim the stray threads off now so they don't poke out of your hem later. Now gently flip the ban-rol all the way over to the wrong side of the fabric. This rolls the tiny hem for you without you having to measure all the way around or burn your fingers with the iron. For complete accuracy, you may want to press this part down so the hem is flattened first.


5. Stitch along the edge next to the ban-rol to secure the hem.


6. Now gently pull the ban-rol comb out of the stitches.


~OmG~ what a stable, perfectly minuscule hem you just made. And there's no double stitching to be seen:


Note that you can use ban-rol when hemming in the round. Just overlap it where the circular hem meets. The comb will pull out as usual.

METHOD THREE: WITH WASH-AWAY STABILIZER
I do love the ban-rol method because it creates a very clean and light hem, versus the serged method which may add thread bulk or opacity to your hem. However, ban-rol is not flexible enough to be sewn around tight curves. I have used it on fuller A-line dress hems so it can follow gentle curves, but what if you're trying to hem a rounded placemat or the curved sides of a man's dress shirt? Or something else weird-shaped in a bee print?:


I agree; those bees are CUTE AS HELL.

This method is similar in theory to the ban-rol method, in that you're sewing something to the right side of the garment and then flipping it over to help turn the hem. EXCEPT you're using something that is wide enough so you can trim it to match the curves exactly. And you can't make a comb out of it to remove later. It's essentially like sewing a facing on a garment edge, but you want the seam to roll farther back toward the wrong side of the garment, and you want the facing to disappear somehow.

So, you have some options: you can use tracing paper, which you can then tear off the hem, but you'll leave paper in your hem. You can use tear-away stabilizer, which also leaves stabilizer in your hem. Or you can use wash-away stabilizer, which will disappear after the garment's first washing. None of these are ideal, so it just depends on what type of fabric you're working with and what you have on hand.

I decided to try this sew-and-turn method with Fabri-Solvy, which is a fabric-like wash-away stabilizer normally used for appliqués and such. It comes in a range of widths and lengths, so I thought that getting a sheet that's 20-inches wide and 1-yard long would enable me to customize my own strips to match the curves of a small hem.


1. Pin the stabilizer on top of the right side of your hem. Trim it to match the raw edge perfectly:


2. You can now trim down the rest of the stabilizer to make it easier to handle if desired. Accuracy isn't important here:


3. Sew the stabilizer to the fabric at your desired hem width:


4. Now flip the stabilizer to the wrong side of the garment. This gets a little fiddly because the stabilizer is soft, but you want to make sure the raw edge of your fabric and the stabilizer are butted up against the fold of your hem so it's an even width around. Use your fingers to maneuver the curves into place. You can use the very tip of your iron to help crease the hem, but try not to let the iron touch the exposed stabilizer because it may shrivel and/or start to melt.


5. Sew the hem in place.


6. Trim away the excess stabilizer. You can leave it as is until its first full washing, or you can saturate the hem in water for a few minutes to dissolve the stabilizer still inside the hem, then let dry.


This method is pretty effective, but it can't really be used on fabrics that shouldn't be washed. I also felt like I was using my scissors a lot, which would be annoying on a longer hem. It uses more resources in general since the stabilizer is not reusable,and I would have to buy longer sheets for bigger garments. Still a good trick to know, yes?

-------------------------------------------------------------------------------------------------

I hope this post introduced you to some new ways to achieve a nice narrow hem. Do you have any other tricks or tips to add? Are there other kinds of materials that could be used instead of ban-rol or stabilizer to help roll hems? Let me know your favorite methods!