Sunday, November 27, 2011

a couple cute skirts for a cute lil' kiddo

I took a break from selfish sewing (whoa) and made two skirts for a co-worker's 5-year-old daughter. She's smart, she deserves 'em. Also, her mom bribed me into it so I had no choice. (joke)


I made this using the Oliver + S free "Lazy Days Skirt" pattern found here. I added lining since the material was pretty thin, and applied the bottom ribbon a bit differently than instructed so I'd only have one line of visible stitching, instead of two, to worry about.


I also added a line of stitches at the top of the elastic to prevent rolling. I think it looks better that way anyway.


For the second skirt I used House on Hill Road's "Twirly Skirt Tutorial" found here


The instructions said to use two 40" wide pieces of fabric for the skirt, which became a skirt with a circumference of, yikes, 80 inches. I tried this, but by scrunching 80 inches of that thin waistband fabric over 1/2" elastic and a fabric tie, the waistband ended up being incredibly stiff and practically immobile. I thought this would be uncomfortable for a kid to wear all day, so I chopped off a significant amount of skirt fabric so the waistband could have more give. 


 Still twirly enough, I hope.


I hope she likes these!

--------------------------------------------------------------------------------------------------------
Project linked to:
Link Party 

Friday, November 25, 2011

the 9-to-5 trench dress

I'm calling this my 9-to-5 dress because I'm not sure where else I'd wear it but to work. Technically my work hours are 8:45 to 5:15, but that's just too many syllables.


This is McCall's 6279, version C with the collar & lapels, elbow-length gathered sleeves, self-cuffs and a store-bought belt.
This chick thinks she's sassy but I bet she ain't.

I don't know why I'm always attracted to puff sleeves on garments when I see them on the hanger or pattern envelope. Maybe it's because I think it'll help balance out my hips, but my shoulders are fairly broad and that style can look pretty linebacker on me. I guess it's now obvious from the pattern envelope illustration, but these sleeves are supposed to be PUFFY. Here's a comparison of the width of this dress' sleeve (top) versus a normal set-in sleeve cut to the same size (bottom):


Totally fanned out, meant to be excessively gathered on the top and bottom. I wish I had known how to de-puff the sleeve pattern before I cut the fabric, but I had already sewn the seam and attached the sleeves to the cuffs when I realized just how much poof there would be. I took in some of the excess fabric by taking in the seam, then gathering the sleeve as normal on the top but attaching it to the dress well below the gathers. See the red dotted lines:


It worked okay. By shortening them this way, the cuffs flare out a bit but whatever. I think the sleeves still need tweaking overall, particularly the "gathers" on the right shoulder -- mess mess mess.

My iron hates this dress.


Things I learned while making this dress:
1) When applying fusible interfacing, PRESS it on, don't IRON it or else your fabric will stretch and ripple underneath it. Yup, Sewing 101. But hell, I get impatient. It looked so bad I ended up ripping off all the interfacing from the front except for on the lapels. It was too stiff anyway.


2) When you're ripping off interfacing and decide to speed up the process with scissors, BE CAREFUL. Guess what? Fabric is just as easy to slice with scissors as interfacing is. Thankfully my brutal mistake is hidden by a lapel. 


3) For darker fabrics, also use dark interfacing and dark lining. I used cotton broadcloth for this dress and it needed to be lined all the way around, though the dress pattern doesn't call for it. I used white interfacing and white lining, which is okay but I think grays out the wine color of my dress when it's back-lit.


4) Before you take 20 minutes to pin-baste your sleeves, for the love of God, make sure you have right sides together so your sleeve will not be inside-out when you finish. (This happened to me... twice).


4) 12 metal buttons can cost more than your pattern and dress fabric combined. Errr.


That's it. I don't love this dress which is disappointing. I hate putting time (and all that hand-stitching) into a garment that I don't end up appreciating. I also hate when I can't double-dip my dresses -- meaning, be able to wear them for work AND weekend fun time.


So, who rushed out to Joann's on Black Friday to snatch up some $1.79/yd. flannel or whatever?

Friday, November 18, 2011

scrap buster: no-slip corduroy coasters

Everything's cuter in corduroy, even coasters.


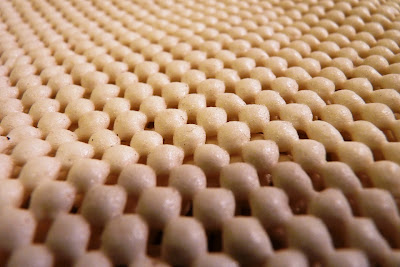
When I first moved in my apartment, I bought some cotton quilted coasters on Etsy that tied some of my decor colors together. However, these coasters find themselves on the floor more often than the tabletops because they slip around so easily. Solution? Non-slip rug pads.


I'm still mourning my red corduroy skirt that I botched a few weeks ago. I tried getting fancy with a self-designed waistband, then hastily cut into the back seam to take it in... whoops, way too tight. Can't part with the fabric, though, so now it's helping protect my living room furniture from beer bottle ring stains.

Cut two pieces of 4"x4" fabric per coaster.

Apply fusible interfacing to the wrong side of each piece.

Pin a 3"x3" piece of non-slip rug padding to the
 right side of one side of the coaster only.

Your sewing machine's presser foot will not want to 
slide over the rug pad, so do the minimal amount 
of sewing necessaryto secure it (I did corners).

With right sides together (the rug pad will be inside),
sew around the corners, leaving a gap to turn.

Clip corners and trim seams, but leave enough fabric
around the gap so that you can secure it by topstitching later.

Turn right side out, poking out corners. Press.
Topstitch close to the edge, all the way around, securing the gap.

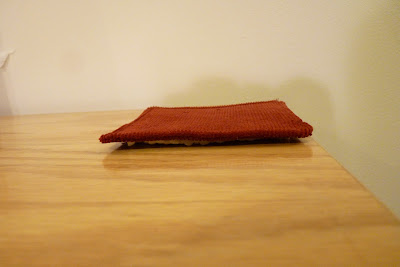
You can only see the rug pad if you lean down and look for it.


Just TRY and scoot this thing across a wood table. This baby's going nowhere.


.....................................................................................................................................
Project linked to:

 and  and 

Thursday, November 17, 2011

liebster award

I'm honored that Janny of Que Linda! has chosen me to receive a Liebster Award. The Liebster Award is a way to feature five "up-and-coming" bloggers who currently have fewer than 200 followers (but deserve more, of course).  Liebster is a German word meaning "dearest" or "beloved." It can also mean "boyfriend," according to the Internet, but we can ignore that.


The official rules for this award are:

1. Copy and paste the award on your blog
2. Thank the giver and link back to the blogger who gave it to you
3. Reveal your top 5 picks and let them know by leaving a comment on their blog
4. Hope that your followers will spread the love to other bloggers


Thank you, Janny! She's only had her blog up and running since September but she already has so many amazing tutorials, recipes, and home decor & sewing projects to share. Definitely check out her DIY chevron wall, complete with a downloadable Excel design worksheet to help make your own.


Now, when looking for other bloggers to feature for this award, I had a bit of trouble determining how long some of them have been around and how many followers they have -- since people can follow or subscribe to certain blogs in various ways. I chose Blogger bloggers and went by the Google Friend Connect followers, if they were displayed. These are all wonderful blogs of mostly sewists who got their start in 2011. Enjoy:


.........................................................................................................................................

Wednesday, November 16, 2011

dresses dresses dresses

I'm tellin' ya, folks. Thrifted vintage bed sheets make the best apparel. Here's another.


Simplicity 2177. I wavered over buying this one, mostly because it looks like this chick is wearing hers to Easter mass:


Not really the look I wanted. But I liked the design and shape of the dress, particularly the bodice features and how the front is cut on a diagonal.


I banned floral patterns from my wardrobe for awhile, but I'm slowly starting to embrace them. I like when they're small scale and simply designed, anyway.

Pockets!


The back has a 20" lapped zipper, which only gave me a minor headache when putting in. I still have trouble making a smooth transition from the bottom of a zipper to the regular seam below it. I got this one to work for the most part. 

The back neckline gaped a bit, so I added a couple darts up there to take in the fabric. I don't know if upper back darts are a real allowable thing, but I did it anyway. It still gapes open when I bring my shoulders forward in a hunch, or when I do the chicken dance/flap my arm wings -- yes, of course I tried that. Guess I can't wear this to a wedding reception, then.


I considered adding long sleeves, but thought all those flowers might be too overwhelming. During my midway fitting, the dress seemed kinda Little House on the Prairie, but that was easily remedied by slashing off a few inches off the hem and making sure the bodice was nice & fitted to the waist.

The sleeveless version of this dress calls for bias tape to finish the straps, but I just made my own from my fabric instead of buying a solid color. They stick out a little but I'm terrible at sewing narrow bias tape. And may I report: today I finally (finally!) bought a rotary cutter and ruled mat (finally!). HELLO, STRAIGHT & EVEN BIAS STRIPS OF FABRIC CUT AT PERFECT 45 DEGREE ANGLES TO THE SELVEDGE. I also bought a seam gauge (finally!) and a tracing wheel with tracing paper (finally!). Um, best day of my sewing life.

So, this dress works for summer but the colors pair well with brown so I can definitely layer it for fall. Nothin' better.


------------------------------------------------------------------------------------------------------------
Linked to:
and


Saturday, November 12, 2011

lisette itinerary dress, ala missoni

 Did Missoni for Target explode all over your closet this fall? 

I steered clear of it when the craze hit in mid-September, and now I'm glad because I'm usually uncomfortable wearing something that is instantly recognizable by brand. You won't see me strutting around with a Ralph Lauren flag sweater or a Coach bag, for instance. Not like I could afford those things even if I wanted to strut with 'em.

I am attracted to Missoni designs in general, and the Target ones use interesting color combinations in their signature zig zag style. But the zig zags are too big, and straight sweater dresses aren't flattering on my body. Not to mention everyone owns something in it. So when I came across some smaller-scale colorful zig zag cotton on clearance at Joann's, I knew it'd be a way to emulate the Missoni style without anyone saying, "Hey, cool Target dress! My mom, aunt, sister, best friend, boss and 3-year-old daughter have that same one, annnnnd I also have it in blue."


Kinda makes you dizzy when you scroll down the page. The colors are nice -- black, purples, olive green and some white. I don't have anything like that in my closet.


I used the Lisette Itinerary dress pattern from their new line in Simplicity. It's Lisette 2060, view B. 


All the Lisette stuff is pretty cute, but I think it's mostly the styling, font, colors and layout of their pattern covers that make you wanna make their clothes. I DO appreciate this attention to aesthetics; other pattern companies have nice-looking designs once made, but sometimes the pattern covers and model styling just make me laugh...or groan.

I didn't use contrasting fabric for the yoke because I didn't wanna buy any. I squeezed this dress outta 2.25 yards of 45" fabric so I wasn't able to cut the yoke along the selvedge. I like the vertical zig zag effect, though. I also couldn't make the obi belt with what I had, so my existing waist belts will have to do. This dress is a basic rectangle, and because I used quilting cotton (I know, an apparel sewing no-no) it needs a thick sturdy belt to keep the waist cinched without looking puffy or sloppy.


The neckline looks wavy in these photos. I guess it doesn't really lay completely flat against my chest, but in real life when I'm moving around you can't really tell.


My zig zags don't match at the sides but I don't mind. Lemme tell ya, this dress is pretty short. I'm 5'7" and the upward slope at the sides goes to mid-thigh, so this is definitely a date night dress, not a work dress. When I sit down and cross my legs, there's some side-thigh exposure for sure. If that's not your thing, I'd recommend adding a few inches, if not several! I will NOT wear this bare-legged for that reason. Hello there:


It's a pullover dress but there are three functional buttons on the top right shoulder, which helps maneuver the neckline over your fancy 'do. Also they're just kinda cute. Note: continuity error -- the neckline photos were taken in the mirror, so the buttons look like they're on my right shoulder. Actually on the left.


The only design change I made was cutting the neckline slightly lower than the pattern. This was so it'd look less boxy and wouldn't strangle me.

If I made the Itinerary dress again, I'd understitch the facing so it wouldn't roll to the front as easily. The pattern has you "secure" the facing when you top stitch at the bottom of the yoke, which is fine but still allows the top to shift around. I'd also use fabric with more drape... this one's pretty stiff and I know I will have to constantly yank the skirt down as I walk. Like it though!

Total project cost: $11.19 = $1.00 pattern (yes! 5 for $5 Simplicity pattern sale at Joann's last weekend); $9.00 fabric (2.25 yards at $4/yd); $1.19 buttons (notions sale at Fabric.com).