


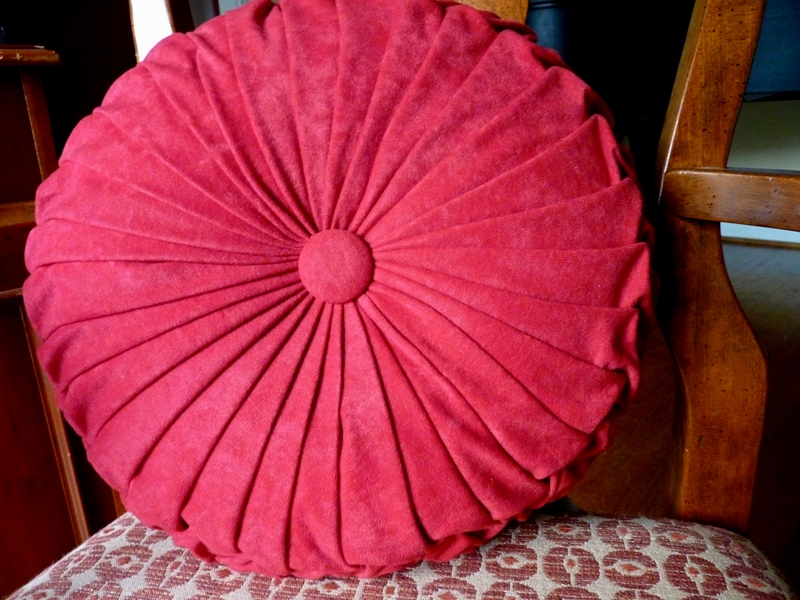
If you stalk the apartment decor section of Urban Outfitters like I do, you may already recognize these round velvet pintuck pillows that come in an array of colors (currently 11 colors). They have a rating of 4.5 out of 5 stars over 73 reviews, probably because they are pretty fabulous. They're also $32-$34 each, which isn't outrageous but of course I like to think I can always do better.
So I made one.


Certainly it's not exact, especially the pintucking, but it still emulates the retro-throwback style. And it was half the price to make. So, wanna make your own? Get ready to smock!
Click below to see the full tutorial:
Step 1) Gather your materials. I purchased 1 1/4 yds. of suedecloth that kinda has a similar sheen and texture as velvet (or so I tell myself... I refused to buy expensive actual velvet or the Christmasy crushed panne stuff). I also bought a 16-inch round pillow form, thread, a long upholstery needle (5") to help tuft the pillow, and a cover button kit with two 1 1/4 inch buttons.

Step 2) Cut two rectangles of fabric that each measure 38.75" x 16".

Step 3) Time to create grid of dots that will serve as your smocking pattern. Be sure to mark on the wrong side of both pieces. There will be five columns and 30 rows of dots on each rectangle. The column of dots begin 5 1/2 inches from each long edge, and the rows begin 1 1/4 inches from the short edges, and are spaced 1 1/4 inches onward. The dots will therefore form squares with sides that are all 1 1/4 inches long.


Hard to see, but I used a regular pencil to mark my grid. Be sure your pencil or marker doesn't bleed or show through on the right side, as some of the dots will remain un-pintucked and therefore visible on the other side when the pillow's finished.
Step 4) Draw diagonals on the grid to show where the fabric will be gathered (pintucked). In the leftmost column, the diagonals will be drawn from the top right of one "box" to the bottom left. A box will be skipped in between, as the diagonals alternate directions and column placement down each row. This will look like a lattice smocking pattern, except backwards, if you've ever done that:

In the photo above, the horizontal lines I drew were a previous effort to make my dot-marking process faster (I stopped measuring and began eye-balling it after awhile). So, those have nothing to do with how everything will be sewn.
Step 5) This is the only time you'll use a sewing machine. With right sides together, stitch the two rectangles together at the two short sides. Trim the seam. This will create a large loop like an infinity scarf. If everything was measured properly, a 5/8 in. seam allowance should make it so the dots are still spaced 1 1/4 inches apart across the seam. Some of your diagonals will have to cross the seams to ensure that the smocking pattern continues evenly all the way around the edge of the pillow:

Step 6) Double-thread your hand needle so the thread is less likely to break. You can also use quilting thread, upholstery thread or something else more durable. Begin on a row at the top of one of the rectangle sides. You'll be smocking downward along the column, not across the row. Begin by sliding your needle through the second dot from the left, from right to left. Bring it all the way through, so that the knot at the end of the thread is stopped:


Secure the stitch by passing through one more time.
Step 7) Stitch through the dot that is connected by the diagonal. The diagonal line indicates that this needs to be gathered. Gather the fabric by pulling tautly so the two stitches meet.


Secure the gathered stitch.

Step 8) Moving downward, stitch through the dot that connects the next diagonal below the one you just gathered. Let that stitch lay flat. Secure it so you don't accidentally pull or gather it.

Step 9) Stitch the dot that connects the diagonal -- since there's a drawn line there, gather that stitch. Secure it.

Step 10) Continue this method down the entire length of both rectangles. When your thread gets short, just knot it, re-thread and start where you left off. You're essentially following this initial pattern, where the numbers indicate the order in which to stitch your needle through the dots:

You'll be doing the same sort of the thing for the subsequent columns, except for the second and fourth columns you'll be gathering the dots in the opposite direction.
Here's what one gathered column looks like on the wrong side of the fabric:

And on the right side:

Here's what two gathered columns look like on the wrong side:

Right side:

And all four columns:


The final loop looks bigger than the pillow form itself, but it ends up fitting once you pull and pleat the sides.

Step 11) Working on a flat surface, fit your pillow form into the smocked loop.

To create pleats, Follow the folds that the smocked edge created. This is pretty easy to figure out based on how the fabric lays.

Step 12) Pinch the ends of each pleat and stitch through, about 1/4 in. from the raw edge. Continue stitching around the circle of pleats, making sure the pleats lay in the same direction. Pull tautly so all the edges meet in the middle, but not too tightly that the smocked part gets pulled down from the edge of the pillow form. Once you get around the way around, secure the thread so the pleats stay snug.

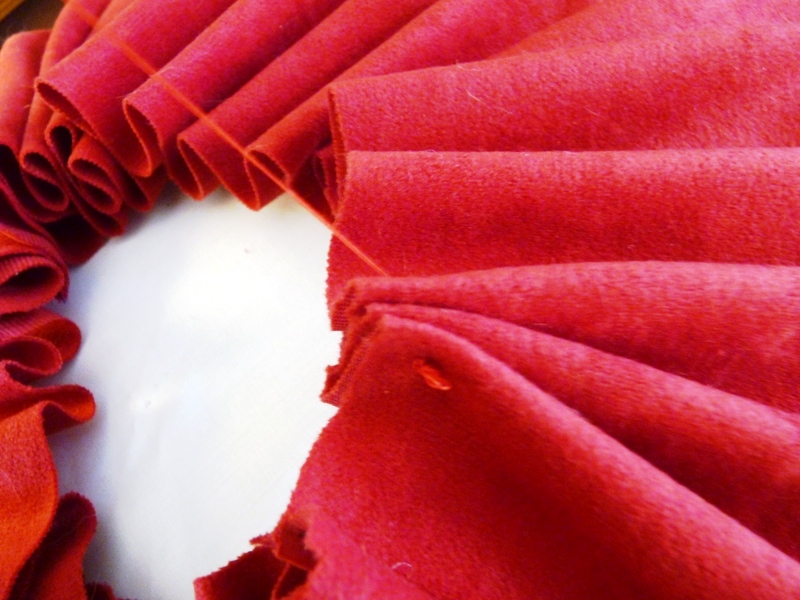


Step 13) Do the same thing on the other side. This may be trickier since the cover will be pretty snug around the pillow form.
Step 14) Now, with the buttons still off, tuft the pillow if desired. This creates the "dip" in the center of the pillow on both sides by tightly stringing thread through the stuffing. I did this using a 5" upholstery needle, which was long enough to hold onto while I pushed it through the other side of the pillow. I probably ran the thread through each side about a dozen times to make sure the tuft was secure. Knot this tightly once you're satisfied with the tuft.


Step 15) Cover your buttons with small circles of leftover pillow fabric. Or, an alternative is to buy matching or decorative buttons that you'd like to put in the middle of the pillow. I've only ever covered buttons with messy fabric glue, but decided this time to get a button cover kit that came with two 1 1/4 inch buttons and a little gadget for snapping the back on the button to hide the fabric edges in between. I bought this thing for under $3 at Joann's and it was super simple and nifty:


Step 15) Attach the buttons. There were little metal loops on the backs of the buttons I used, so I was able to string the thread through and attach it to pillow where the pleats met. I had to keep it loose enough to where I could still lift an edge to make knots underneath.


Done! Now take a picture of it propped up on your couch and brag about it on Facebook. Everyone likes a good Urban Outfitters knock-off.

----------------------------------------------------------------
Project linked to:
 |
| http://craftomaniac.blogspot.com/ |
and
http://todayscreativeblog.net/
and
http://www.livinghannahstyle.com/
and
http://www.iheartnaptime.net/
and
http://www.livinghannahstyle.com/
and
http://www.iheartnaptime.net/