Saturday, June 30, 2012

lol patterns

I've come across some ridiculous sewing patterns and model styling lately so I wanna share the LOLings with you. These are all currently available patterns, by the way. Shall we jump right in? 

_______________________________________________________________________________

KWIK SEW 0108: "CHARMING COTTAGE"


I find it ironic that this fabric-eating beast is a "Kwik" Sew pattern (the website unfortunately won't even tell you the yardage you need). I mean, you've already spent enough time on your daughter's gender socialization with the pink bedroom and ballet lessons. No need to sew her a HOUSE made of RUFFLES. This thing rests over a card table, with a storage box on top (that you also sew) to hold up the roof. OK let's think about this. What is this three-foot-tall child supposed to do crouched under a two-foot-tall card table? She can't even pretend to cook & vacuum in there! Please, ma, save yourself the trouble of appliqueing that felt mailbox. 

___________________________________________________________________ 

KWIK SEW 3932: COLORBLOCK DRESS


Hey, I like a good colorblocked dress. This color palette reminds me of something, though.... 


___________________________________________________________________ 

MCCALLS 6597: GIRLS JACKET VEST AND SKIRT


No one will suspect for a second that these are handmade clothes. "So, you used how many different quilting cotton prints here?"

Let's not even talk about the gnomes.
___________________________________________________________________ 

MCCALLS 3880: WRAP...? 


This is a great multi-purpose item. Use it as a tablecloth in your foyer, or as a body temperature-regulating cape after you cross the finish line of your first half-marathon! 

___________________________________________________________________ 

BUTTERICK 5747: "RETRO" DRESS AND BELT

The line drawing looks pretty cute, actually.


But then you see the collar dimensions in real life. In cornflower yellow.


So is this retro, or...


___________________________________________________________________ 

KWIK SEW 3431: PET... STUFF


I love how these three items have nothing to do with one another, but are all equally impractical. A yorki in a COLLARED DENIM JACKET, with the whole nine yards of flat-felled seams and tabs. And can we please get a YouTube video of Maru rolling around uncontrollably in that cylindrical pet bed? 

___________________________________________________________________ 

MCCALLS 6240 DRESS


I think I could see where a waterproof prom dress would come in handy.

___________________________________________________________________ 

SIMPLICITY 2358: MESSENGER BAGS


A messenger bag for the manly men in our lives. Cool hat, brah. 

I tried finding real Fed Ex fabric online just in case some of you wanted to use this pattern to live out that delivery-man fantasy of yours, but I couldn't source it, sorry.
___________________________________________________________________ 

SIMPLICITY 2208 FLEECE JACKETS


Good, I needed a way to recycle my old wine corks. 
___________________________________________________________________ 

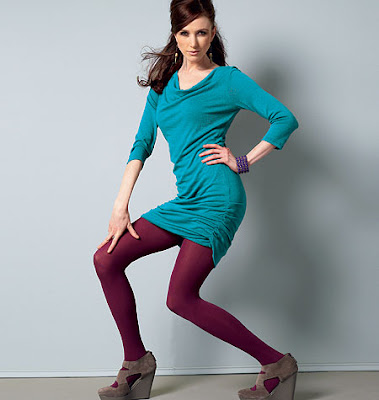
And here are just some fun model poses while we're at it: 

McCalls 6608 Skirt 

McCalls 6612 Dress 

Vogue 1304 Dress 

McCalls 6606 Tops

Vogue 8817 Dress 

McCalls 6614 Jackets 
Beyond thrilled to be in love, these two. 

_____________________________________________________________________

Have you found any gems of your own lately, or am I the only one chuckling away at JoAnn's pattern book table?

Oh, and another important question: which of those poses should I try next time I model a handmade garment on my blog?

Tuesday, June 26, 2012

racerback & forth

Not-so-new jersey. It was high time to use these two lengths of rayon jersey I've had for awhile. Granted, "awhile" for me means like three months. "Why stash 'em when you can make ho-hum clothes out of 'em?" is my motto, after all.


I don't think the hem is crooked IRL, but I won't guarantee it either way.


You may recognize this feather print fabric from Dixie's and Suzanne's past creations. I feel like I link to those gals a lot. Blog crushes, you know how it goes.


Heyo, 4th grade throwback. I used to wear my shirts tucked in like this (only in the front), because my best friend in elementary school, who was way cooler than I was, did it. Say aye if you wanna be like me now. 

...fair enough.


Swayback or big bum or are those interchangeable? Who cares. I'm truly not crazy about my pattern choice here (McCalls 6359) because I don't even like the racerback style on me. I should have used my feather print on something more elegant. Erg. I actually tried to sell this pattern in our Memorial Day yard sale, but no one bought it. So instead I made it for myself... twice... and I'm somewhat grumpy about it. It's one of those patterns that produces clothes that no one will suspect you made. Non-sewers are so bored by these clothes that when they hear they're handmade, they're fascinated.


The pattern lists both wovens and lightweight knits as recommended fabrics. Leave off the bust darts if you use a stretchy knit. Also, make a test garment or take into account the stretch of your fabric. When making my usual size on my black polka dot version, it was enormous. I took in each side at least 47 feet and it still looks a little loose under my armpits, but I decided to keep it a slouchy-ish style. For the feather dress version I was feeling annoyed so I just dramatically cut the smallest size in the envelope, a 6 (whaaat). It's obviously more snug but I'll dare to get away with it. Here it is hanging dead on a hanger, pretending to be a swimsuit cover-up the Old Navy clearance rack:


For the feather dress, I added an elastic casing at the waist and an underlining to make it opaque.

Wanna see some edges? Of course you do. You live on the edge for these edges.


The pattern calls for store-bought bias tape to be applied as a facing to the armhole and necklines. I tried that but polyester bias tape was too heavy and not stretchy enough for this thin rayon jersey, so it made everything gape and stick out. I decided to make narrow edge binding from self-fabric instead. To do so and not lose my sanity, I used Portia's method of cutting strips of jersey by first applying masking tape/painter's tape. It stabilizes the fabric so it doesn't slink around as you cut, and it's already a perfect inch wide so there's not much measuring involved. Just cut along the edges of the tape and remove it. I tried here for consistent pattern placement but I think I just wasted fabric:


I didn't want to create bias tape-like creases, but instead just fold them in half before attaching. Since rayon jersey's so unstable, I used my handy dandy DIY fabric starch to stiffen up the strips after I folded them in half. The starch actually works kind of like an adhesive, too, so I didn't even have to baste the raw edges together after folding, starching and pressing:


I measured and applied the binding to the neckline and armholes in a method that was a combination of this Threads video and a narrow version of the Sewaholic Renfrew pattern. Nice!

You know what else is nice?


So what's your honest opinion on the racerback style? Too sports-bra-like? 
And what's your honest opinion on the sockbun style? Too ballerina-bun-like?

Thursday, June 21, 2012

diy spray starch: eliminate curled edges on jersey

Look familiar?:


Knit jersey is GREAT (yea? nay?), but, you know, it has some characteristics that can bug the hell out of us seamsters. The raw edges don't fray, but they do curl. This can work in your favor if you want it to be a design element, like on the cardigan Lizz made from Dixie's pattern. Or it can mean difficulty matching edges and trimming seams accurately. And careful -- watch that overlocker knife when you use your finger to unroll the edge as you serge.

I don't know what you people do/don't know, but I thought I'd go ahead and share a new-to-me discovery of a way to keep those roley-poley edges in check. Quite obvious, really: fabric starch!

Certainly you can buy some fabric starch spray at your local grocery store or whatever, but I decided to go au naturel and make my own. Save money, avoid the chemicals, love your jersey.

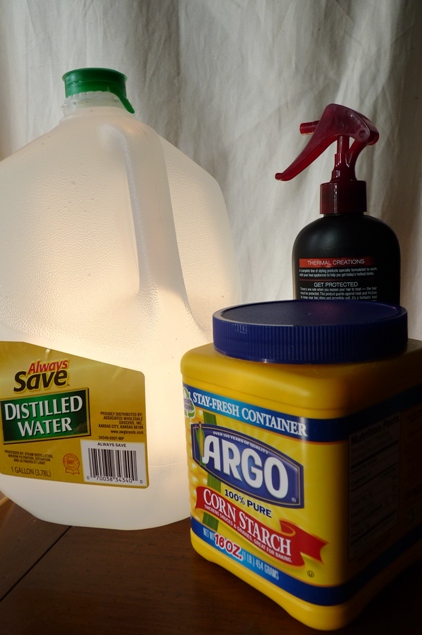
THE INGREDIENTS:


  • Distilled water (in case you have hard tap water with high mineral content that can damage your iron or possibly your fabric)
  • Corn starch
  • Empty plastic spray bottle. They sell these at stores, too, but luckily I had saved this spray bottle from a questionably effective hair product so I'm totally eco-friendly here. OK that's questionable, too. Please forgive that I bought water in a huge plastic tub.

I used 1 cup (240 mL) of distilled water: 


and 4 level teaspoons (20 mL) of corn starch:


You may want to use less corn starch to test first, and I think it also depends on the fabric content and weight. Cotton jersey stiffened up more easily, so three teaspoons would probably be fine, but rayon jersey seemed to need the help of an extra teaspoon. I wanted to get rid of the curl but also wanted to use it as a stabilizer for stitching, so I was happy with my lightweight cotton jersey turning pretty crisp.

Mix these ingredients in a bowl or something that will be easy to pour from. I used my measuring cup. The liquid will turn milky white, and the lumps should dissolve once stirred.


Pour into your spray bottle, reattach the nozzle and give it a good shake. Don't spill like I did. Or photograph the process in the light of an epic sunset, like I did.


Here's what normally happens when you don't starch but simply press the edge out and then lift or move the fabric at all:


Instant re-curl! Instead, press the curl out, then spray the edge liberally with your starch. I spray until it's pretty damp, but don't go overboard.


Run your iron over it until dry. I did not use steam.


And your edges will be nice and crisp. Go ahead, wave the fabric around. No re-curl!


Here's the fabric, where the left edge has been starched and the right edge has not. Much more sewable, eh:


The starch will come out when you wash your finished garment. No worries. In the end you'll still have a nice drapey garment to frolic around in.

And here's a part I test-hemmed along the crossgrain. It seems more successful (less wavy) than my jersey hems usually are, and faster than using Steam-a-Seam:


Unfortunately I don't know how long this starch will keep before you need to make a new batch. The Internet has mixed verdicts on DIY starch, so maybe just make a small amount as you need it. Be sure to shake the mixture each time before you use it, and as always, test on scrap fabric first to make sure it doesn't leave any residue or stains.

Any other fabric starching or jersey stabilization tips out there?

Saturday, June 9, 2012

cambie, can it be?


Can it be... that I sewed something blue?


I do like other colors, I think. I just forget about them when I'm shopping for fabric. But I should really stop being embarrassed to show you blue garments because otherwise I'd have nothing to blog about and it'd be a disaster for humanity if I stopped blogging, right guys?


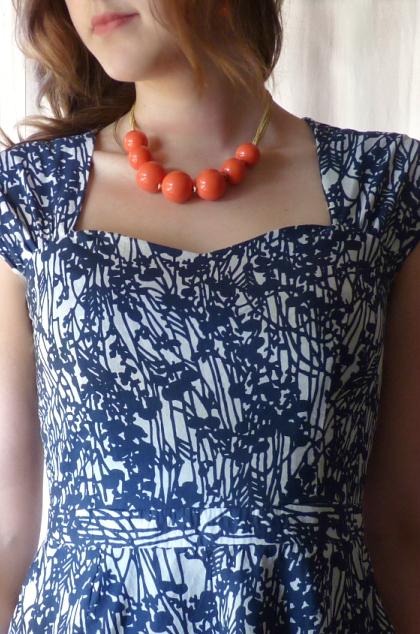
I doubt this dress needs an introduction because anyone who reads sewing blogs probably recognizes that I used the new Cambie dress pattern from Sewaholic. One of the fabulous benefits of sewing for yourself is that you'll always have a unique-to-you garment in the end. Yet, when you're part of a sewing blog community and everyone's making the same dress at once because you love Tasia and her patterns with all your heart, it kinda makes this dress feel like old hat already.


Luckily for me, the real-live people I interact with daily do not know that there are adorable seamsters in other nations/states/nation-states prancing around in their own versions of this same gathered-capsleeve sweetheart dress. (OK, maybe it's only Scruffy Badger who I've ever witnessed prancing, and she looks good doing it!) And it still means I will never again have to experience the horror of walking into a party wearing the same Target dress as someone else. Weird: just three months ago I was still friendly with Target and didn't feel too gross about buying their clothes. But I was there last night and found myself scoffing at their sad unlined shapeless polyester dresses with misaligned stripes at the seams. The seamstress snobbery hath surfaced.


So yes, I do love my Cambie dress, I really do. A lot, even. This feels like one of the better-quality garments I've made. The full lining helps with that, and it just fits well (in the bodice at least) and is modest yet flattering. I lined the skirt with Bemberg rayon which seems way more luxurious than the $2.99 polyester I usually use (o-god I admit). The main fabric is a navy-and-white pure cotton lawn in a "botanical abstract" print from Fabrics and Trimmings on Etsy. I had enough left over to make the bodice lining, so I decided to stay economical. Here's the inside:


Yeah they didn't have white lining so I went with the navy. I notice in the photos that it does darken the fabric from the outside but big whoop, yaknow? Call it an ombre effect. This dress wasn't difficult to put together, but took a few evenings of solid work to finish it. I sometimes got lost within the layers when I was sewing in the lining and had to reorient myself over again. The fit of the skirt was the most time-consuming part, as I couldn't get the pockets to lay right without them tugging or gaping in the wrong places.


Since I'm Sewaholic's target seamstress (meaning, pear shape and/or awesome), I cut a straight size 6 according to my measurements. Who knows what happened, but the front skirt ended up being way too huge to fit the waistband. I took it in a lot but still had to ease the rest in, so my "A-line" skirt kinda drapes awkwardly when I stand certain ways:


I didn't make a muslin but the fitting wasn't that onerous beyond the skirt. The neckline gaped, as expected, but I took in the front bodice at the top side seams which made it acceptably snug across the top of the bust. The back neckline also gaped, as expected (I'm a hunchback, remember?), but I was able to adjust and angle the straps to eliminate that. I like that the straps/sleeves are attached last so you can ensure that everything sits correctly in the end:


I didn't make any design changes, and the only technical change I made was understitching the sweetheart neckline so the seam wouldn't roll forward. I'd recommend it. You could also understitch the back neckline and armhole seams in the bodice, but I only noticed seam-roll issues in the front so I didn't find it necessary to do the whole thing. Here's the understitching from the inside:


I made this dress primarily to wear to a friend's wedding (today!) but I bet it'll get some mileage at work and nicer restaurants. Uh, but knowing me I'll probably wear it to bars to watch the NBA playoffs, too. Overdressed freak.


How are your summer (or winter, as it may be) dresses coming along?